Most American car owners want their vehicles to look flawless, yet even a single overlooked step can ruin a ceramic coating application. Surface preparation is more than just a quick wash. Professional detailers know that up to 90 percent of coating failures stem from improper prep or contamination. If you want your car to achieve that deep, glass-like shine and maximum durability, understanding these proven steps can make all the difference.
Table of Contents
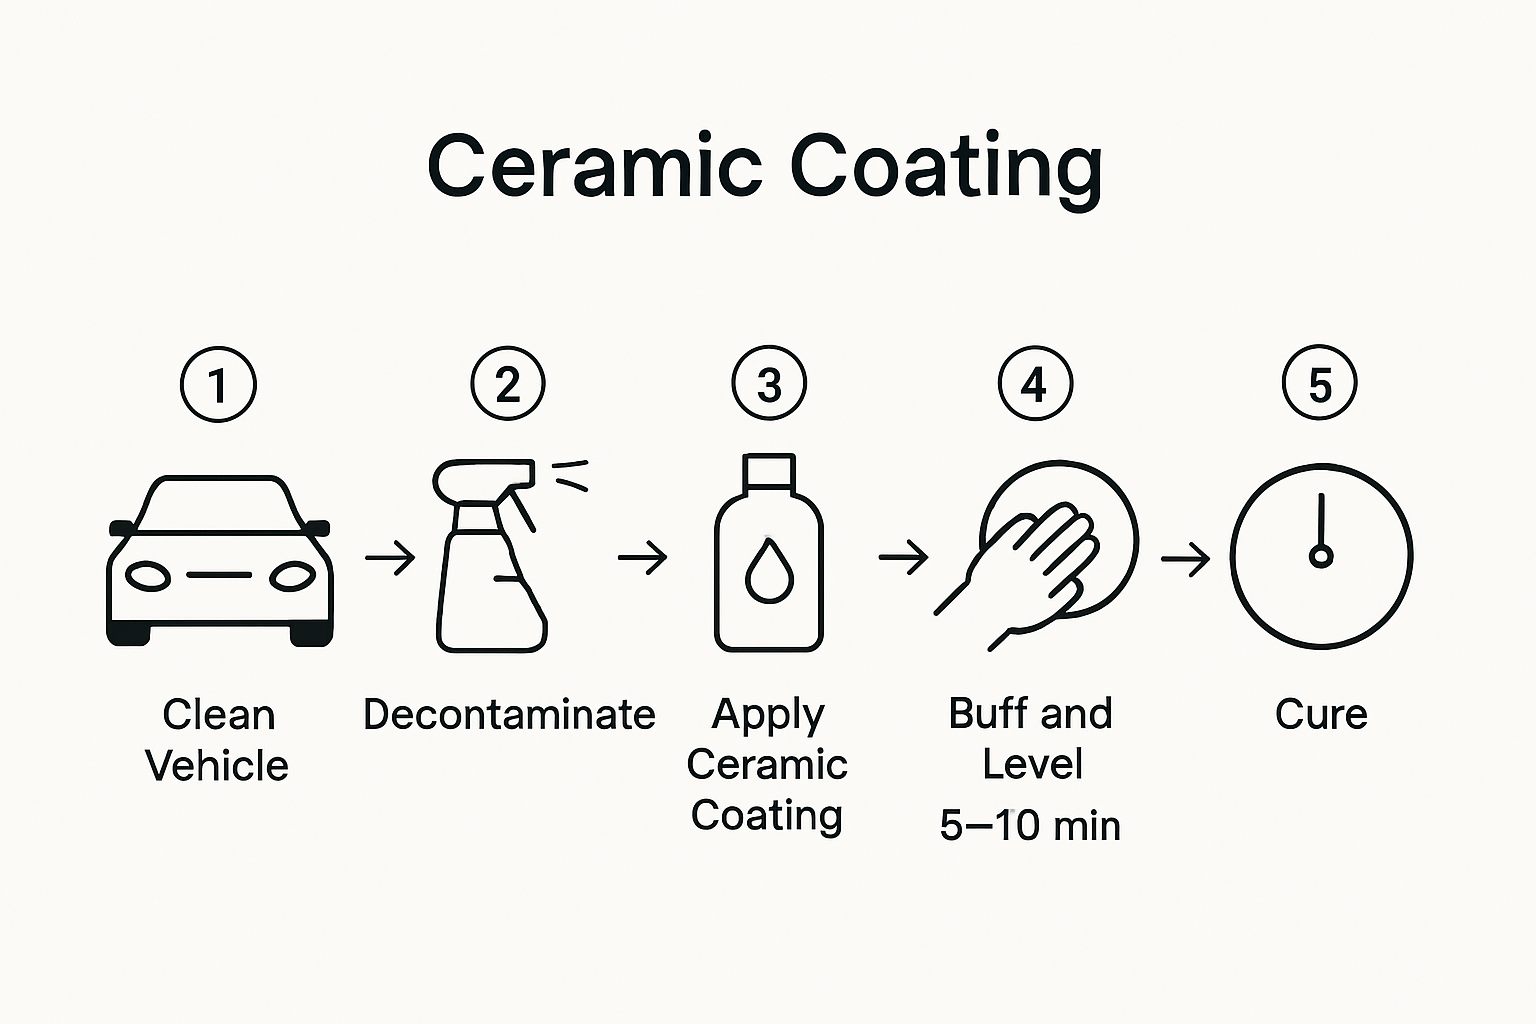
- Step 1: Prepare the Vehicle Surface Thoroughly
- Step 2: Decontaminate and Dry the Exterior
- Step 3: Apply the Ceramic Coating Evenly
- Step 4: Buff and Level the Coating for Perfection
- Step 5: Cure and Inspect for Complete Coverage
Quick Summary
| Key Point | Explanation |
|---|---|
| 1. Meticulous Surface Preparation is Essential | Thoroughly clean and decontaminate the vehicle to ensure the ceramic coating adheres properly and performs optimally. |
| 2. Use Appropriate Drying Techniques | Utilize high-quality microfiber towels and adopt gentle drying methods to prevent scratches and maintain a pristine surface before coating. |
| 3. Apply Ceramic Coating Systematically | Employ a cross-hatch technique while applying the coating to ensure even coverage and prevent gaps that could weaken protection. |
| 4. Carefully Buff After Application | Allow the coating to settle, then buff gently to eliminate imperfections, ensuring a flawless finish and maximum performance. |
| 5. Allow Proper Curing Time | Keep the vehicle dry and avoid contact with water for at least 24 hours post-application to allow optimal bonding of the ceramic coating. |
Step 1: Prepare the Vehicle Surface Thoroughly
Thoroughly preparing your vehicle’s surface is the most critical foundation for a successful ceramic coating application. Professional detailers understand that impeccable surface preparation determines the coating’s adhesion, durability, and overall performance.
Your preparation process begins with a comprehensive cleaning strategy that eliminates every trace of contamination. Start by washing your vehicle with a pH-neutral automotive shampoo designed to remove dirt without stripping existing protective layers. Use microfiber wash mitts and work in sections, ensuring you rinse thoroughly between each area to prevent cross contamination. After the initial wash, use an automotive clay bar to remove microscopic contaminants like industrial fallout, tree sap, and embedded metal particles that standard washing cannot eliminate.
The next crucial step involves paint correction to address surface imperfections. This means carefully removing swirl marks, light scratches, and oxidation using polishing compounds and specialized buffing tools. Professional detailers recommend wiping down the entire surface with an isopropyl alcohol solution after paint correction to remove any remaining polishing oils and create an absolutely clean substrate for ceramic coating application. This final decontamination step ensures maximum coating adhesion and creates a flawless foundation for long lasting protection.
Warning: Skipping or rushing through surface preparation will compromise your ceramic coating’s effectiveness. Take your time and be meticulous in each stage of the process.
Step 2: Decontaminate and Dry the Exterior
Removing every last microscopic contaminant from your vehicle’s surface is essential for achieving a perfect ceramic coating application. This step ensures that no embedded particles interfere with the coating’s bonding and ultimate performance.
Begin the decontamination process by using a clay bar treatment to extract stubborn contaminants that traditional washing cannot eliminate. Gently glide the clay bar across the surface using a lubricant, working in small sections and capturing industrial fallout, tree sap, brake dust, and other microscopic debris. After completing the clay bar process, thoroughly rinse the vehicle to remove any remaining clay residue.
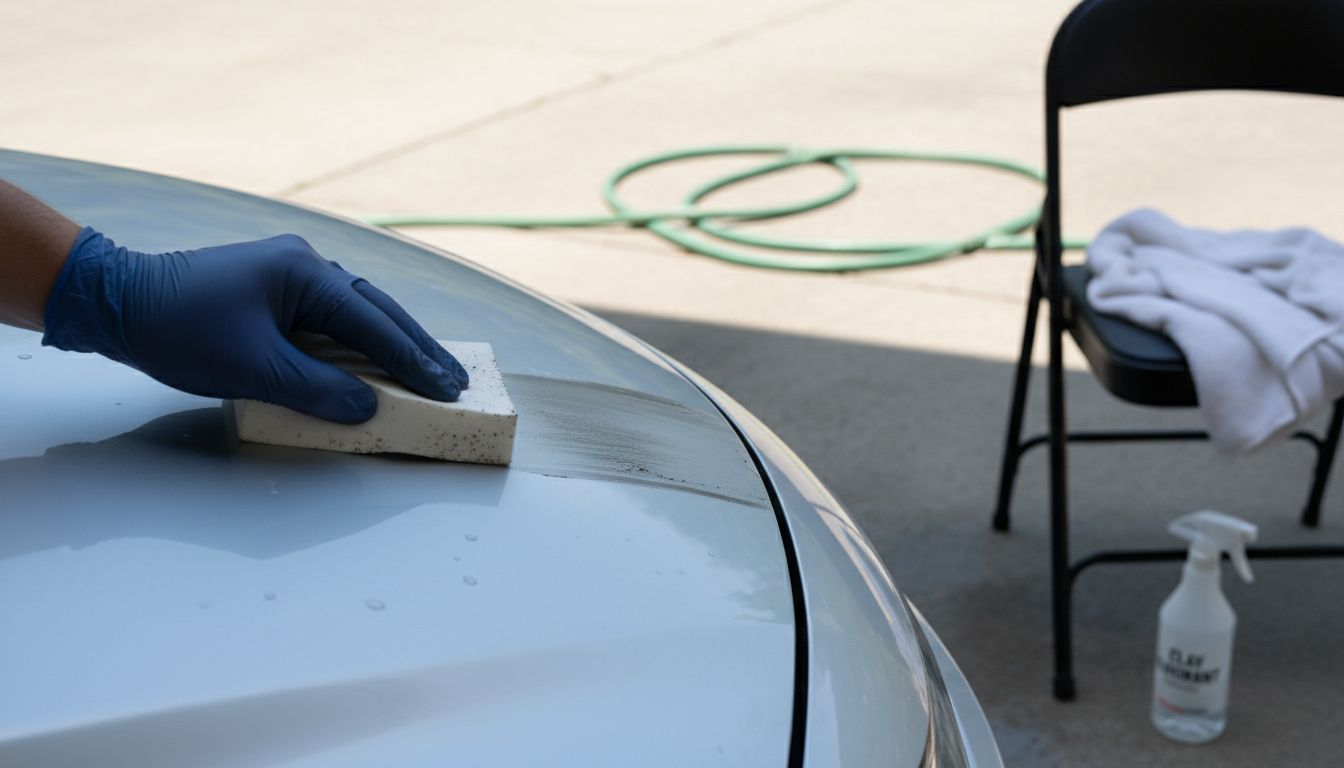
Drying becomes equally critical at this stage. Use only high quality microfiber towels specifically designed for automotive detailing. Pat and drag the towels gently across the surface rather than rubbing, which can potentially reintroduce scratches or swirl marks. Work systematically from top to bottom, ensuring no water droplets remain that could create spotting or interfere with the ceramic coating’s application. Pay special attention to crevices, around emblems, and other hard to reach areas where water tends to collect.
Warning: Improper drying techniques can compromise all your previous preparation work. Always use clean, soft microfiber towels and avoid any aggressive wiping motions that might damage the surface.
Step 3: Apply the Ceramic Coating Evenly
Applying ceramic coating requires precision and a systematic approach to ensure complete and uniform protection for your vehicle. The goal is to create a flawless protective layer that bonds seamlessly with your car’s surface.
Follow a precise cross-hatch application technique to guarantee comprehensive coverage. Begin by dividing your vehicle into manageable sections approximately two feet square. Work methodically using applicator pads or microfiber cloths designed specifically for ceramic coating application. Apply the coating using alternating north/south and east/west strokes to ensure no area is missed. This technique eliminates potential gaps and ensures consistent thickness across the entire surface.
Pay close attention to your application time in each section. Professional detailers recommend limiting coating application to approximately 1-2 minutes per area to prevent over application or uneven coverage. Use gentle but consistent pressure when applying the coating, allowing the product to spread evenly without creating pools or streaks. Work in a clean environment with consistent temperature and minimal dust to prevent contamination during the application process.
Warning: Rushing or becoming inconsistent during application can compromise the entire ceramic coating process. Maintain focus and work systematically to achieve professional results.
Step 4: Buff and Level the Coating for Perfection
After applying the ceramic coating, achieving a flawless finish requires meticulous buffing and leveling techniques. This final step transforms a good coating application into an exceptional protective layer that looks stunning and performs optimally.
Follow the precise leveling guidelines by allowing the coating to dwell on the surface for 2-5 minutes after initial application. During this time, the coating will begin to settle and bond with the vehicle’s surface. Use a clean microfiber cloth and work gently across each panel, using minimal pressure to smooth out any uneven areas. Inspect the surface from multiple angles under good lighting to identify and address any high spots or inconsistencies.
Professional detailers recommend using soft microfiber towels with a plush texture to prevent introducing any additional scratches during the buffing process. Move the cloth in smooth horizontal and vertical motions, ensuring you do not apply excessive pressure that could compromise the coating’s integrity. Take your time and work systematically across each section of the vehicle, maintaining a consistent technique to achieve a uniform and glossy finish.
Warning: Rushing through the buffing stage can create visible imperfections that will be challenging to correct later. Patience and attention to detail are crucial for achieving a professional grade ceramic coating application.
Step 5: Cure and Inspect for Complete Coverage
The final stage of ceramic coating application is critical for ensuring long lasting protection and optimal performance. This process requires patience and careful attention to detail to maximize the coating’s effectiveness and durability.
Follow the recommended curing guidelines by placing your vehicle in a well ventilated garage and keeping it completely dry for at least 24 hours after application. During this time, avoid any contact with water or moisture that could interrupt the bonding process. Use this opportunity to carefully inspect the coating under good lighting, checking for any uneven areas or spots that might require additional attention. Move around the vehicle systematically, examining each panel from multiple angles to ensure complete and uniform coverage.
Professional detailers suggest considering an additional nano coating application after the initial ceramic coating has fully cured. This extra layer can provide enhanced protection and increase the overall durability of the coating. Be mindful of environmental conditions during the curing period avoid direct sunlight extreme temperatures or humid environments that could potentially compromise the coating’s ability to bond properly with your vehicle’s surface.
Warning: Touching or washing the vehicle during the initial curing period can severely damage the coating and reduce its protective capabilities. Exercise extreme patience and resist the temptation to interact with the vehicle surface during this critical bonding phase.
Protect Your Investment with Expert Ceramic Coating Services
Applying ceramic coating perfectly involves detailed steps like surface preparation, precise application, and proper curing to ensure durable protection. If you want to avoid common pitfalls such as improper drying or uneven coating, trust the professionals who understand these critical processes. At CDC Auto Detailing, we specialize in expert ceramic coatings that provide a flawless finish and lasting defense for your vehicle in South Jersey.

Experience the convenience of premium mobile car detailing right at your doorstep. Visit CDC Auto Detailing today to discover our full range of services including ceramic coatings, paint protection film, and custom detailing packages. Don’t wait for imperfections or damages to appear on your vehicle’s surface. Schedule your appointment now and give your car the professional care it deserves with industry-leading products and expert application techniques.
Frequently Asked Questions
What is the first step in applying ceramic coating for long-lasting car protection?
To ensure successful ceramic coating application, the first step is thoroughly preparing your vehicle’s surface. Clean your car using a pH-neutral automotive shampoo, followed by a clay bar treatment to remove microscopic contaminants before proceeding with paint correction.
How can I properly dry my vehicle after washing it for ceramic coating?
To dry your vehicle effectively, use high-quality microfiber towels designed for automotive detailing. Gently pat and drag the towels across the surface, working from top to bottom, ensuring no water droplets remain to avoid spotting and interference with the coating application.
What technique should I use when applying the ceramic coating?
Use a precise cross-hatch application technique, dividing your vehicle into manageable sections about two feet square. Apply the coating in alternating north/south and east/west strokes to achieve complete coverage and an even thickness across the surface.
How long should I let the ceramic coating cure before washing my car?
Allow the ceramic coating to cure in a well-ventilated area for at least 24 hours without any contact with water. This critical bonding period ensures maximum protection; any premature contact can damage the coating’s integrity.
What should I do if I notice imperfections after applying ceramic coating?
If you spot imperfections after application, carefully inspect the coating under good lighting after the curing phase. Use a soft microfiber cloth to buff and level out uneven areas gently, ensuring you maintain a consistent technique for the best results.
How can I enhance the durability of my ceramic coating?
Consider applying an additional nano coating layer after the initial ceramic coating has fully cured. This can provide even greater protection and improve the durability of the ceramic coating for long-term car preservation.
Recommended
- How Long Does Ceramic Coating Last? Understanding Durability – CDC Detailing
- How Often Should You Wash a Ceramic Coated Car? – CDC Detailing
- Winter maintenance tips for ceramic-coated vehicles – CDC Detailing
- Ceramic Coating Service in Pitman, NJ – CDC Detailing LLC
- 7 Types of Roof Coatings Every Homeowner Should Know – Liberty Roofworks