
TL;DR:
- Proper cleaning of farm machinery involves a systematic process that includes dry cleaning, pressure washing, and disinfection to prevent damage and biosecurity risks.
- Using the correct tools, like pressure washers with appropriate nozzles and following proper contact times for disinfectants, ensures effective maintenance and safety.
- Regular cleaning according to field conditions and following best practices significantly extends equipment lifespan and reduces repair costs.
The agricultural vehicle cleaning process is a systematic method for removing soil, organic debris, and pathogens from farm machinery to protect equipment function, operator safety, and biosecurity compliance. Skipping or rushing this process costs more than most farmers realize. Proper maintenance returns $2.50 to $3.50 for every dollar spent, while neglect reduces equipment lifespan by 30–40% and drives repair costs up by 200–300%. The industry term for this full workflow is “clean and disinfect” (C&D) protocol, and it covers everything from dry debris removal to chemical disinfection. This guide walks you through every stage, the right tools, and the mistakes that quietly destroy expensive machinery.
What tools and materials are needed for the agricultural vehicle cleaning process?
The right equipment determines whether your cleaning effort actually works. Using the wrong pressure or nozzle type can damage painted panels or push debris deeper into cavities instead of removing it.
Pressure washers
High-pressure washers rated at 3,000–4,000 PSI are the standard for farm machinery. Units at 4,000 PSI handle heavy-duty cleaning without damaging structural components when paired with the correct nozzle. Nozzle selection is not optional. The wrong tip causes surface damage or leaves contamination behind.
| Nozzle type | Spray angle | Best use |
|---|---|---|
| Wide fan | 40 degrees | Painted panels and plastic covers |
| Medium fan | 25 degrees | General mud removal from body surfaces |
| Narrow fan | 15 degrees | Wheels, undercarriage, and heavy grime |
| Turbo/rotary | Variable | Stubborn caked soil on metal surfaces |
| Zero-degree | 0 degrees | Never use on paint or plastic |
Chemical agents
Three chemical categories cover a complete C&D protocol: detergents for breaking down grease and soil, degreasers for engine bays and hydraulic areas, and disinfectants for pathogen elimination. Always follow manufacturer concentration specifications. Higher disinfectant concentration is not more effective and can corrode metal surfaces or degrade rubber seals.
Supporting tools and safety gear
- Stiff-bristle brushes and scrapers for loosening caked mud before water application
- Compressed air gun for radiators, air filters, and enclosed cavities
- Plastic sheeting or waterproof tape to protect electronic control units (ECUs) and air intakes
- Personal protective equipment: waterproof gloves, eye protection, and rubber boots
- Buckets, foam applicators, and low-lint cloths for chemical application
Pro Tip: Cover the exhaust stack, air intake, and any exposed electrical connectors with plastic bags secured with tape before you start the pressure washer. Water intrusion into ECUs causes failures that cost far more than the cleaning saves.
How to perform the step-by-step agricultural vehicle cleaning process
A structured sequence prevents cross-contamination and protects sensitive components. Skipping steps or reversing the order reduces effectiveness and can spread pathogens rather than eliminate them.
Step 1: Dry cleaning first
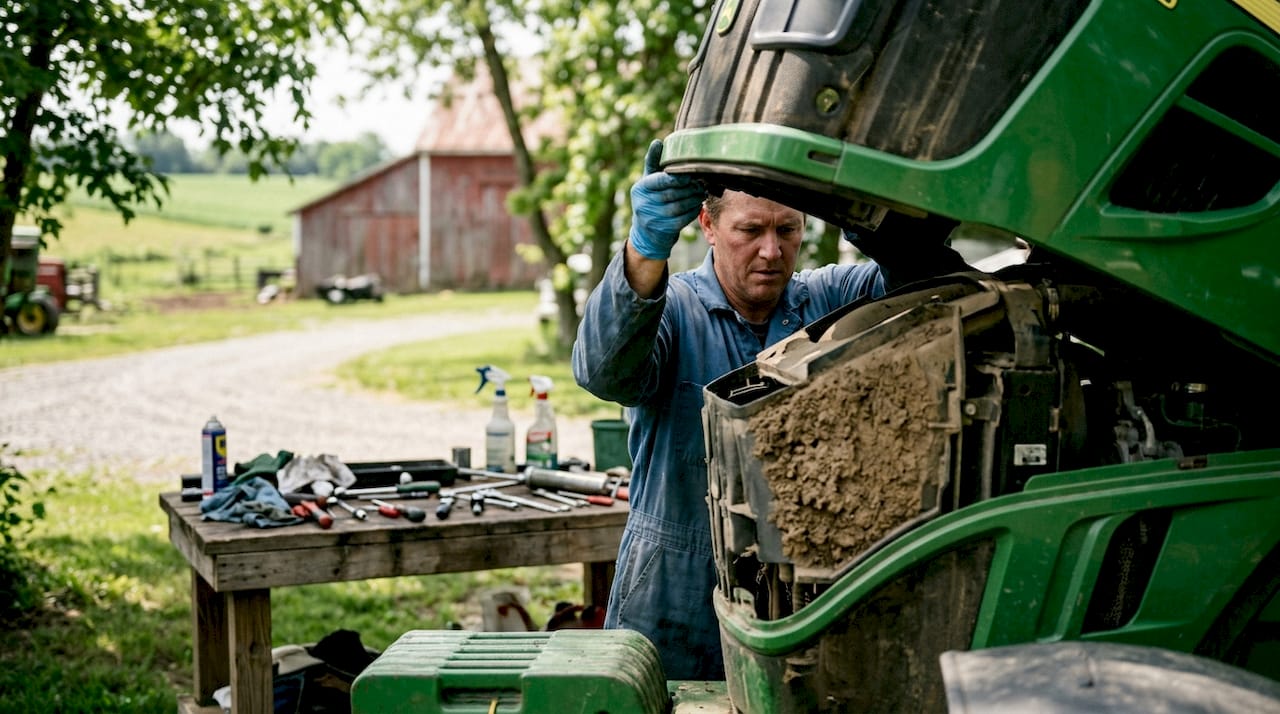
Use compressed air to clear debris from radiators, air filter housings, and enclosed cavities before any water touches the machine. Applying water to dry, loose soil turns it into slurry that packs into gaps and is far harder to remove. Blow out wheel arches, engine bays, and any cavity where soil accumulates. Remove guards, belly plates, and access panels to reach hidden deposits. These hidden areas are where weed seeds and disease vectors concentrate.
Step 2: Remove guards and access panels
Pull off all removable guards, belly plates, and shields. Removing guards exposes hidden soil that would otherwise remain and spread invasive species or plant diseases to the next field. Scrape off large clumps of mud manually before washing. This reduces the volume of contaminated water runoff and makes the pressure washing stage faster and more thorough.
Step 3: Pressure wash top to bottom
Start at the cab roof and work downward. Top-down washing prevents re-contaminating areas you have already cleaned. Use the 25-degree nozzle for body panels and the 15-degree or turbo nozzle for the undercarriage, wheel hubs, and axle housings. Pay specific attention to the following areas:
- Undercarriage and chassis rails
- Wheel hubs and brake drum faces
- Linkage arms and three-point hitch components
- Cab steps and floor areas where soil tracks in
- Engine bay surfaces (with ECUs protected)
Rinse from top to bottom a second time to flush loosened debris completely off the machine.
Step 4: Apply detergent and degrease
Apply a foam detergent to the entire machine and allow it to dwell for the time specified on the product label, typically 5–10 minutes. Work a stiff brush into joints, hinges, and textured surfaces where soil bonds to metal. Apply a dedicated degreaser to the engine bay, hydraulic reservoir area, and any surface with oil contamination. Rinse thoroughly before moving to disinfection.
Pro Tip: Detergent dwell time matters. A product that sits for the labeled contact period breaks down biofilm and organic residue far more effectively than one rinsed off immediately. Set a timer.
Step 5: Disinfect with correct contact time
Disinfection requires a two-step process: mechanical cleaning first, then chemical inactivation. Disinfectants fail completely if organic residue remains on the surface. Apply the disinfectant evenly across all surfaces and keep them wet for 10–30 minutes. Surfaces that dry before the contact time is complete are not disinfected. Use a low-pressure sprayer or foam applicator to maintain coverage. Rinse thoroughly after the contact period ends.
Step 6: Dry and inspect
Allow the machine to air dry or use compressed air to accelerate drying on electrical components. Reinstall all guards and belly plates. Conduct a visual inspection for missed soil deposits, corrosion starting points, and any damage revealed during cleaning. Log the cleaning date, products used, and any findings. This record supports compliance documentation and helps you track maintenance intervals accurately. For a full checklist approach, the agricultural vehicle detailing checklist from Cdcautodetailing covers fleet-level compliance tracking.
What are common mistakes in cleaning agricultural vehicles?
Most cleaning failures come from shortcuts taken at the beginning of the process, not the end. The errors below are the ones that cause the most damage and the most biosecurity risk.
- Using a zero-degree nozzle on painted or plastic surfaces. This strips paint, cracks plastic panels, and forces water into seals. Use the 40-degree nozzle for any non-metal surface.
- Skipping dry cleaning. Applying water before compressed air turns loose soil into compacted slurry. This makes cleaning harder and leaves more residue behind.
- Insufficient disinfectant contact time. Surfaces must stay wet for 10–30 minutes for disinfection to work. Spraying and immediately rinsing provides no pathogen control.
- Wrong disinfectant concentration. More is not better. Excess concentration damages rubber seals, corrodes metal, and creates a false sense of security without improving kill rates.
- Ignoring electronic components. Pressure washing directly onto ECUs, sensors, or unsealed connectors causes electrical failures. Always cover these before washing.
- Leaving guards and belly plates on. Hidden soil under guards carries weed seeds and disease organisms to the next field. Remove every access panel before you start.
“The ‘come clean, leave clean’ philosophy is the gold standard for farm biosecurity. Every vehicle entering or leaving a property should complete a full C&D protocol, with top-down sequencing and compressed air applied before any water. Systematizing this process removes human error from the equation.”
Pro Tip: Designate a specific wash-down area on your property with a concrete pad and drainage. This contains contaminated runoff, makes the process faster, and prevents re-contamination from soil on the ground.
For a deeper look at advanced pressure washer techniques for farm equipment, Cdcautodetailing’s guide covers nozzle control and surface-specific approaches in detail.
How often should agricultural vehicles be cleaned for compliance?
Cleaning frequency depends on operating conditions, field type, and biosecurity risk level. A tractor working in dry, sandy conditions needs less frequent deep cleaning than one operating in wet, clay-heavy fields with high weed pressure.
Tractor accidents cause over 250 deaths annually in US farms, and debris buildup on brakes, steering linkages, and visibility surfaces contributes directly to mechanical failures. Cleaning is not just a hygiene task. It is a safety inspection in disguise.
| Interval | Condition | Key tasks |
|---|---|---|
| Daily | All operating conditions | Pre-start visual check, remove large debris, check air filters |
| After each field | High weed or disease pressure | Full dry clean and pressure wash, disinfect if biosecurity risk |
| Weekly | Standard operations | Full C&D protocol, inspect undercarriage and wheel hubs |
| Monthly | All vehicles | Deep clean including guards removed, lubrication check, corrosion inspection |
| During outbreaks | Disease or pest alert | Full C&D protocol before and after every field entry |
Seasonal tractor maintenance, including cleaning schedules tied to planting and harvest cycles, is covered in detail in this seasonal tractor maintenance guide. Adjusting your cleaning intervals to match field conditions and seasonal risk is the most cost-effective approach to farm vehicle maintenance.
Key Takeaways
A systematic agricultural vehicle cleaning process, executed in the correct sequence with the right tools and contact times, is the single most effective way to protect equipment lifespan, operator safety, and biosecurity compliance.
| Point | Details |
|---|---|
| Dry clean before water | Use compressed air first to prevent soil turning into hard-to-remove slurry. |
| Match nozzle to surface | Use 40-degree for paint and plastic; 15-degree or turbo for wheels and undercarriage. |
| Hold disinfectant contact time | Surfaces must stay wet for 10–30 minutes or disinfection fails completely. |
| Clean top to bottom | Top-down sequencing prevents re-contaminating areas already washed. |
| Adjust frequency to risk | Increase cleaning intervals during disease outbreaks or high-contamination field conditions. |
What I’ve learned from watching farmers skip the steps that matter most
Charles here. After years of working with farm vehicle fleets, the pattern is consistent: the farmers who treat cleaning as a mechanical safety check rather than a cosmetic task have fewer breakdowns, fewer biosecurity incidents, and lower annual repair bills. The ones who rush it or skip the disinfection step entirely are the ones calling for emergency service mid-season.
The detail that surprises most equipment managers is how much damage comes from skipping dry cleaning. Turning loose soil into slurry with a pressure washer and then forcing that slurry into joints, seals, and cavities is one of the most common causes of premature wear I see. It takes five extra minutes with a compressed air gun to prevent it. That is the kind of return on time that compounds over years of operation.
The “come clean, leave clean” philosophy is not just a biosecurity slogan. It is an operational discipline. When you systematize the sequence, every operator on your property follows the same steps in the same order, and you eliminate the variability that causes failures. The 12 essential agricultural vehicle care tips from Cdcautodetailing expand on this discipline with practical longevity strategies worth reading alongside this guide.
— Charles
Professional detailing services for agricultural vehicles
Farm vehicles face cleaning challenges that go beyond what a standard wash-down handles. Caked-on chemical residue, corrosion starting under mud deposits, and contaminated surfaces inside cab interiors require professional-grade methods and products.

Cdcautodetailing provides mobile detailing services for agricultural and fleet vehicles across South Jersey, bringing professional-grade equipment and cleaning protocols directly to your operation. From full exterior decontamination to protective coatings that resist future soil adhesion, the services are built for working vehicles, not showroom cars. The auto detailing services overview covers the full range of treatments available for farm and commercial vehicles. Contact Cdcautodetailing to schedule a service visit or discuss a maintenance program for your fleet.
FAQ
What is the correct order for the agricultural vehicle cleaning process?
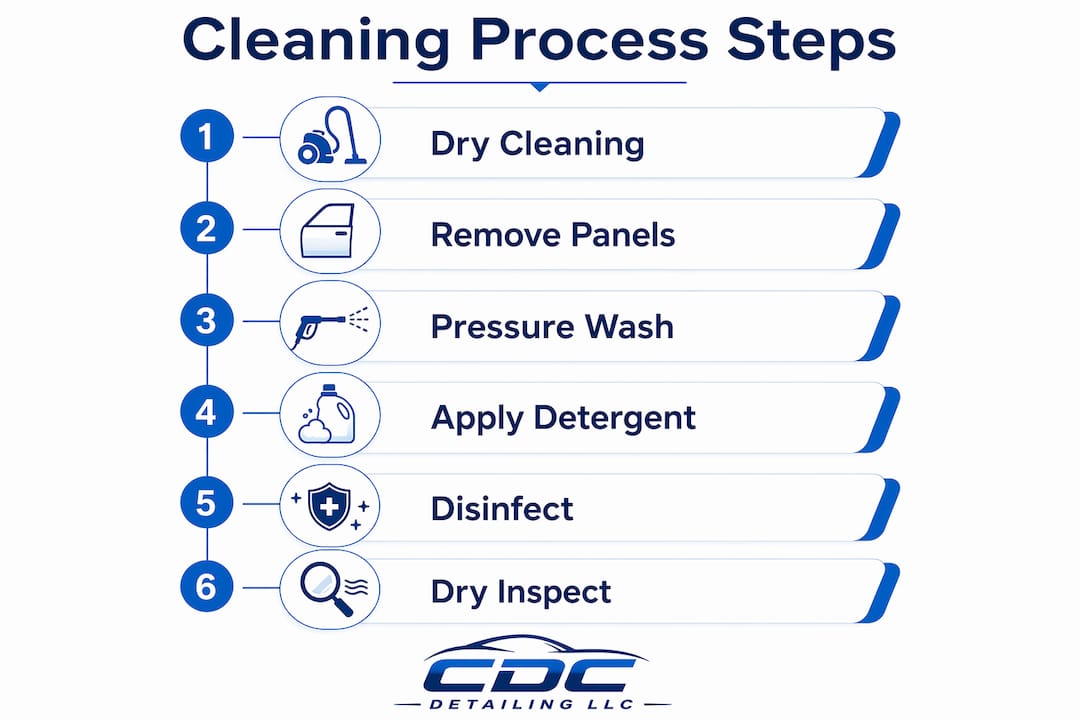
The correct order is dry cleaning with compressed air first, then pressure washing top to bottom, then detergent application, then disinfection with a 10–30 minute contact time, and finally a rinse and inspection.
How long should disinfectant stay on farm equipment surfaces?
Disinfectants require 10–30 minutes of wet contact time to inactivate pathogens. Surfaces that dry before this period ends are not effectively disinfected.
What PSI pressure washer works best for cleaning farm machinery?
A pressure washer rated at 3,000–4,000 PSI with multiple nozzle options is the standard recommendation. Use a 40-degree nozzle for painted panels and a 15-degree or turbo nozzle for wheels and undercarriage.
How often should tractors and farm vehicles be fully cleaned?
Daily pre-start checks are the minimum. A full clean and disinfect protocol should occur weekly under standard conditions and after every field entry during disease outbreaks or high-contamination periods.
Why does dry cleaning matter before pressure washing?
Applying water to loose soil turns it into slurry that packs into joints and cavities. Compressed air removes this debris dry, making the subsequent pressure wash faster and more thorough.