
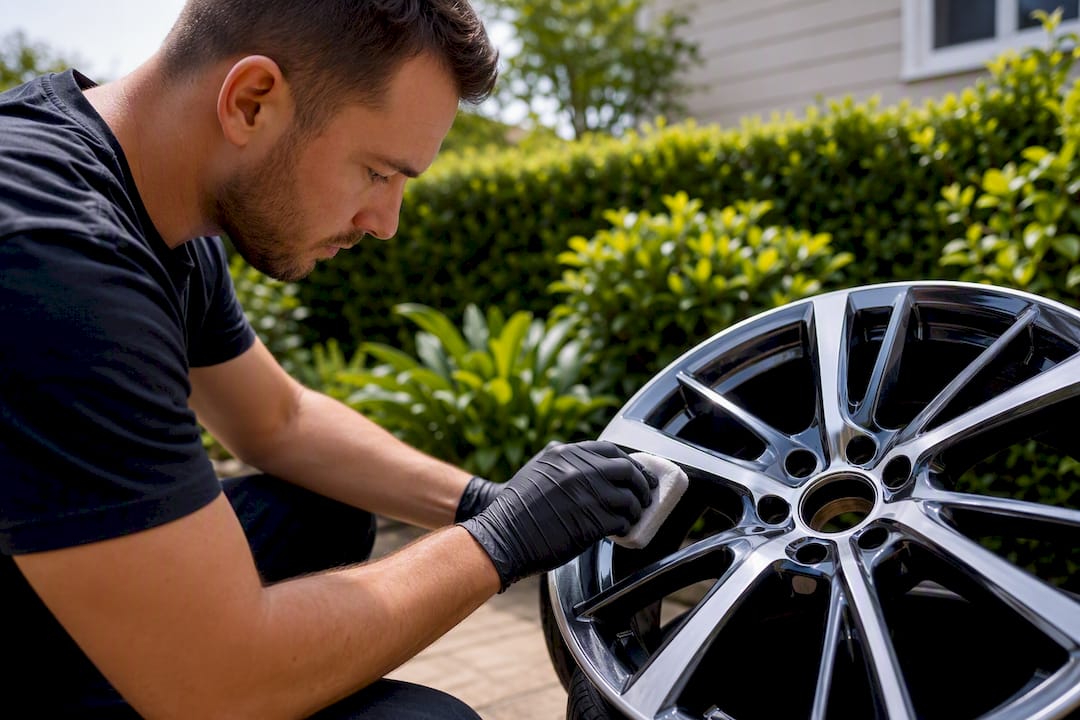
Yes. A properly prepared ceramic coating meaningfully reduces brake-dust bonding and makes wheel cleaning far easier. Longevity depends heavily on prep quality, the product used, and how you drive.
The wheels take more abuse than almost any other painted surface on your car. Brake dust bakes on in the heat, road salt eats at clear coats, and most owners scrub with whatever brush is closest. A ceramic coating adds a sacrificial, chemically resistant layer that keeps grime from bonding in the first place.
- Expect roughly 1 to 2 years of protection from a single coating layer under normal driving
- Heat resistance matters more here than on paint, since brake systems generate sustained high temperatures
- Daily drivers and enthusiast owners see the biggest payoff; track cars often need heavier-duty or more frequent reapplication
Wheel-specific coatings need to survive real heat. Manufacturers commonly rate their formulas for heat resistance up to 300°C, a spec that matters because brake rotors can push wheel-facing surfaces well past what a body panel ever experiences.
TL;DR:
- Coatings rated for heat up to 300°C or higher are essential as brake rotors can push surface temperatures well past 600°C.
- Proper decontamination, including iron fallout removal and clay barring, is crucial to ensure coating longevity and effectiveness.
- Testing matte or satin finishes on a hidden area before full coating prevents unwanted sheen changes that may bother owners.
- Protective effects typically last one to two years, with harsher conditions like track use or road salt significantly shortening that period.
- Mobile professional application offers thorough prep, even coverage, and expert curing, making it a better choice than DIY for most owners.
Table of Contents
- What Ceramic Coating on Wheels Actually Does
- Which Wheel Finishes Work Best With a Coating?
- How to Prep and Apply Ceramic Coating for Rims
- How Long Does Wheel Ceramic Coating Really Last?
- What a Professional Wheel Coating Job Looks Like
- Should You DIY Your Wheel Coating or Hire It Out?
- Get Your Wheels Professionally Coated Without the Guesswork
- Key Takeaways
- Sources
What Ceramic Coating on Wheels Actually Does
The core mechanism is simple: ceramic coating on wheels creates a hydrophobic, chemically bonded barrier that sits on top of the factory clear coat or finish. Instead of brake dust and road grime physically adhering to bare metal or paint, contaminants sit on the coating’s slick surface where a rinse can knock them loose.
That hydrophobic layer is why washing gets faster almost immediately. Detailing professionals consistently point to reduced cleaning effort as the single biggest everyday benefit, since contaminants release from a coated wheel with far less scrubbing than a bare one requires.
Chemical and heat resistance is where the real protection happens. Iron particles from brake pads etch into unprotected clear coats over time, leaving that rust-colored staining you see on neglected wheels. A coating’s resistance to heat, ranging from around 300°C to as high as 600°C in some formulations, keeps those particles from bonding chemically to the surface in the first place.
- Faster, less abrasive washing with fewer chemicals needed
- Resistance to iron-particle staining and brake dust bonding
- Added gloss and depth on most factory and aftermarket finishes
One caveat worth knowing before you commit: coatings can subtly shift the sheen on matte or satin wheels, even when a product claims broad compatibility. Test a hidden spot first.
Which Wheel Finishes Work Best With a Coating?
Most wheel surfaces take a ceramic coating well, but not all finishes respond the same way. Clear-coated painted wheels and polished aluminum are the easiest candidates. The coating bonds to the existing clear layer and behaves almost exactly like it would on your car’s paint.
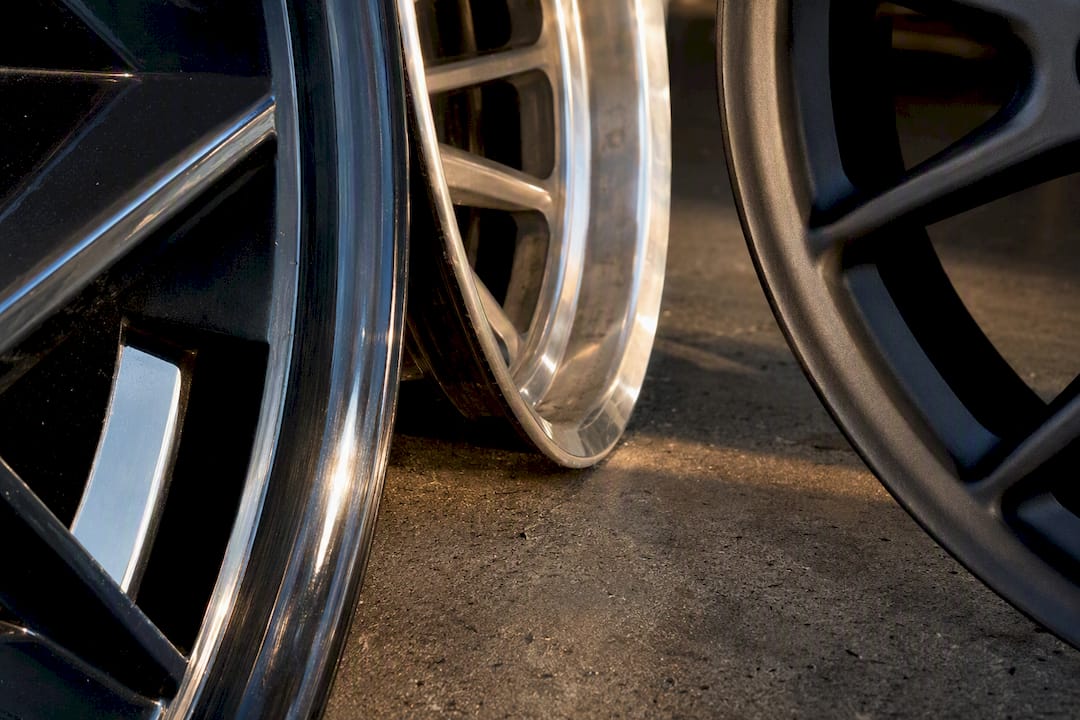
Powder-coated wheels are generally compatible too, since the powder-coat finish itself acts as a stable base layer. Chrome wheels can be coated, but chrome’s ultra-smooth, non-porous surface means bonding is weaker and reapplication tends to happen sooner than on painted finishes.
Matte and satin wheels are where things get tricky. A coating engineered for gloss finishes can push a matte surface toward a slight sheen it was never meant to have, a change some owners love and others hate.
- Painted/clear-coated wheels: excellent compatibility, strong bonding
- Powder-coated wheels: good compatibility, stable base for bonding
- Chrome wheels: workable but weaker bond, shorter service life
- Matte/satin wheels: test a small area first before committing to all four
Pro Tip: If your wheels are matte or satin, coat the inside of one barrel first and drive on it for a week. If the sheen change bothers you there, you’ll hate it on the face.
Daily drivers and commuters get the strongest return since they’re washing wheels most often and dealing with the steadiest brake-dust buildup. Show car owners benefit from the added gloss. Track cars, where rotor temperatures spike hard and often, may need a coating specifically rated for higher heat tolerance or more frequent touch-ups.
How to Prep and Apply Ceramic Coating for Rims
Getting this right starts before the coating ever touches the wheel. Skipping prep is the single biggest reason wheel coatings fail early.
- Decontaminate thoroughly. Use an iron-fallout remover to dissolve embedded brake dust, follow with a wheel-safe cleaner, and clay bar any remaining bonded contaminants. Vendor kits like Gtechniq’s wheel coating system build this decontamination step directly into their instructions because trapped grime under a coating shortens its life dramatically.
- Strip surface oils. Wipe the wheel with a dedicated panel prep solution to remove any residue from cleaners or waxes. Coating over oils prevents proper bonding.
- Apply in small sections. Work one quarter of the wheel face at a time using cross-hatch application passes, watching the product’s dwell window closely before it flashes.
- Remove excess promptly. Buff off high spots within the manufacturer’s stated window. Waiting too long leaves visible streaking that’s a hassle to correct later.
- Don’t skip the barrels and spokes. These areas take the worst of the brake dust and are the most commonly rushed part of any DIY job.
- Cure properly. Keep wheels dry and out of rain or dust for the manufacturer’s recommended cure window, typically 12 to 24 hours depending on product and ambient humidity.
If you’re working in a garage without climate control, curing conditions get harder to guarantee, and tight spokes on multi-spoke wheels make full coverage tedious. That’s usually when hiring a professional starts to make more sense than fighting it yourself. For a closer look at how a controlled application process differs from a driveway job, this professional ceramic coating process guide walks through what changes with the right tools and environment.
Pro Tip: Coat one wheel completely before starting the next. Splitting attention across all four at once is how streaking and missed spokes happen.
How Long Does Wheel Ceramic Coating Really Last?
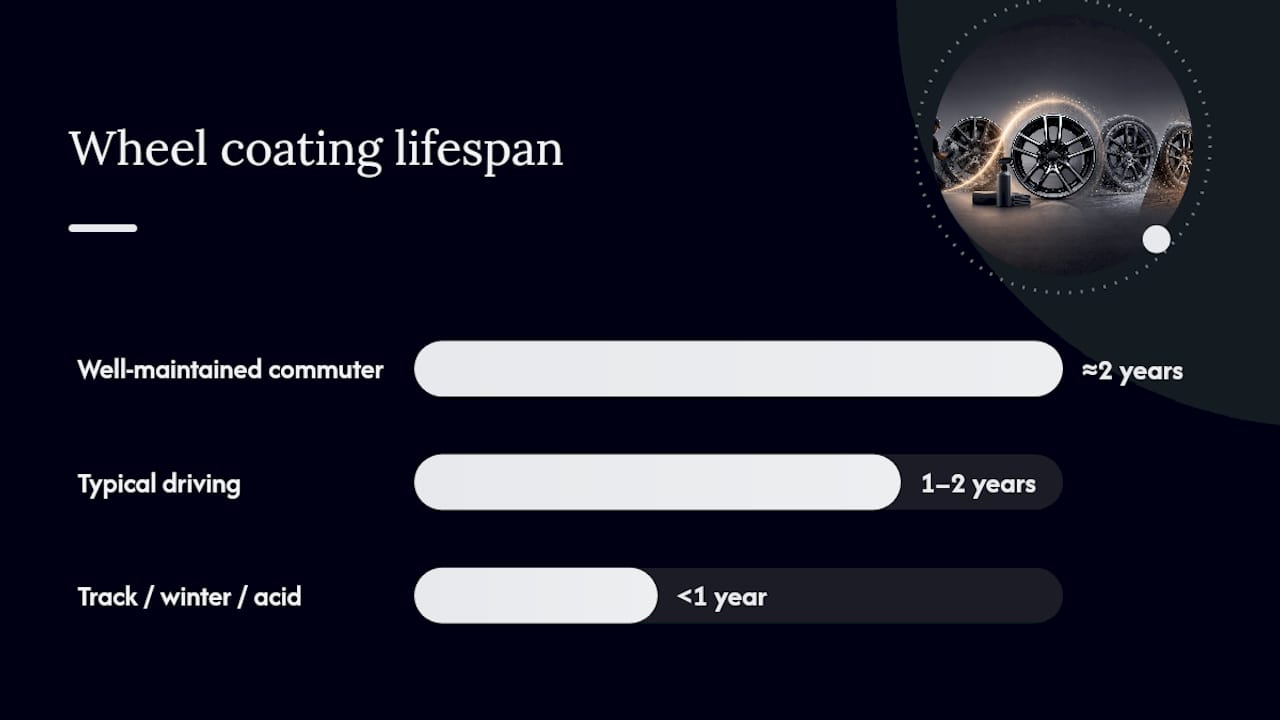
Realistic expectations matter more here than almost any other detailing product. Most manufacturer pages and forum consensus point to roughly one to two years of protection from a single application under normal driving conditions.
Maintenance routine determines where you land in that range. A coated wheel doesn’t need scrubbing anymore, but it still needs the right products.
- Use pH-neutral wheel shampoo, never harsh acid or alkaline wheel cleaners that strip the coating
- Rinse first to knock loose grit before any brush touches the surface
- Use soft wheel brushes designed for coated finishes, not stiff-bristle brushes meant for bare metal
- Address stubborn iron deposits with an iron-fallout spray rather than scrubbing harder
Track use, winter road salt, and aggressive acid-based cleaners all shorten that one to two year window considerably. A commuter car washed weekly with the right products often stretches toward the upper end of that range, while a track car running hot brakes every weekend might need reapplication well before the year mark.
The good news: coated wheels stay noticeably cleaner between washes the entire time the coating is active, which is why most owners describe the maintenance trade-off as worth it even with a firm expiration date attached. For readers weighing coatings against other protective options, this wheel protection resource covers finish-specific cleaning routines in more depth.
What a Professional Wheel Coating Job Looks Like
Cdcautodetailing runs mobile ceramic coating appointments across South Jersey, applying coatings on-site rather than requiring a shop visit. A typical wheel job follows the same sequence outlined above, but with commercial-grade decontamination products and a controlled process that’s harder to replicate in a driveway.
- Full iron-fallout decontamination and clay treatment before any coating touches the wheel
- Cross-hatch application by section, with dwell and cure times managed for the specific product used
- A follow-up check to confirm even coverage across barrels, spokes, and lips
- Maintenance guidance sent home with every client so the coating reaches its full service life
, backed by working on wheels across every finish type from powder-coat to polished aluminum… For readers who want the fuller technical breakdown behind these benefits, the site’s ceramic coating benefits guide goes deeper into how the chemistry holds up over time.
Should You DIY Your Wheel Coating or Hire It Out?
DIY makes sense if you’re comfortable working in small, careful sections and have a dust-free space to cure the coating overnight. Follow the numbered prep steps above exactly, and always test matte or satin finishes on a hidden spot before committing to all four wheels.
— Charles
Get Your Wheels Professionally Coated Without the Guesswork
Cdcautodetailing brings the entire wheel coating process to your driveway, so you skip the dust-free garage requirement and the trial-and-error most DIY jobs involve on the first attempt. The mobile setup means full decontamination, cross-hatch application, and proper cure monitoring happen at your home or office in South Jersey, with follow-up maintenance guidance included so the coating actually reaches its one to two year window.

Every job starts with the same iron-fallout removal and panel prep covered earlier, applied with commercial-grade products most driveway kits don’t include. Clients booking full details often add wheel coating alongside a paint ceramic package, since both share the same prep stage and curing logic. If you’re ready to stop guessing at dwell times and cross-hatch angles yourself, book a ceramic coating appointment and get a quote for your specific wheel finish.
Key Takeaways
A properly prepped ceramic coating on wheels cuts brake-dust bonding and cleaning effort for roughly one to two years, but finish type and driving conditions decide the real outcome.
| Point | Details |
|---|---|
| Heat resistance is the key spec | Look for coatings rated 300°C or higher since brake systems generate sustained heat exposure. |
| Prep decides success or failure | Iron-fallout removal, claying, and an oil-stripping wipe must happen before any coating touches the wheel. |
| Test matte and satin finishes first | Coatings can add unwanted sheen; check a hidden spot before coating all four wheels. |
| Expect one to two years of protection | Track use, road salt, and harsh cleaners shorten that window considerably. |
| Cdcautodetailing offers mobile application | On-site prep, cross-hatch coating, and cure monitoring across South Jersey with maintenance guidance included. |
Sources
- Ecocoat Wheel – IGL Coatings
- Wheel Ceramic Coating – Brake Dust Shield | FEYNLAB®
- Ceramic coating wheels benefits — Velgen Wheels blog