
A fleet detailing workflow is a standardized, repeatable SOP organized as a phased rollout: pilot and calibrate, scale to a steady maintenance cadence, then run periodic deep cycles with KPI reviews. Get that structure right and you have predictable costs, documented quality, and vehicles that stay on the road instead of sitting in a wash bay longer than necessary. The three phases look like this:
- Phase 1 — Pilot and calibrate (Days 1–30): Run a representative sample of vehicles, time each unit by class, and establish your baseline time-per-unit and condition benchmarks.
- Phase 2 — Steady cadence (Days 31–60): Expand to the full fleet, train client-side leads, and lock the recurring schedule.
- Phase 3 — Deep cycle and KPI review (Days 61–90): Execute the first full deep-clean cycle, review fleet detailing KPIs, and finalize contract terms.
Every vehicle in the program gets a 14-point QC sign-off, before-and-after photo documentation at four exterior angles plus a cabin overview, and a single named point of contact for the account. Those three elements are what separate a professional program from a vendor who just shows up with a pressure washer.
Table of Contents
- What does a fleet detailing workflow look like step by step?
- Why does pre-wash and decontamination matter so much?
- How do you run exterior detailing for fleets efficiently?
- What does a reliable interior cleaning process look like?
- What tools and chemicals do you need for fleet-scale work?
- How should you schedule fleet detailing to protect uptime?
- What does fleet detailing actually cost per unit?
- How do you build a QC system that fleet stakeholders trust?
- Key Takeaways
- Why standardization beats chemistry every time
- CDC Detailing LLC fleet programs: start with a pilot
- Useful sources and further reading
What does a fleet detailing workflow look like step by step?
A reliable vehicle detailing process runs in seven ordered steps. Skipping or reordering them is where quality problems start.
Step 1 — Inspection and vehicle classing (5–10 min per unit)
Walk every vehicle before touching it. Note condition tier (maintenance, mid-cycle, or deep-cycle), flag pre-existing damage, capture the VIN or unit ID, and assign a service scope. This is your manifest entry. Common failure point: skipping the pre-inspection means disputed damage claims later.
Step 2 — Pre-wash and decontamination (10–20 min per unit)
Rinse loose debris, apply a foam pre-soak, and address chemical decontamination (iron remover, tar solvent) before any contact wash. Details on method selection are in the next section.
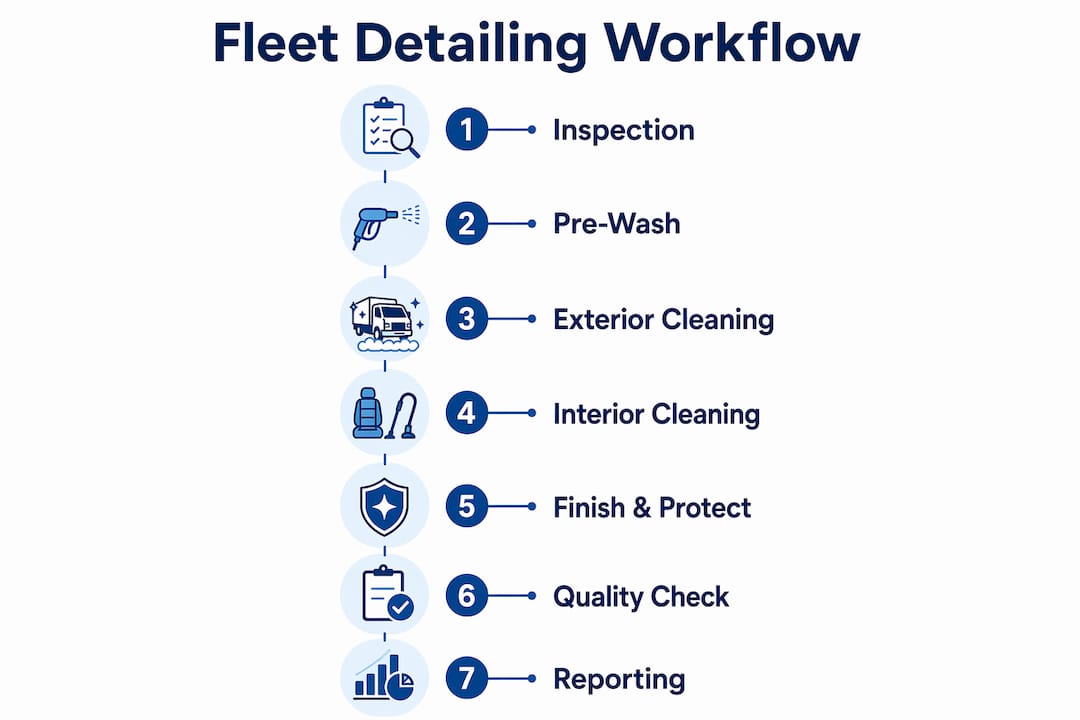
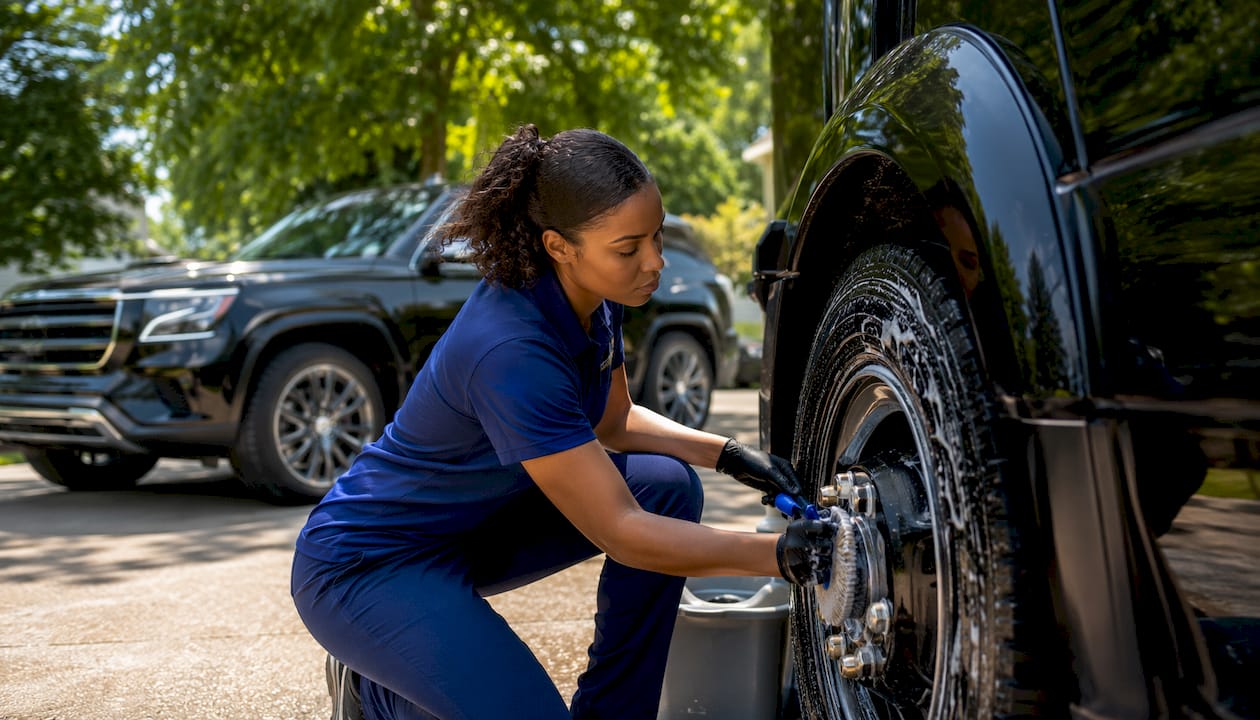
Step 3 — Exterior sequence (20–45 min per unit, class-dependent)
Top-down rinse, wheels and arches, foam/pre-dwell, pressure rinse, contact wash, clay or decon bar if scheduled, polish or protect if scheduled, glass and trim. Full sequence is covered in the exterior section below.
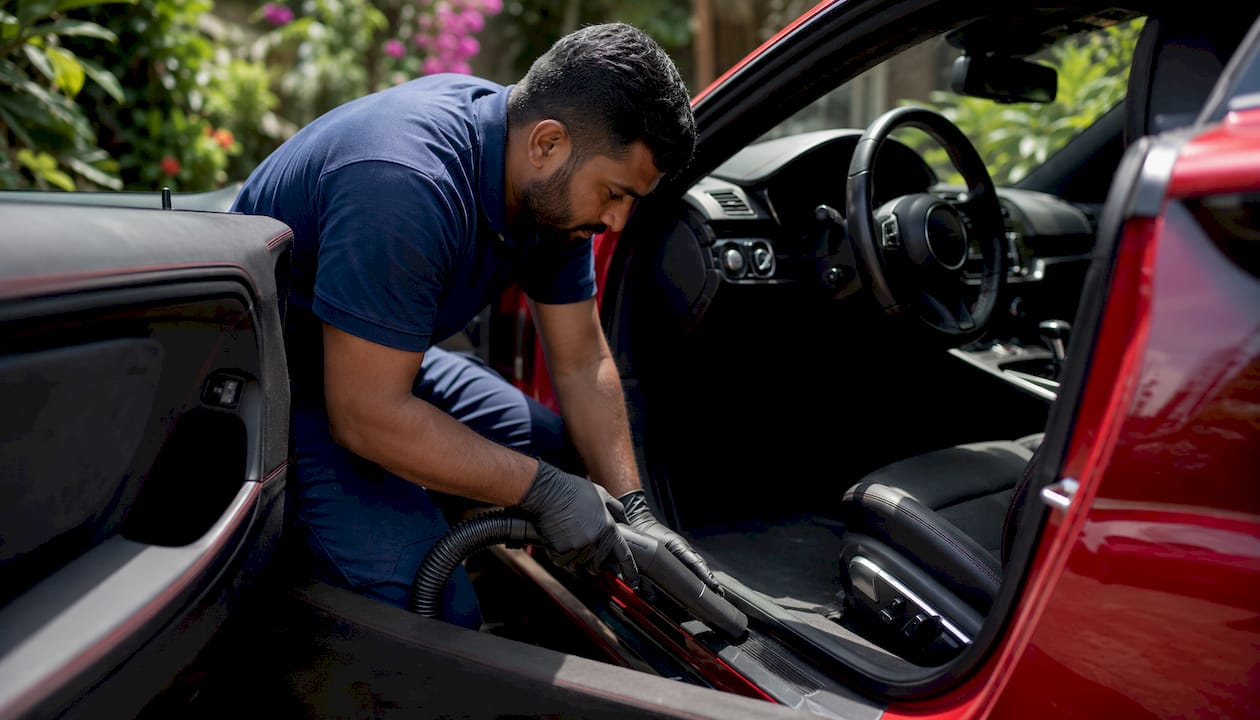
Step 4 — Interior sequence (15–35 min per unit)
Trash and mats out, vacuum crevices, pre-spray soiled zones, extract or shampoo as needed, wipe and dress surfaces, deodorize. Zone-based grab-and-go kits keep this moving without crew members hunting for supplies.
Step 5 — Finish, dressing, and quick protectants (5–10 min per unit)
Tire dressing, trim dressing, quick detailer or spray sealant on paint if not polished, final glass wipe. This step is where the vehicle goes from clean to presentable.
Step 6 — QC and photo log (5 min per unit)
Run the 14-point checklist, photograph four exterior angles and the cabin overview, timestamp and upload to the shared folder. No photo, no sign-off.
Step 7 — Closeout and report
Update the manifest with unit ID, service scope completed, anomalies flagged (damage, odor, mechanical issues), and technician sign-off. Send the daily report to the fleet manager contact.
Assembly-line vs. sequential flow
For fleets of 10 or more vehicles, an assembly-line model cuts total time significantly. Assign a wash lead, a wheel tech, and an interior lead. Each technician stays in their lane while vehicles rotate through stations. Sequential flow (one tech completes one vehicle) works fine for smaller batches or when space is constrained.
Pro Tip: During the pilot, time four representative vehicles per class from Step 1 through Step 7. Average those times and use them as your per-unit labor budget for scheduling and pricing. Adjust after the first 30 days of full-fleet data.
Why does pre-wash and decontamination matter so much?
Skipping a proper pre-wash is the single fastest way to introduce swirl marks across an entire fleet. Dragging a wash mitt over road grime without a foam pre-soak is essentially sanding the clearcoat. For a fleet manager, that means polishing costs you did not budget for.
Beyond paint preservation, a thorough decontamination step removes iron particles and tar deposits that accelerate corrosion, particularly on vehicles operating in winter road-salt environments. Regular washing of the engine bay and undercarriage also allows visual inspection for leaks and worn components, which fleet maintenance experts note can surface mechanical issues before they become expensive repairs.
Comparing three pre-wash approaches for fleet settings
| Method | Best Use Case | Water Use | Trade-offs |
|---|---|---|---|
| Full pressure wash with foam cannon | On-site depot, 15+ vehicles, water/power access | High | Fastest for heavy grime; requires wastewater reclamation compliance |
| Low-water / reclaimed water setup | Urban sites, water-restricted locations | Moderate | Adds equipment cost; reclaim mats or vacuum recovery needed |
| Waterless or low-contact chemistry | Indoor facilities, small batches, lightly soiled units | Minimal | Slower per unit; not suitable for heavily contaminated vehicles |
- Site constraints to check before mobilizing: water access (spigot vs. tank), local environmental rules on runoff, drain proximity, and whether the site requires a water reclamation mat.
- Pressure safety: anything under 2,300 psi is generally safe for painted surfaces; pressure washer guidelines recommend erring toward 1,800 psi to protect clearcoat on older vehicles.
- Chemical dwell times: aggressive degreasers and iron removers need 30–60 seconds of dwell before agitation. Wiping immediately wastes the product and often leaves contamination behind.
- pH awareness: alkaline degreasers above pH 12 can strip wax and damage rubber seals if left too long. Acid-based wheel cleaners require thorough rinsing, especially where steel and aluminum meet.
Pre-wash and decon are not optional steps you compress when running behind. They are what make every downstream step faster and safer.
How do you run exterior detailing for fleets efficiently?
The exterior sequence for fleet vehicles follows a top-down logic for one practical reason: contamination flows downward. Cleaning wheels before the roof means re-contaminating panels you already washed.
The exterior task order
- Top-down rinse to remove loose debris
- Wheels and wheel arches (dedicated brushes, alkaline degreaser, acid wheel cleaner for heavy brake dust)
- Foam application and pre-dwell (60–90 seconds minimum)
- Pressure rinse, top to bottom
- Contact wash with a pH-neutral shampoo and clean microfiber or wash mitt
- Clay bar or decon treatment (scheduled cycles only, not every visit)
- Polish or paint correction (scheduled deep cycles only)
- Glass cleaning, inside and out
- Trim dressing and tire shine
- Final QC wipe
Common problem areas and quick fixes
Heavy wheel grime on delivery and service vehicles responds well to a two-stage approach: alkaline degreaser first, then a mild acid wheel cleaner, followed by a thorough rinse. Adhesive residues from decals or stickers come off cleanly with a dedicated adhesive remover; never use a razor on painted surfaces. Tar deposits on lower panels need a petroleum-based tar remover with adequate dwell time before wiping.
Efficiency tactics that actually move the needle
Role specialization matters more than speed. A dedicated wheel tech who does nothing but wheels and arches while the wash lead works the body panels cuts total exterior time per unit by a meaningful margin. Color-coded consumable kits (one color for wheels, one for paint, one for glass) prevent cross-contamination and reduce the time techs spend hunting for the right product. Staging vehicles in a line with enough space to work both sides without moving the unit eliminates the dead time of repositioning.
For a standard maintenance exterior visit, expect 20–30 minutes per sedan or compact van, 30–45 minutes per full-size van or pickup, and 45–75 minutes per heavy-duty truck or bus. These are working ranges; your pilot data will sharpen them for your specific fleet mix.
Pro Tip: Apply a ceramic coating to high-use fleet units during a scheduled deep cycle. Coated surfaces shed dirt faster, which cuts pre-wash and contact wash time on every subsequent maintenance visit.
What does a reliable interior cleaning process look like?
Interior condition is what drivers notice every shift and what passengers judge in customer-facing fleets. A rushed interior that smells stale or has visible stains reflects directly on the company operating the vehicle.
The most practical approach for fleet interiors is a zone-based sequence using grab-and-go kits: one kit per zone (front, middle, rear), pre-loaded with the right products for that zone. Crews can work in parallel on different vehicles without stopping to restock.
Interior sequence, zone by zone
- Remove trash and floor mats before anything else. Mats go to a separate cleaning station.
- Vacuum crevices, seats, and cargo areas with a crevice tool. This step takes longer than most techs budget for it.
- Pre-spray heavily soiled areas (seat bolsters, floor carpets, headliners if stained) and let the product dwell.
- Extract or shampoo as needed. Spot treatment handles most maintenance visits; a full extraction is a scheduled deep-cycle task.
- Wipe and dress all hard surfaces: dash, door panels, center console, steering wheel, and door jambs.
- Clean glass from inside, top to bottom, with a dedicated glass cleaner and a clean microfiber.
- Deodorize: an enzymatic odor eliminator handles biological sources; a light scent bomb is a cosmetic fix, not a solution.
Sanitation and PPE for shared-fleet vehicles
Rideshare, taxi, and medical transport vehicles require a sanitation step after every cycle. Use a hospital-grade disinfectant on high-touch surfaces: door handles, grab bars, seat belts, and armrests. Techs working these vehicles should wear nitrile gloves and, for vehicles with visible biohazard material, an N95 mask. Never skip PPE to save time on a shared-fleet unit.
Stain triage: spot-treat or schedule a deep extraction?
If a stain responds to a pre-spray and light agitation within two minutes, spot-treat and monitor. If it does not lift, flag it in the anomaly report and schedule a step-by-step extraction on the next deep-cycle visit. Forcing a stain with aggressive scrubbing on a maintenance visit risks damaging upholstery and creating a larger problem.
Pro Tip: Photograph the cabin overview before and after every interior service. A timestamped before photo is your protection when a driver reports damage that existed prior to the detail.
What tools and chemicals do you need for fleet-scale work?
Standardization is the operational lever most fleet detailing programs underuse. When every crew runs the same kit with the same chemicals at the same dilutions, training time drops, re-clean rates drop, and you can actually troubleshoot quality issues because variables are controlled.
Equipment inventory for a fleet crew
- Pressure washer: 1,800–2,300 psi, cold or hot water, with foam cannon attachment
- Portable extractor: 8–12 gallon capacity for interior carpet and upholstery
- Dual-action polisher: 15mm throw for paint correction cycles (not every maintenance visit)
- Cordless vacuum: for interior zones without power access
- IR or forced-air blower: for drying door jambs, mirrors, and trim crevices quickly
- Brushes: dedicated wheel brush, lug nut brush, interior detailing brush set, engine bay brush
- Microfiber sets: color-coded by task (paint, glass, interior, wheels) — minimum 20 per crew per day
- Color-coded totes or carts: one per zone or task category
Chemical categories to standardize
- Alkaline wheel and engine degreaser (pH 11–13 range)
- pH-neutral auto shampoo for contact wash
- Iron remover and tar/adhesive remover for decontamination cycles
- Multi-surface interior cleaner (APC diluted to task)
- Fabric spotter for upholstery pre-treatment
- Protectants: trim dressing, tire shine, quick detailer or spray sealant
- Wheel sealant for scheduled protection cycles
Buy by concentrate. A 1-gallon concentrate that dilutes to 10:1 costs a fraction of ready-to-use product at fleet volumes. Label every diluted bottle with the product name, dilution ratio, and date mixed. Keep Safety Data Sheets (SDS) accessible on-site, not back at the shop.
Pro Tip: Lock a three-product core for maintenance cycles: one shampoo, one interior APC, one protectant. Every other product is a scheduled add-on. This reduces training friction and prevents chemical drift when staff rotate.
How should you schedule fleet detailing to protect uptime?
The scheduling question fleet managers get wrong most often is treating detailing as something that happens when vehicles are available, rather than building availability into the schedule. The better approach is the reverse: identify low-utilization windows first, then build the detailing schedule around them.
Scheduling windows by fleet type
- Delivery fleets: overnight yard time (10 PM–5 AM) or weekend staging days
- Rental fleets: between return and next dispatch, typically a 60–90 minute turnaround window
- Service/utility fleets: shift-change intervals or scheduled maintenance days when vehicles are already off-road
- Corporate/executive fleets: weekday evenings or early mornings before the first driver pickup
Routing and batching
Cluster vehicles by geography and daypart. A crew driving 45 minutes between accounts is losing billable time. Use delivery-style routing logic: assign crews to geographic zones, batch vehicles at each stop, and calculate crew capacity in units per hour before committing to a schedule. For maximum scheduling efficiency, the goal is to minimize transit time and maximize consecutive units worked.
On-site vs. studio: which model fits your fleet?
| Factor | On-Site Mobile | Studio / Depot Drop |
|---|---|---|
| Fleet size | Best for 15+ vehicles | Works for any size |
| Water/power access | Required on-site | Controlled environment |
| Weather risk | High (outdoor work) | None |
| Mobilization cost | Included in per-unit rate | Driver time to transport |
| Deep corrections / coatings | Difficult outdoors | Preferred setting |
| Turnaround speed | Faster for maintenance cycles | Slower (transport adds time) |
On-site mobile detailing is the right call for high-frequency maintenance on large fleets. Studio drops make sense for deep paint corrections, ceramic coating applications, and any work that needs a controlled environment. A hybrid model, where mobile handles weekly maintenance and studio handles quarterly deep cycles, works well for fleets of 20 or more units.
Crew role planning
Assign roles before the crew arrives, not when they get there. A wash lead manages the exterior sequence and quality. An interior lead runs the zone-based interior workflow. A QC runner handles the 14-point checklist, photo documentation, and manifest updates. Spare kits staged at the vehicle, not in the van, eliminate the dead time of walking back for supplies.
What does fleet detailing actually cost per unit?
Fleet clients buy predictable outcomes — uptime, consistent appearance, and simple invoicing — not individual washes. Pricing should reflect that. Per-unit rates vary by vehicle class, service frequency, site conditions, and SLA requirements.
Sample per-unit price ranges by class and cadence
| Vehicle Class | Maintenance (biweekly) | Mid-Cycle (monthly) | Deep Cycle (quarterly) |
|---|---|---|---|
| Sedan / compact car | $30–$60 | $75 | $250 |
| Full-size van / pickup | $50–$90 | $160 | $350 |
| Box truck / sprinter | $75 | $220 | $500 |
| Heavy-duty truck / bus | $200 | $350 | $450 |
Ranges reflect industry examples. Actual pricing depends on location, site access, condition, and contract volume. Travel surcharges, water/power setup fees, and condition-based add-ons apply separately.
Pricing factors that move the number
- Vehicle class and condition: a heavily soiled delivery van costs more to service than a lightly used corporate sedan at the same frequency
- Cadence: higher frequency means lower per-unit cost because vehicles stay in maintenance condition rather than requiring reset work
- On-site setup: sites without water or power access require tank trucks or generator rigs, which add mobilization cost
- Travel time: anything beyond a reasonable drive radius typically carries a travel surcharge
- SLA and reporting requirements: photo documentation, digital manifests, and KPI reporting add administrative time that should be priced in
- Condition surcharges: biohazard cleanup, heavy odor treatment, and paint decontamination are add-ons, not included in a maintenance rate
Pricing pilots and step-up clauses
Price the pilot at a fixed per-unit rate that covers your actual time, including setup and calibration. After the pilot, propose a step-up clause: if condition scores improve (vehicles arrive cleaner because the program is working), the per-unit rate for maintenance visits decreases. If condition deteriorates due to operational changes, a surcharge applies. This structure aligns incentives for both parties and makes contract renewals straightforward.
When fleet managers evaluate the ROI of a deep-cycle program, vehicle remarketing value is a real factor. Vehicles that enter the resale market in documented, well-maintained condition command better prices and sell faster.
How do you build a QC system that fleet stakeholders trust?
High-volume fleet operations win on operations, not on marginal product chemistry. The digital audit trail — photo sets, GPS-verified timestamps, and searchable manifests — is what removes disputes and shortens accounts-payable cycles for procurement teams evaluating vendors.
The 30-60-90 phased rollout
- Days 1–30 (Pilot): Service a representative sample (20 units recommended). Time each vehicle by class. Establish baseline condition scores and photo documentation standards. Identify scheduling conflicts and site constraints.
- Days 31–60 (Expansion): Roll out to the full fleet. Train client-side leads on how to read reports and escalate anomalies. Refine the schedule based on pilot data.
- Days 61–90 (Deep cycle and KPI review): Execute the first full deep-clean cycle. Run the KPI report. Present findings to the fleet manager and propose contract terms for the next period.
The 14-point QC checklist
Every vehicle gets a sign-off on all 14 points before the tech moves to the next unit:
- Exterior panels: no missed spots, streaks, or water spots
- Wheels and tires: clean, dressed, no brake dust residue
- Wheel arches: degreased and rinsed
- Glass (exterior): streak-free, no smearing
- Glass (interior): streak-free, no fingerprints
- Trim and moldings: dressed, no product overspray on glass
- Door jambs: wiped, no dirt accumulation at hinges
- Mirrors: clean and streak-free
- Interior surfaces: wiped, no product residue
- Seats and upholstery: vacuumed, spot-treated, no visible stains
- Carpets and floor mats: vacuumed, extracted if scheduled
- Odor: neutral or treated
- Cargo area: clean and free of debris
- Photo log: four exterior angles and cabin overview uploaded and timestamped
KPIs to track and report
| KPI | Target | Why It Matters |
|---|---|---|
| Units per labor hour | 2.5–4.0 (class-mixed) | Measures crew efficiency and informs staffing decisions |
| Re-clean rate | <2% | Tracks first-pass quality; high rates signal training or process issues |
| SLA on-time % | — | Confirms scheduling reliability for the fleet buyer |
| Photo compliance % | 95%+ | Ensures audit trail integrity for every vehicle |
| Vehicle downtime per visit | <35 min | Measures operational impact on fleet availability |
Pro Tip: Assign a single named point of contact for each fleet account. That person owns anomaly escalation, schedule changes, and the monthly KPI report. Accounts with a dedicated contact renew at significantly higher rates than those managed by whoever answers the phone.
Key Takeaways
A well-run fleet detailing workflow is built on three pillars: a phased rollout that calibrates time-per-unit before full deployment, a 14-point QC checklist with mandatory photo documentation, and a single point of contact who owns the account from pilot through renewal.
| Point | Details |
|---|---|
| Run a 30-day pilot first | Time four vehicles per class to set accurate per-unit labor budgets before scaling to the full fleet. |
| Require photo documentation | Four exterior angles plus a cabin overview, timestamped and uploaded per vehicle, eliminate disputes and build audit-proof records. |
| Align scheduling with low-use windows | Overnight, shift-change, and weekend windows keep vehicles in service and detailing off the critical path. |
| Price by class, cadence, and SLA | Per-unit rates should reflect vehicle type, service frequency, site conditions, and reporting requirements — not a flat fee. |
| Cdcautodetailing runs fleet programs this way | CDC Detailing LLC offers mobile fleet detailing in South Jersey with pilot packages, photo audit setup, and KPI reporting built in. |
Why standardization beats chemistry every time
The conventional wisdom in detailing circles is that the right products make the difference. After working through enough fleet programs, the pattern that actually holds is different: operations win, chemistry is a distant second.
A crew running mediocre products with a tight process, defined roles, and a real QC checklist will consistently outperform a crew with premium chemistry and no structure. The reason is simple. Inconsistency compounds. One tech who skips the dwell time, another who uses the wrong dilution, a third who photographs only three angles instead of four — none of those errors are catastrophic individually, but across 50 vehicles a week, they produce a re-clean rate that erodes margin and strains the client relationship.
The 14-point checklist is not bureaucracy. It is the mechanism that catches the fourth angle before the vehicle leaves, not after the fleet manager calls to complain. The single point of contact is not a customer service nicety. It is the person who knows that Unit 47 has a recurring odor issue and that the fleet manager wants a call, not an email, when something unusual comes up. Digital photo logs are not overhead. They are what gets a vendor paid on time when procurement wants documentation before releasing an invoice.
Fleet managers who treat detailing as a commodity purchase, selecting on price alone, tend to cycle through vendors every 12–18 months. The ones who select on operational infrastructure — documented SOPs, photo compliance, KPI reporting — build programs that run for years. The fleet detailing advantages that compound over time are not about any single wash. They are about the system behind it.
CDC Detailing LLC fleet programs: start with a pilot
Cdcautodetailing runs mobile fleet detailing programs across South Jersey with the full operational infrastructure described in this article: a structured pilot package, 14-point QC sign-offs, photo audit setup, and KPI reporting from day one.

A CDC Detailing pilot covers up to 20 vehicles over two weeks. You get time-per-unit calibration by vehicle class, a photo audit trail established for every unit, a condition baseline report, and a KPI summary at the end of the pilot period. Before reaching out, have your fleet size, typical scheduling windows, and vehicle classes ready. That information lets the team build a realistic pilot scope and per-unit estimate without a back-and-forth.
To see the full range of service scopes and package options, the fleet detailing service guide covers what each tier includes and how to match it to your fleet’s condition and cadence. For managers considering on-site mobile execution, the mobile detailing implementation guide walks through what to prepare before the first crew arrives. Contact Cdcautodetailing to schedule your pilot and get a per-unit estimate within 24 hours.
Useful sources and further reading
-
Fleet Detailing Contracts: Your Playbook for Steady, High-Volume Revenue — Auto Detail School: Covers the 30-60-90 phased rollout, KPI targets, and pricing structure for fleet contracts. The most operationally detailed free resource available for detailing operators building fleet programs.
-
Detailing Routines for Fleet Vehicles: Speed and Quality — Killer Brands: Practical breakdown of tiered interior cleaning schedules, tool selection for throughput, and environmental compliance considerations for fleet operations.
-
Detailing Commercial Vehicle Exterior — Fleet Maintenance: Industry-level guidance on pressure washing safety, chemical dwell times, and the connection between exterior detailing and mechanical inspection for commercial vehicles.
-
Best Practices for Managing Fleet Appearance — Rocket Express Car Wash: Covers fleet appearance standards, inspection scoring systems, and technology tools for tracking vehicle condition across large fleets.
-
How to Detail Rideshare or Fleet Vehicles Efficiently — Jimbo’s Detailing: Zone-based interior workflow steps and multi-surface product recommendations for high-frequency fleet cycles.
-
Corporate Fleet Detailing: Hotels, Limos & Rental Fleets — Evolve Detailing Blog: On-site vs. studio trade-off analysis and turnaround time benchmarks for rapid-cycle fleet types including rental and limo operations.
-
7 Key Types of Fleet Detailing for Managers — Cdcautodetailing: Maps service tiers to vehicle classes and helps managers select the right scope for each unit in their fleet.
-
Fleet Vehicle Cleaning Guide for Managers — Cdcautodetailing: Regional guidance, rollout templates, and QC checklist samples for fleet managers building or auditing a detailing program.