TL;DR:
- Protecting car paint at home requires a consistent routine of gentle washing, decontamination, and applying layered protective coatings. Using proper tools and methods, such as the two-bucket wash technique and clay bar treatment, prevents damage and prepares surfaces for protection layers like wax, sealant, or ceramic coatings. Combining routine maintenance with physical barriers like paint protection film and breathables covers offers the best defense against UV rays, environmental damage, and physical impacts.
Protecting car paint at home means applying a consistent system of safe washing, surface decontamination, and protective coatings to shield your vehicle’s finish from UV rays, chemical damage, and physical abrasion. The two-bucket wash method, pH-neutral shampoos, and consumer-grade ceramic coatings are the three pillars of effective DIY paint care. Cdcautodetailing recommends combining routine washing with a layered protection strategy, starting with wax or sealant and graduating to ceramic coatings for longer-lasting results. This guide walks you through every step, from the tools you need to the products that deliver real protection in 2026.
What tools and products do you need for paint protection at home?
The right tools make the difference between a safe wash and a scratched finish. Skipping proper equipment is the most common reason car owners accidentally damage their own paint.
Essential tools:
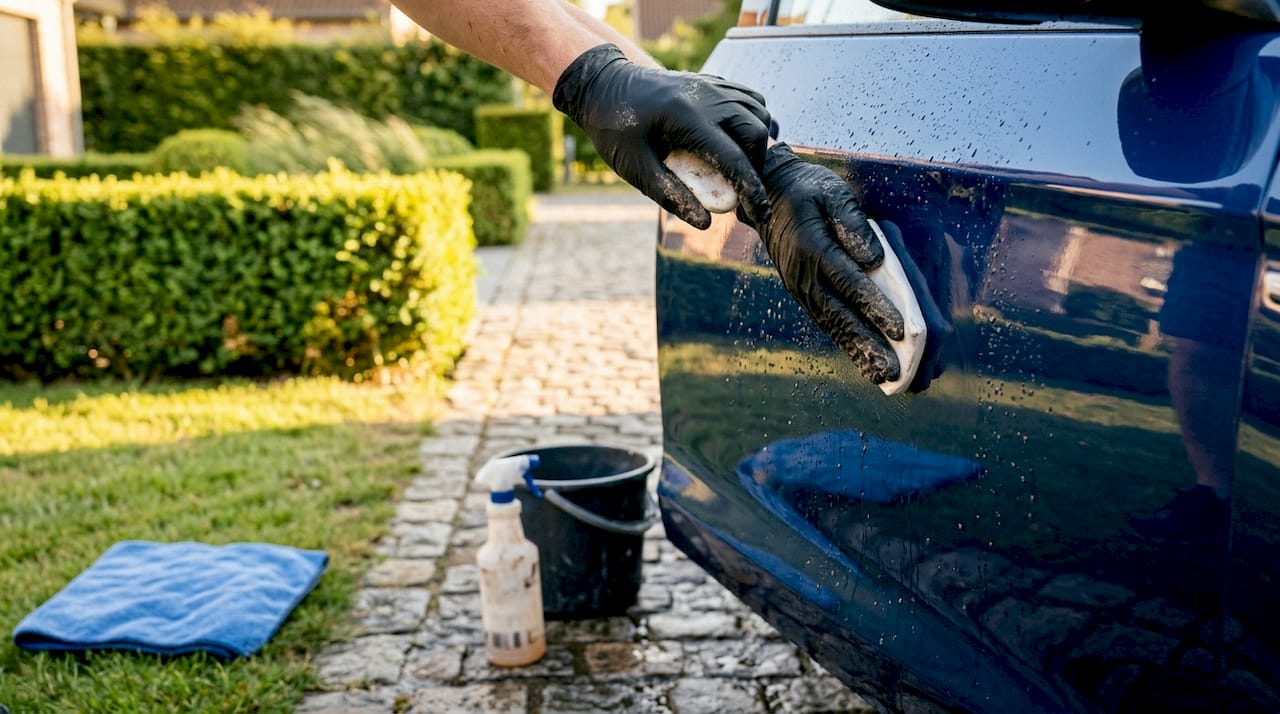
- Microfiber wash mitts and drying towels. Microfiber lifts dirt away from the surface instead of dragging it across the clear coat. Terry cloth and sponges trap grit and cause swirl marks.
- pH-neutral car shampoo. Household dish soap strips protective wax layers. A dedicated car shampoo cleans without degrading your existing protection.
- Two-bucket wash setup. One bucket holds soapy water, the other holds clean rinse water. This keeps dirt out of your wash mitt between passes.
- Clay bar or synthetic clay mitt. Clay bars remove bonded contaminants like iron fallout and industrial dust that shampoo cannot lift.
- Applicator pads and microfiber buffing cloths. These are used for applying and removing wax, sealant, or ceramic coatings evenly.
Choosing a protection product:
| Product | Cost (DIY) | Longevity | Protection scope |
|---|---|---|---|
| Carnauba wax | $10–$40 | 1–3 months | Gloss, light UV |
| Synthetic sealant | $20–$60 | 6–12 months | UV, chemical, water |
| Ceramic coating | $13–$100 | 1–2 years | UV, chemical, hydrophobic |
| Paint Protection Film (PPF) | $1,500–$5,000+ | 5–10 years | Physical chips, UV |
Consumer-grade ceramic coatings cost as little as $13 for a DIY kit and last 1–2 years. PPF blocks over 99% of UV rays and protects against rock chips, but the professional installation cost puts it in a different category from home products.
Pro Tip: A UV-resistant, breathable car cover is a worthwhile addition to your toolkit. Breathable, soft-lined covers with elastic hems block UV and prevent moisture buildup. Plastic tarps trap heat and moisture, which damages paint and encourages mold growth.
How to properly wash and prepare your car for protection at home?
Washing is the foundation of every paint protection routine. Done wrong, it creates the very damage you are trying to prevent.
Follow these steps every time you wash:
- Rinse the entire car with a hose or pressure washer to remove loose dirt before touching the surface.
- Fill two buckets: one with pH-neutral shampoo mixed to the manufacturer’s ratio, one with plain water for rinsing your mitt.
- Wash from the top of the car downward. The roof, hood, and trunk accumulate less grit than the lower panels and rocker areas.
- Dip your mitt in the soapy bucket, wash one panel, then rinse the mitt in the clean water bucket before reloading with soap.
- Rinse the car thoroughly from top to bottom.
- Dry immediately with a clean microfiber drying towel or a forced-air blower. Water left to air-dry leaves mineral deposits that etch the clear coat.
Improper washing with a single bucket spreads grit back onto the paint with every pass. The two-bucket method keeps contaminated water separate and reduces swirl marks significantly.
Pro Tip: After clay bar treatment, run a clean plastic bag over the paint surface. If it glides smoothly, the surface is ready for protection. If it snags or feels rough, the surface needs more decontamination.
Experts recommend washing every 1–2 weeks and performing a full clay bar decontamination every 3–6 months. Skipping decontamination before applying a protective layer traps contaminants under the coating, where they continue to damage the paint.
Two mistakes to avoid: washing in direct sunlight causes shampoo to dry on the surface before you rinse it off, leaving water spots and residue. Using dish soap strips your existing wax or sealant in a single wash.
What are the best protective layers to apply at home?
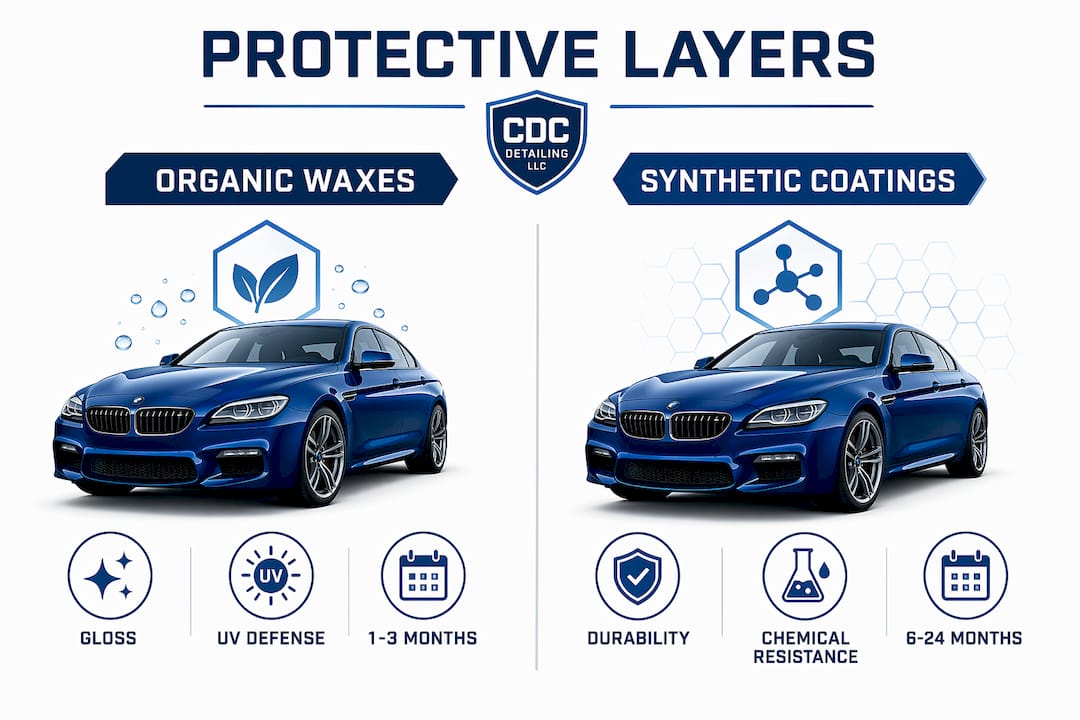
The best protection strategy layers products by function. Wax provides gloss and light UV defense. Sealants add chemical resistance and last longer. Ceramic coatings bond chemically to the clear coat and offer the strongest DIY protection available.
Wax
Carnauba wax is the most accessible option. It produces a warm, deep gloss and costs $10–$40 per application. The trade-off is longevity: wax lasts 1–3 months and requires reapplication every season.
Application steps:
- Work on a clean, decontaminated surface in a shaded area.
- Apply a thin, even layer using a foam applicator pad in straight, overlapping lines.
- Allow the wax to haze (typically 5–10 minutes, check the product label).
- Buff off with a clean microfiber cloth using light, circular pressure.
Over-application of wax causes streaking and makes buffing much harder. A thin coat outperforms a thick one every time.
Synthetic sealants
Synthetic polymer sealants bond more firmly to the clear coat than wax and last 6–12 months. They resist car wash chemicals, road salt, and UV rays better than natural wax. Application follows the same thin-coat principle.
Ceramic coatings
Ceramic coatings create a chemically bonded, hydrophobic shield that resists UV rays, chemical stains, and bird droppings. Modern consumer-grade versions use spray-on, buff-off techniques that require no special tools or controlled environment. They last 1–2 years from a single application.
Application steps for ceramic coating:
- Complete the full wash, clay bar, and polish sequence before starting.
- Work in a shaded area with the surface at room temperature.
- Apply the product to a small applicator block wrapped in a suede cloth.
- Spread in straight lines across one panel at a time, then level with a microfiber cloth.
- Allow the coating to cure per the product instructions before exposing the car to water.
Applying coatings over uncorrected paint locks in defects permanently. Polish the surface first to remove swirls, oxidation, and micro-scratches. The correct prep order is: iron remover, clay bar, then polish.
Pro Tip: Avoid getting ceramic coating on plastic trim or rubber seals. It bonds to those surfaces too and leaves white residue that is difficult to remove. Tape off trim edges before you start.
How to protect your car paint from UV and environmental damage at home?
Washing and coatings handle most threats, but UV exposure, bird droppings, and tree sap cause damage between washes that coatings alone cannot fully prevent.
Environmental threats and countermeasures:
- UV rays. Park in a garage or covered structure whenever possible. When parking outdoors, use a UV-resistant breathable car cover that blocks up to 90% of harmful UV rays. Rotate your parking position periodically so the same panels do not face the sun every day.
- Bird droppings. Remove them within a few hours. Bird waste is acidic and etches clear coat within 24–48 hours in warm weather. Keep a quick-detailer spray and a microfiber cloth in your car for fast removal.
- Tree sap and bug splatter. Both bond to paint quickly in heat. A dedicated bug and tar remover dissolves them without scratching. Do not rub dry sap with a dry cloth.
- Road salt. Rinse the undercarriage and lower panels after driving in salted conditions. Salt accelerates oxidation on unprotected surfaces.
- Non-breathable covers. Plastic tarps trap heat and moisture, causing paint damage and mold growth under the cover. Always choose a multi-layer, breathable fabric with a soft inner lining.
Physical barriers and coatings work together. A ceramic coating repels contaminants so they are easier to rinse off. A car cover prevents them from landing in the first place. Using both gives you the most complete protection between washes.
For high-impact zones like the front bumper and hood leading edge, paint protection film adds a physical barrier that ceramic coatings cannot replicate. PPF absorbs rock chips and road debris without transferring the damage to the paint underneath.
Key Takeaways
Consistent washing with the two-bucket method, followed by proper decontamination and a layered protection product, is the most effective and affordable way to protect car paint at home.
| Point | Details |
|---|---|
| Wash every 1–2 weeks | Use pH-neutral shampoo and the two-bucket method to prevent swirl marks. |
| Decontaminate before coating | Clay bar and polish the surface before applying any wax, sealant, or ceramic coating. |
| Layer your protection | Combine wax or sealant for routine care with ceramic coating for longer-lasting chemical and UV defense. |
| Remove contaminants fast | Bird droppings and sap etch clear coat within hours; remove them immediately with a quick-detailer spray. |
| Use breathable car covers | UV-resistant, multi-layer covers block up to 90% of UV rays without trapping moisture like plastic tarps do. |
What I’ve learned after years of watching car owners get this wrong
Most car owners focus on the product and skip the prep. They buy a quality ceramic coating, apply it to a surface full of swirls and iron fallout, and wonder why the finish looks dull six months later. The coating did its job. The problem was sealed underneath it.
Skipping paint correction before applying any protection layer is the single most expensive mistake in DIY paint care. Those swirls and oxidation spots are now locked under a chemically bonded shield. Removing them means stripping the coating first.
The second mistake I see constantly is treating paint protection as a one-time event. A ceramic coating is not a permanent solution. It degrades over time, especially on cars parked outdoors year-round. Reapplication every 1–2 years, combined with weekly washing, is what actually keeps paint looking new.
My honest recommendation for 2026: use PPF on the front bumper, hood, and mirrors where rock chips are inevitable, and apply a consumer-grade ceramic coating to the rest of the car. That combination covers both physical and chemical threats without requiring professional installation on every panel. The DIY ceramic coating market has matured enough that a careful home application produces results that hold up for a full year with proper maintenance.
The most underrated step in the whole process is the plastic bag test after clay bar treatment. Run a bag over the paint. If it catches, you are not done. That five-second check has saved more paint jobs than any product on the market.
— Charles
Professional detailing that takes your home efforts further
Home maintenance builds a strong foundation, but some steps deliver better results with professional equipment and trained hands.

Cdcautodetailing offers professional ceramic coating services in Pitman, NJ, with controlled application conditions that maximize bonding and longevity beyond what most DIY kits achieve. For physical protection, professional PPF installation covers high-impact zones with precision-cut film that fits your vehicle’s exact contours. Combining your at-home washing routine with a professional coating or film installation gives your paint the most complete protection available. When you are ready to go beyond the basics, Cdcautodetailing makes it easy to book mobile detailing at your location across South Jersey.
FAQ
What is the best way to protect car paint at home?
The most effective approach combines weekly washing with the two-bucket method, clay bar decontamination every 3–6 months, and a protective layer such as a synthetic sealant or consumer-grade ceramic coating applied to a fully corrected surface.
How often should you wax or seal your car at home?
Experts recommend applying carnauba wax every 1–3 months and synthetic sealants every 6–12 months. Ceramic coatings last 1–2 years and require less frequent reapplication.
Can you apply ceramic coating yourself at home?
Yes. Modern consumer-grade ceramic coatings use spray-on, buff-off techniques that require no special tools. The critical requirement is a clean, polished, fully decontaminated surface before application.
Does parking in the shade actually protect car paint?
Shade significantly reduces UV exposure, which causes paint fading and clear coat oxidation over time. A UV-resistant breathable car cover adds further protection when a garage or covered structure is not available.
How do you remove bird droppings without scratching the paint?
Spray a dedicated quick-detailer or bird dropping remover directly on the affected area and let it dwell for 30–60 seconds to soften the deposit. Lift it away gently with a clean microfiber cloth. Never rub dry droppings, as the grit in them scratches the clear coat.