
Start by washing the car, then run your fingertips over the affected panel inside a sandwich bag. If it feels gritty, a clay bar with lubricant fixes the vast majority of overspray cases without touching the clearcoat. That’s the one-line verdict: gentle first, always test a small spot, and only escalate if clay fails.
- Do: wash first, dry, then test-spot in a hidden 12×12 inch area.
- Do: use a lubricated clay bar before reaching for any chemical or machine, as this method safely removes most overspray cases.
- Don’t: scrub overspray dry or attack it with a fingernail or scraper.
- Don’t: use acetone or lacquer thinner on painted panels.
Pro Tip: Always work a small test patch first and wait a few minutes to check for haze or softening before treating the whole panel.
Key Takeaways
Overspray removal succeeds when you wash first, test-spot every method, and escalate from clay to solvent to machine polish only as far as each step actually requires.
| Point | Details |
|---|---|
| Identify before treating | A bag-over-hand tactile test tells you if it’s overspray, tar, rail dust, or sap. |
| Clay bar comes first | A lubricated clay bar with proper technique resolves most light-to-medium overspray safely. |
| Test-spot everything | Work a hidden 12×12 inch area before applying any solvent or machine method to the full panel. |
| Escalate conservatively | Move to solvent, then D.A. polish, then rotary or wet-sanding only if the prior step fails. |
| Call a pro for bonded overspray | Cdcautodetailing checks paint thickness first, then applies machine correction or refinishing as needed. |
Table of Contents
- How Do You Tell Overspray From Other Contaminants?
- Step-By-Step DIY Overspray Removal Protocol
- Which Chemical Removers Are Safe for Car Paint?
- When Should You Use a Polisher Instead of Clay?
- How Do You Remove Overspray From Glass, Chrome, and Trim?
- When Should You Call a Professional Detailer?
- What Should Be in Your Overspray Removal Kit?
- Book Professional Overspray Removal With Cdcautodetailing
- Frequently Asked Questions
- Sources
How Do You Tell Overspray From Other Contaminants?
Run a plastic bag over your hand and glide it across the paint. Overspray feels like fine, gritty sand or tiny raised specks scattered in a mist pattern, while tar feels sticky and smears, tree sap feels tacky and sits in isolated blobs, and rail dust often shows as rust colored pinpoints that bleed when wet. Getting this identification right matters because each contaminant responds to a different fix, and treating overspray like tar (or vice versa) wastes product and risks marring.
- Overspray: gritty, widespread, mist-like dot pattern.
- Tar or adhesive residue: sticky, dark, localized clumps.
- Rail dust or industrial fallout: rust colored specks that can etch if left too long.
- Tree sap: tacky, amber, usually isolated spots near where the car was parked.
If a clay bar drags, catches, or fails to lift the texture after two or three passes, you’re likely dealing with overspray that’s chemically bonded rather than sitting loose on top of the clear coat. That’s your signal to stop clay work and consider professional correction, since I‑CAR’s detailing guidance points to misidentified contaminants as the most common reason DIY attempts backfire.
Pro Tip: If clay skips or chatters instead of gliding smoothly, add more lubricant before assuming you need something stronger.
Step-By-Step DIY Overspray Removal Protocol
Most overspray sits on top of the clear coat and lifts with mechanical decontamination rather than chemicals, according to a detailing how-to breakdown from ChemicalGiys. Work through these stages in order and stop as soon as the overspray is gone.
- Wash first. Two-bucket method, pH-neutral soap, microfiber wash mitt. Dry completely and inspect under good light.
- Assemble your kit. Detailing clay, clay lubricant, microfiber towels, nitrile gloves, and eye protection.
- Test spot. Pick a hidden 12×12 inch section, work it for 30 to 60 seconds, and check for haze, softening, or color transfer before going further.
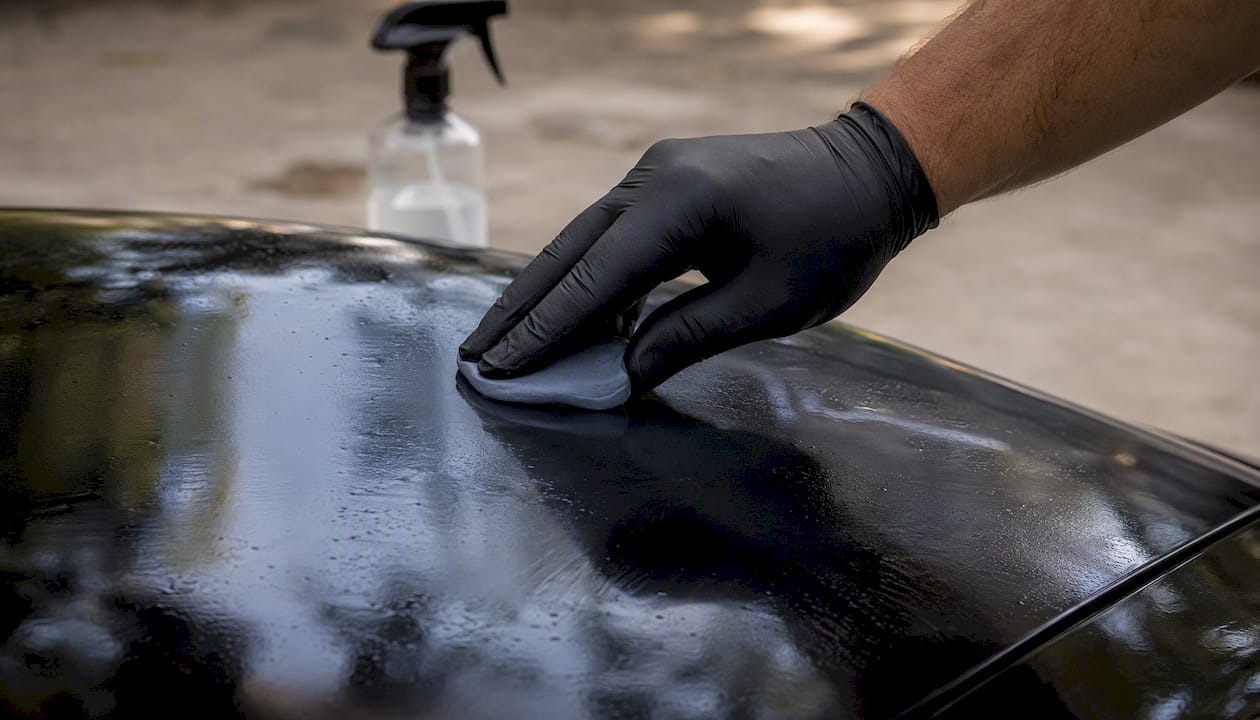
- Clay bar the panel. Fold the clay to a clean side often, spray lubricant generously, and glide in straight lines with light pressure over 12×12 inch sections at a time. Replace the clay once it picks up grit that it can no longer release.
- If clay struggles, try a solvent. A dedicated overspray remover or a 1:3 diluted isopropyl alcohol mix applied to a towel, never sprayed directly on the panel, can soften stubborn spots. Rinse immediately and retest, per the dilution guidance in AutoDetailPedia’s solvent removal guide.
- If haze remains, move to machine polish. Start with a light polish on a dual-action (D.A.) polisher before ever reaching for a cutting compound, and keep working in 12×12 inch test spots.
- Rinse, dry, and reprotect. Wash away any residue, dry thoroughly, and reapply wax or sealant to the corrected area.
- Overspray still visible after two clay passes? Stop and move to the solvent step rather than pressing harder with clay.
- Haze after solvent treatment? That’s your cue for machine polish, not more chemical.
- Any doubt about paint thickness or a failed attempt that left swirl marks? Call a professional before doing more damage.
Pro Tip: Keep a spray bottle of clay lubricant within arm’s reach the entire time. Dry clay dragging on paint is the number one cause of new scratches during DIY decontamination.
Which Chemical Removers Are Safe for Car Paint?
Dedicated overspray removers and tar-and-adhesive removers are formulated to soften cured paint particles without eating into clearcoat, and CarXplorer’s removal guide recommends applying them to a towel rather than spraying directly on the panel, then rinsing right away. Goof Off Overspray Remover is one commonly used automotive-safe option, but test it on a hidden spot first since formulations vary and some older or single-stage paints react differently than modern clearcoats.
Never use acetone, lacquer thinner, or generic paint strippers on painted panels or plastic trim. These will strip clearcoat, cloud plastic lenses, or lift vinyl wrap adhesive almost instantly.
- Read the product label and Safety Data Sheet (SDS) before opening the bottle.
- Work in a ventilated space and wear gloves and eye protection.
- Test on trim, plastic, and painted areas separately since each surface reacts differently.
- Apply to a towel, not the panel, and rinse the treated area immediately after use.
When Should You Use a Polisher Instead of Clay?
Reach for a D.A. polisher only after clay and solvent steps leave visible haze or fine texture that won’t lift. Skip machine correction entirely if you’re not confident reading paint thickness or if the panel has visible chips down to primer. According to an OEM technical bulletin on overspray removal, the safe sequence runs from clay to D.A. polish with a light cutting cream, then rotary correction handled only by trained technicians, with wet-sanding reserved as a last resort that removes only a small fraction of clearcoat thickness. Paint thickness should be measured with a gauge before any aggressive correction.
- Start with a foam polishing pad and light polish, not a cutting compound.
- Work slow speed, light pressure, in 12×12 inch sections.
- Wet-sanding and rotary buffing carry real risk of burning through clearcoat and belong with trained technicians.
Pro Tip: If you don’t own a paint thickness gauge, treat any panel that’s been repainted before (bumpers are common culprits) as thin clearcoat territory and stick to clay only.
How Do You Remove Overspray From Glass, Chrome, and Trim?
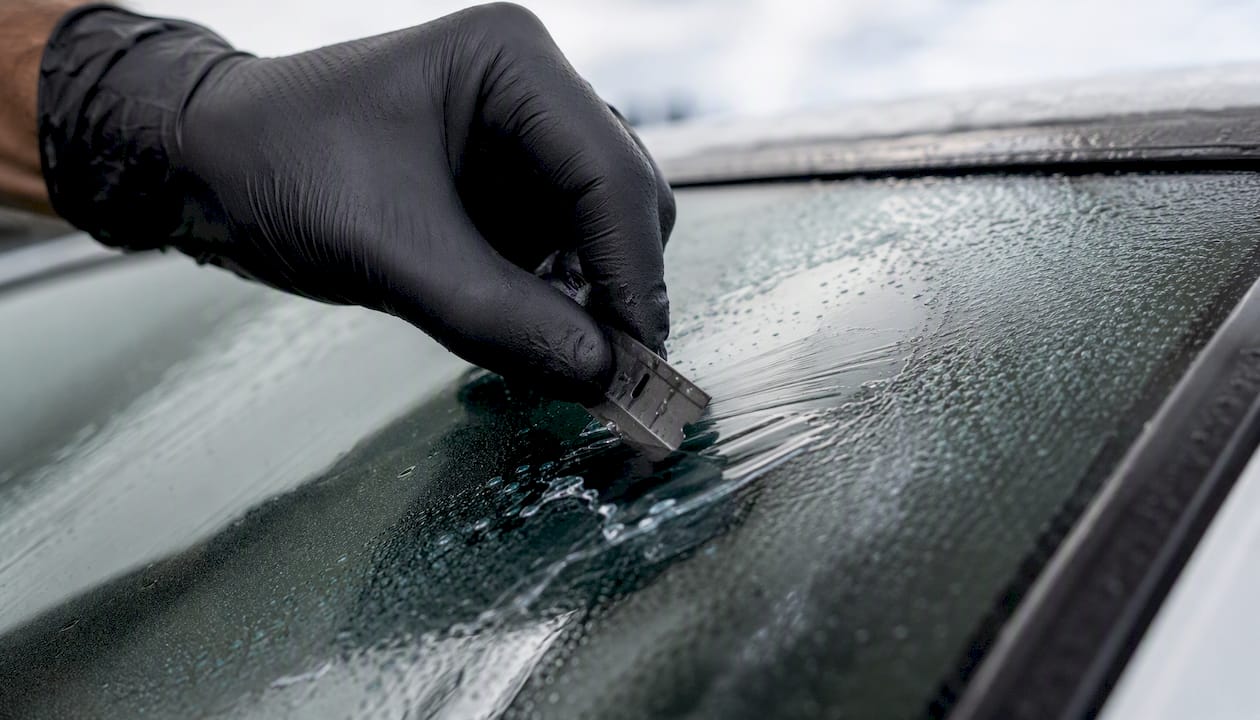
Glass tolerates a razor blade with plenty of lubricant, which lifts overspray fast without scratching, and a clay bar works too if you keep gaskets and rubber molding clear of the blade, per Jerry. Chrome and metal trim respond well to clay or a soft polish; skip harsh solvents that can dull the finish. Soft plastics, vinyl wraps, and paint protection film need a test spot every time, since many solvents stain trim or lift wrap adhesive within seconds.
When Should You Call a Professional Detailer?
Bonded or heat-cured overspray, large fallout areas covering multiple panels, single-stage paint, or thin clearcoat are all signals to stop DIY work. So is any failed attempt that left swirl marks, haze, or dulled patches behind, a common outcome I‑CAR’s contamination guidance links directly to guessing at the contaminant instead of testing first.
A professional will measure paint thickness before touching a polisher, then use rotary correction, controlled wet-sanding, or panel refinishing depending on severity. Ask any detailer these questions before booking:
- Will you measure paint thickness before correction?
- What’s your step-by-step process, and what’s the fallback if the first method doesn’t work?
- Do you guarantee the result, and can you show before-and-after photos of similar overspray jobs?
What Should Be in Your Overspray Removal Kit?
Before you start, gather a two-bucket wash kit, quality microfiber towels, medium-grade detailing clay or a clay mitt, clay lubricant, a dedicated overspray remover (test first), automotive polish, and a D.A. polisher if you plan to go beyond clay. Add gloves and eye protection to the list.
- Meguiar’s clay bar or clay mitt for the primary decontamination step.
- Goof Off Overspray Remover as a backup, tested on a hidden spot first.
- Buy automotive-grade products specifically, and check the label and SDS before use on painted or plastic surfaces.
Full technique details for the clay stage are covered in our clay bar treatment guide, and for post-treatment care see how to wash a car after paint correction.
Why Starting Gentle Actually Protects Your Investment
The instinct to scrub harder when overspray won’t budge is exactly backwards. Clearcoat is thin, and every aggressive pass shaves a little off permanently. Start with clay, respect the test spot, and let the paint tell you when it’s time to stop and call in a trained hand.
Book Professional Overspray Removal With Cdcautodetailing
Cdcautodetailing is the option to reach for once DIY escalation stops making sense, whether that’s bonded overspray covering multiple panels, single-stage paint, or a clearcoat too thin to risk another polish pass. Instead of guessing your way through solvents and machine correction, you get a paint-thickness check up front, then whichever combination of D.A. polishing, controlled wet-sanding, or panel refinishing the damage actually calls for.

Booking works the same way whether you’re in Pitman or elsewhere across South Jersey: request an estimate, get a diagnostics visit scheduled at your location, and walk away with a clear scope of work before anything touches your paint. Many owners pair overspray correction with ceramic coating afterward, since fresh clearcoat left bare is exactly what invites the next round of contamination. If your panel has already been polished more than once, or you’re just not sure what you’re dealing with, request an estimate and let a trained tech measure it before you spend another weekend guessing.
Frequently Asked Questions
Will a clay bar remove overspray from car paint without damaging the clearcoat?
Yes, in most cases. A lubricated clay bar glides over the raised overspray specks and lifts them without cutting into the clear coat, provided you keep the surface wet with lubricant and replace the clay once it picks up grit.
Can I use rubbing alcohol to remove overspray from my car?
Diluted isopropyl alcohol, roughly one part IPA to three parts water, can help soften fresh overspray when clay alone isn’t enough. Apply it to a towel rather than the panel and test a hidden spot first, since concentration and paint age both affect the risk of dulling.
What happens if I use acetone on car paint overspray?
Acetone strips clearcoat and can permanently dull or discolor the panel. It’s fine for cleaning tools, never for painted surfaces.
How do I know if overspray damage requires a professional?
If a clay bar drags or fails to lift the texture after two or three passes, or if the overspray covers large areas or sits on single-stage paint, that’s chemically bonded contamination that needs machine correction from a trained technician.
Does overspray removal remove clear coat?
Clay bar and light polish, done correctly, remove essentially none of the clearcoat. Wet-sanding removes a measurable amount and should only be attempted by someone using a paint thickness gauge, which is why it’s typically left to professionals.
Sources
- OEM technical bulletin: Overspray removal procedure and escalation steps (includes clay, polishing, rotary, wet-sanding guidance)
- I‑CAR RTS: Common detailing mistakes and contamination assessment
- Remove paint overspray from car: safe guide — CarXplorer
- How do you remove spray paint and splatter without damaging it? — AutoDetailPedia
- Jerry
- How to remove paint from car without scratching it — ChemicalGiys (how-to blog)