
The safest fast fix for tar on your car is a purpose-built automotive tar remover applied to a cool, washed panel, left to dwell per the label, then gently lifted and followed by a wash and reapplied protection. If you don’t have one on hand, an oil-based fallback like WD-40 or Goo Gone applied to a cloth (never sprayed directly) can work in a pinch. Skip the scraping, avoid hot panels, and avoid harsh solvents that may damage wax or plastic trim.
TL;DR:
- A dedicated automotive tar remover is safest and most effective, but household options like WD-40 or Goo Gone can work if used carefully on cooled, washed panels.
- Wiping or scraping tar without proper prep risks scratches, especially on hot surfaces or when grit is embedded in the residue.
- Always test removers on an inconspicuous area and avoid letting products dry or sit in direct sun, which can deepen bonding or cause streaking.
- After tar removal, a full wash, reapplication of wax or sealant, and checking for surface damage help restore paint protection and prevent future bonding.
- Professionals can better handle heavy or baked-on tar spots, reducing the risk of damaging the clear coat and offering longer-lasting protection solutions.
Table of Contents
- Why tar bonds to paint and why gentle action matters
- What to gather before you start
- Step-by-step: paint-safe tar removal procedure
- Stubborn residue: when to reach for a clay bar
- Substrate compatibility and safety checks before you spray
- Getting your protection back after cleanup
- What a detailer watches for that most drivers miss
- DIY removal versus calling in a professional
- How CDC Auto Detailing handles tar removal and protection
- Where this guidance comes from
- Sources
- FAQ
Why tar bonds to paint and why gentle action matters
Road tar isn’t just sticky residue. It’s bitumen mixed with road grit, sand, and debris, and that grit is what turns a quick wipe into a scratch risk. Rubbing a dry cloth over a tar spot drags those embedded particles across your clear coat like sandpaper.
Heat makes things worse. The longer tar sits and the hotter the panel gets, the more it hardens and bonds, which is why a fresh spot on a cool car is far easier to handle than a baked-on stain from last summer.
- Wiping tar dry can create fine scratches from trapped grit.
- Heat and time harden tar, making it stickier and more stubborn.
- Stronger solvents may cut through tar fast but can strip wax or damage nearby plastic trim.
That last point matters more than most people think. The strongest solvent isn’t always the safest choice for a painted panel, especially near rubber seals or plastic moldings.
What to gather before you start
Prepping the right kit before you touch the tar saves you a second trip to the garage and reduces the chance of grabbing something too harsh. A dedicated automotive tar and glue remover is the best starting point. Check the label for a statement about paint and plastic compatibility, since some tar removers exclude use on polycarbonate or acrylic surfaces.
Beyond the remover itself, you’ll want a short list of supplies:
- Microfiber towels (several, since you’ll fold to a clean face often).
- A spray bottle of water, mild car shampoo, and a clay bar with lubricant for stubborn spots.
- Nitrile gloves and eye protection, since most removers contain solvents that irritate skin and eyes.
Household fallbacks like WD-40, Goo Gone, or even creamy peanut butter can loosen light tar in a pinch, but they work slower and won’t touch heavily bonded spots. Never reach for gasoline or acetone, and never let any remover sit and dry in direct sun since that can bake residue deeper into the clear coat.
Pro Tip: Keep a travel-size tar remover and a folded microfiber in your glovebox so you can treat fresh spots before they harden.
Step-by-step: paint-safe tar removal procedure
Once you have your supplies ready, the process itself is straightforward if you follow it in order and resist the urge to skip the wash step.
- Wash and rinse the panel first. This clears loose grit and dirt so you’re not grinding particles into the paint later.
- Spot-test the remover. Apply a small amount to an inconspicuous edge, such as a door jamb or lower rocker panel, and wait a few minutes to check for any discoloration or softening.
- Apply the remover. Follow the label instructions for a dedicated product, or for WD-40 or Goo Gone, spray onto a cloth first and dab it onto the tar rather than spraying the panel directly. Avoid direct sun and hot surfaces, since heat speeds evaporation and can cause streaking.
- Let it dwell. Oil-based fallbacks typically need 10 to 30 minutes to soften tar enough to lift cleanly; dedicated removers usually work faster, so check the label. Don’t let any product dry on the surface.
- Blot and lift gently. Fold a microfiber towel into quarters and use one clean face per wipe, switching faces as they pick up grit. This technique keeps you from dragging tar-loaded fabric back across the paint and causing fresh marring.
- Clay, wash, and re-protect. If residue remains, a clay bar with plenty of lubricant will lift what’s left without abrading the paint. Finish with a full wash, dry the panel, and reapply wax, sealant, or schedule a protective coating.
Repeat the dwell-and-lift cycle only if needed. Going over the same spot repeatedly with fresh product is safer than pressing harder or switching to a stronger solvent.
Pro Tip: Work one panel at a time in the shade. A cool, shaded surface keeps the remover from flashing off before it has time to work.
Stubborn residue: when to reach for a clay bar
If tar leaves behind a rough patch you can feel but not see, that’s usually embedded residue sitting just above the clear coat, and a clay bar is the right tool for it. Kneaded clay with generous lubricant lifts these particles without cutting into the paint, as long as you use light pressure and keep the surface wet.
- Work in small sections and use straight, light passes rather than circular scrubbing.
- Check the clay bar itself for grit pickup and fold to a clean face often.
- Avoid aggressive polishing on thin or aftermarket clear coats, since it removes a small layer of material each time.
Most consumer guides list clay-bar decontamination as an effective follow-up when solvent alone doesn’t fully clear the spot. If you notice the clear coat looks etched, hazy, or permanently dulled after treatment, that’s usually beyond what clay or polish can fix at home, and it’s worth having a professional assess whether the finish needs corrective work.
Substrate compatibility and safety checks before you spray
Not every surface on your car reacts the same way to tar remover. Plastic trim, paint protection film, headlights, and matte or ceramic-coated finishes can all respond differently to the same solvent that works fine on bare paint.
- Read the product label or SDS for exclusions, since some tar removers aren’t rated for polycarbonate or acrylic plastics.
- Spot-test on a hidden area first and wait the recommended time before checking for softening, clouding, or color change.
- Keep gloves and eye protection on, work away from open flame or ignition sources, and never let the product dry on the panel.
Material safety data sheets for tar removers commonly list flammability, skin and eye irritation, and inhalation risk as their primary hazards, which is why ventilation and PPE are standard label recommendations. Reading that sheet before you open the bottle takes two minutes and tells you exactly what you’re working with.
Getting your protection back after cleanup
Tar removers are effective precisely because they’re solvents, and solvents don’t stop at tar. They also strip wax, sealant, and some of the natural oils in your paint’s protective layer, so a proper aftercare routine matters as much as the removal itself.
- Run a full shampoo wash afterward to clear solvent residue and loosened oils; for detailed guidance on maintaining paint safety during cleaning, see bug splatter removal: keep your paint safe.
- Reapply wax or sealant the same day, or consider a longer-lasting sealant or coating if you deal with tar often.
- Inspect the panel in good light for dullness, haze, or texture changes that suggest the clear coat took damage.
Ceramic coatings and paint protection film both make future tar spots easier to remove since contaminants sit on top of the coating rather than bonding directly to paint. If you booked a wash right after a paint correction, the same gentle technique applies here.
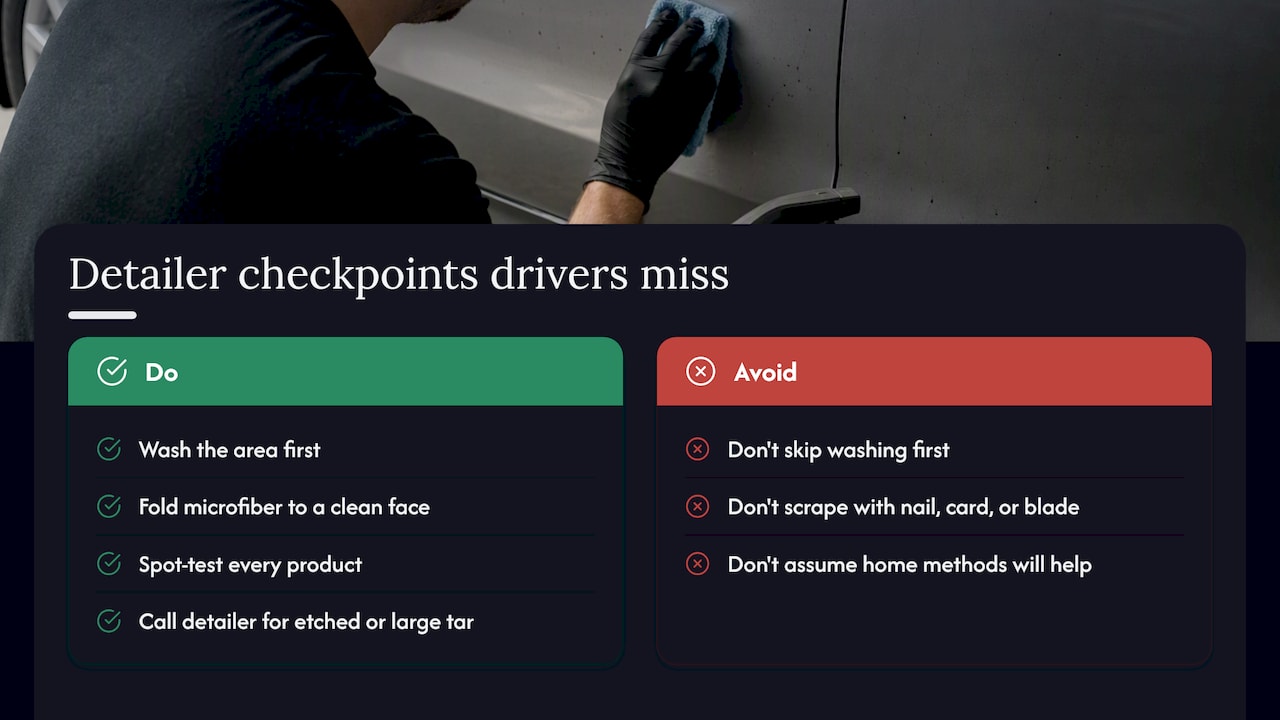
What a detailer watches for that most drivers miss
Wash first, every time. Skipping that step is the single most common mistake, since it’s what turns a routine tar spot into a scratched panel. Never scrape with a fingernail, plastic card, or razor blade, no matter how tempting it looks, since even a soft edge can catch grit and dig a line into the clear coat.
Fold your microfiber to a clean face constantly and spot-test every product, even one you’ve used before, since formulas change and paint systems vary by vehicle. When tar has chemically etched the clear coat or covers a large section of the car, that’s past the point where home methods help. A mobile detailer can assess the actual depth of the damage and correct it properly, and often that visit is also the right time to talk about longer-term options like PPF or ceramic coating.
DIY removal versus calling in a professional
A single quarter-sized tar spot from a fresh paving job is a reasonable weekend project. Heavy contamination across multiple panels, or tar that’s been baking in the sun for weeks, is a different situation, since the risk of scratching or etching the clear coat climbs fast once you’re scrubbing repeatedly.
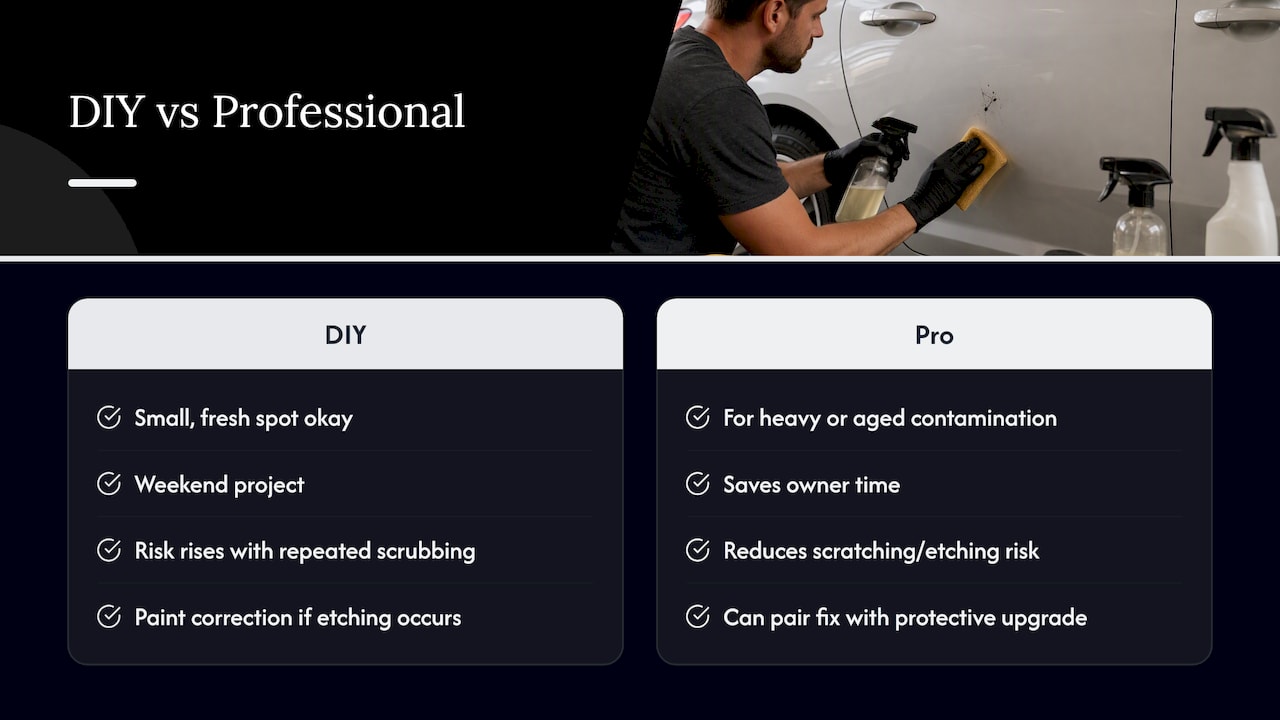
Professionals reduce that risk because they’ve handled the failure modes before and can spot early etching before it becomes permanent. They can also pair the fix with a protective upgrade so the same spot doesn’t reappear next season. For most drivers, the deciding factor comes down to how much time you have and how much risk you’re comfortable taking with your own clear coat.
How CDC Auto Detailing handles tar removal and protection
When tar has spread across multiple panels or you suspect it’s etched into the clear coat, a mobile visit saves you the guesswork and the risk of making it worse. Professional detailers can handle corrective cleaning on-site, work through clay and light polish safely, and provide protective upgrades to help prevent tar from reappearing on the same panel.

If you’d rather have a professional assess the damage than experiment with removers at home, an exterior detail clears existing contamination and restores shine, while a ceramic coating package makes future spots easier to wipe away before they bond. Reach out to schedule a visit and get a straight answer on what your paint actually needs.
Where this guidance comes from
This guide draws on AAA’s exterior cleaning advice, Auto Express product testing, manufacturer compatibility notes from Liqui Moly, consumer guidance from CarParts.com, and material safety data sheets for tar removers. For paint-safe technique on other bonded contaminants, see our overspray removal guide, and for general upkeep, our detailing best practices.
Sources
- 3 Steps for Cleaning Tar Off Your Car’s Exterior | AAA Club Alliance
- Best tar removers 2026 | Auto Express
- Tar Remover | LIQUI MOLY
- PGS SOLVIT MSDS
- Carparts
FAQ
Will WD-40 remove tar from car paint?
Yes, WD-40 can soften tar enough to lift it, but it should be applied to a cloth rather than sprayed directly onto the panel. AAA recommends letting it dwell for a short period before wiping, then following up with a full wash to remove any oily residue.
What is the best tar remover for cars?
A purpose-built automotive tar and glue remover is the preferred first choice, since it’s formulated to break down bitumen without the guesswork of household products. Product testing shows these removers vary in speed and plastic compatibility, so checking the label for exclusions matters before you buy.
Will Dawn dish soap remove tar from car?
Dish soap alone is unlikely to break down hardened tar effectively, since it’s designed for grease and grime rather than bonded bitumen. AAA guidance notes that dish soap can also dull paint shine over time, so a proper car shampoo is the better choice for prep and post-treatment washing.
What is the best asphalt remover for cars?
Asphalt and tar removers use similar solvent chemistry, so the same purpose-built automotive tar and glue remover works for both. Always check the label for surface compatibility and spot-test first, since some formulas exclude certain plastics and can affect nearby trim.