
TL;DR:
- Proper stain removal in a car requires matching the cleaning method to the stain type and surface material. Blotting instead of rubbing prevents spreading and damage, while vacuuming first removes loose debris to avoid embedding dirt. When stains are stubborn or old, professional cleaning is necessary to avoid further damage.
Step by step car stain removal is a systematic process where prompt, material-specific treatment prevents permanent damage, eliminates odors, and restores your interior’s original look. Most vehicle owners make the mistake of grabbing any cleaner and scrubbing hard. That approach spreads the stain deeper into the fabric and can permanently set it. The right method matches the cleaning technique to both the stain type and the surface material. This guide covers everything from essential supplies to stain-specific steps, material considerations, and the most common errors that turn a minor spill into a costly problem.
What supplies do you need for car stain removal?
Preparation determines whether your cleaning effort works or makes things worse. Vacuuming before applying any liquid removes loose grit that would otherwise grind into fibers the moment moisture hits them. Skipping this step turns dry dirt into embedded mud. Always vacuum first, every time.
Your core supply list should include:
- Microfiber cloths (at least 4–6 clean ones per session)
- Soft-bristle brush for gentle agitation on fabric and carpet
- Enzyme-based cleaner for organic stains like food, pet accidents, and blood
- White vinegar diluted 1:1 with water for sugar-based spills like coffee and soda
- Baking soda for grease and oil absorption
- Rubbing alcohol (isopropyl, 70%) for ink stains
- Leather-safe cleaner and conditioner for leather surfaces
- Spray bottle for controlled liquid application
Surface type matters before you open a single bottle. Cloth and carpet tolerate more agitation than leather. Vinyl and plastic need non-abrasive cleaners. Leather requires gentle, pH-neutral products and conditioning after every cleaning session. Knowing your surface before you start prevents damage that no amount of cleaning will fix.
Pro Tip: Always test any cleaner on a hidden area first. Testing for colorfastness before full application prevents discoloration you cannot reverse. The underside of a seat or a corner behind the door panel works perfectly.
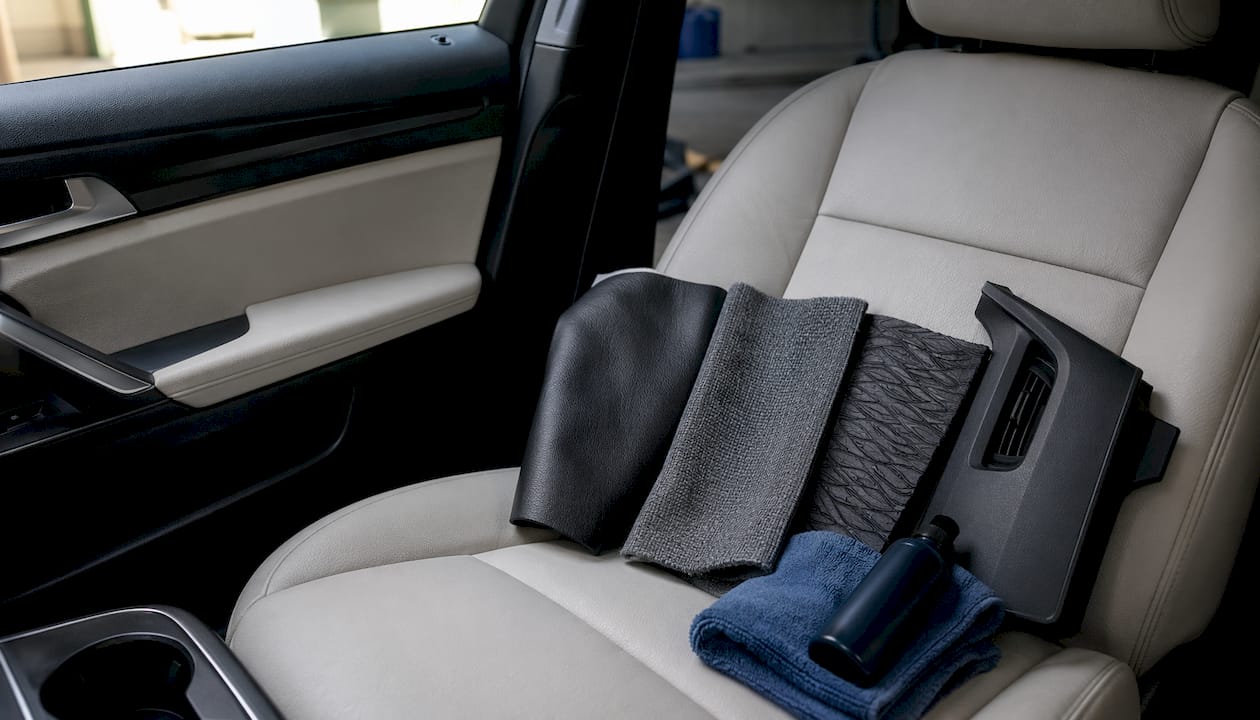
Over-wetting upholstery causes mold growth and musty odors because excess liquid seeps into the foam padding beneath the fabric. Foam does not air-dry easily. Use a spray bottle and apply cleaners in light, controlled bursts rather than pouring directly onto the surface.
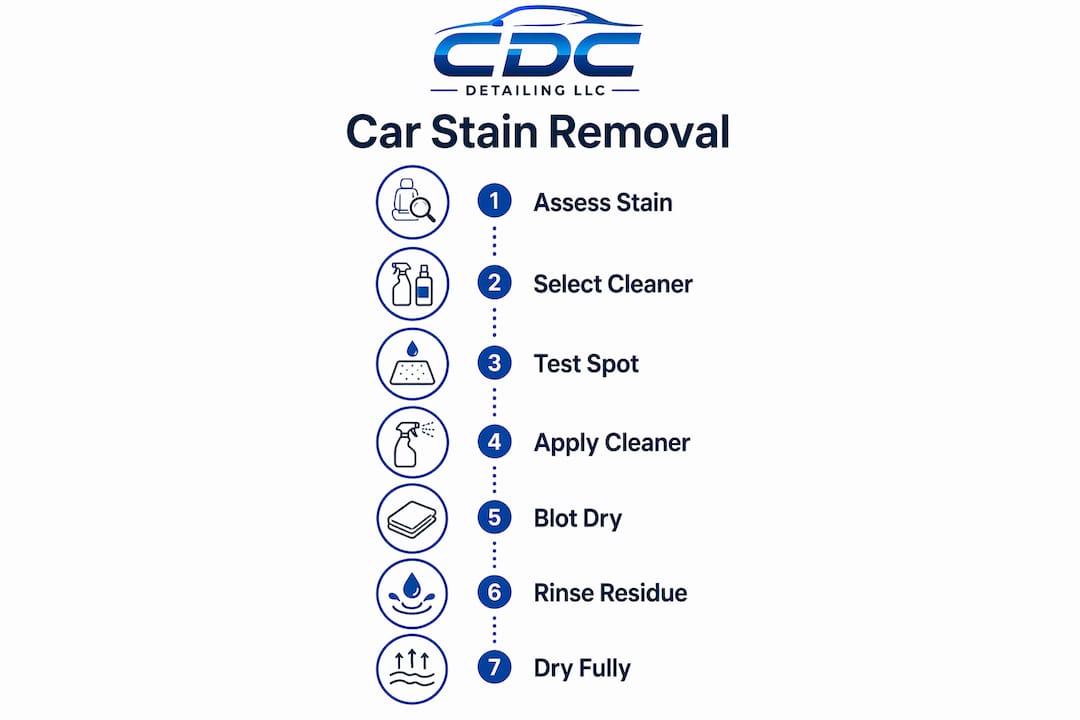
Step by step stain removal for common car interior stains
The industry term for this process is “spot treatment,” and professional detailers follow a strict sequence to avoid spreading contamination. Professional detailers recommend 100% blotting with clean microfiber towels rather than rubbing. Rubbing frays fabric fibers and pushes the stain deeper. Blotting lifts it out.
Coffee, soda, and sugar-based stains
- Blot the spill immediately with a dry microfiber cloth. Work from the outer edge inward to prevent spreading.
- Mix equal parts white vinegar and water in a spray bottle.
- Lightly mist the stained area. Do not saturate.
- Agitate gently with a soft-bristle brush using small circular motions.
- Blot with a clean microfiber cloth until the stain lifts.
- Rinse with a small amount of clean water to remove vinegar residue.
- Blot dry and allow the area to air out with the car door open.
Grease and oil stains
- Sprinkle a generous layer of baking soda directly onto the stain.
- Let it sit for at least 15 minutes to absorb grease. That dwell time is what makes baking soda effective. Rushing this step wastes the effort.
- Vacuum up the baking soda completely.
- Apply a small amount of dish soap diluted in water and work it in with a soft brush.
- Blot with a clean microfiber cloth.
- Rinse with clean water and blot dry.
Mud stains
- Let the mud dry completely before touching it. Wet mud spreads; dry mud breaks apart.
- Vacuum the dried mud thoroughly.
- Apply a diluted all-purpose interior cleaner and agitate with a soft brush.
- Blot with a microfiber cloth and repeat until the stain clears.
Blood stains
Always use cold water on blood. Heat causes blood proteins to bind tightly to fabric fibers, making the stain permanent. Cold water keeps the proteins loose so you can lift them out.
- Blot the stain with a cold, damp microfiber cloth immediately.
- Apply a small amount of hydrogen peroxide (3%) to fresh stains on light-colored fabric.
- Blot, do not rub. Repeat until the stain fades.
- Rinse with cold water and blot dry.
Ink stains
- Dampen a microfiber cloth with isopropyl rubbing alcohol (70%).
- Dab the ink stain gently. Do not rub or you will spread the ink.
- Work from the outside edge inward.
- Blot with a dry cloth between applications.
- Repeat until the ink transfers to the cloth.
Pet stains and organic odors
Enzyme-based cleaners break down organic pet stains and neutralize odors at the molecular level rather than masking them. These cleaners require a dwell time of 10–15 minutes to work properly. Wiping them off too early stops the chemical reaction before it finishes.
- Blot up as much of the accident as possible first.
- Apply the enzyme cleaner generously and let it sit for 10–15 minutes.
- Blot with a clean microfiber cloth.
- Rinse with a small amount of clean water and blot dry.
- Leave the door open to allow full air drying.
After any stain treatment, rinse out soap residue thoroughly. Leftover cleaner acts as a surfactant that attracts new dirt, making the cleaned area look dirty again within days.
How does interior material change your cleaning approach?
Not all cleaning solutions work across all surfaces. Specific materials require products tailored to their surface to avoid damage. Using the wrong cleaner on leather or vinyl can cause cracking, fading, or surface degradation that no conditioner will fully repair.
Leather seats
Leather is the most unforgiving surface in a car interior. Ammonia and harsh solvents strip the natural oils from leather, causing it to dry out and crack. Use only pH-neutral, leather-safe cleaners. After cleaning, always apply a leather conditioner to restore moisture and prevent future cracking. Avoid soaking leather. A lightly dampened microfiber cloth is all you need for application.
Fabric and carpet
Fabric tolerates more agitation than leather, but aggressive scrubbing still frays fibers and creates a fuzzy, worn appearance. Use a soft-bristle brush and keep strokes short. Carpet responds well to natural cleaners like vinegar solutions and baking soda for most common stains. For deep-set stains in carpet, a wet-dry vacuum after treatment pulls moisture and loosened debris out effectively.
Vinyl and plastic surfaces
- Use non-abrasive, interior-safe cleaners only.
- Avoid glass cleaners containing ammonia on any tinted windows or plastic trim. Ammonia degrades window tint film and can cloud certain plastics.
- Silicone-based dressings attract dust and create glare on modern matte interior plastics. Use specialized matte-safe protectants instead.
- Wipe vinyl with a damp microfiber cloth and a small amount of diluted all-purpose cleaner. Dry immediately to prevent streaking.
Pro Tip: Follow a top-down cleaning workflow when cleaning the full interior. Clean headliners and upper surfaces before seats and carpet. Dust and debris fall downward, and cleaning from the top prevents re-contaminating surfaces you already cleaned.
What mistakes cause car stains to get worse?
The single most common mistake in DIY car stain removal is rubbing instead of blotting. Rubbing spreads the stain outward, works it deeper into the fibers, and frays the fabric surface. Every professional detailer will tell you the same thing: blot, never rub.
Overwetting is the second most damaging mistake. Excess liquid seeps past the fabric and into the foam padding beneath, where it cannot air-dry. That trapped moisture creates mold and a persistent musty odor that no surface cleaner will eliminate. Use a spray bottle and apply liquid in short, controlled bursts. If the fabric feels soaked, you have used too much.
Other common errors to avoid:
- Skipping the colorfastness test. Apply any new cleaner to a hidden spot first. Wait two minutes and check for color change or damage before treating the visible stain.
- Not rinsing cleaner residue. Soap left in fabric attracts dirt and causes the stain to reappear within days. Always follow cleaning with a light rinse of clean water and blot dry.
- Using heat to dry. A hair dryer or parking in direct sun to speed drying can set remaining stain residue permanently. Air drying with doors open is the correct method.
- Repeating the same failed technique. If a stain does not respond after two cleaning cycles, switch your approach. Stubborn stains often require a different cleaner or a longer dwell time.
When a stain does not respond to two or three careful attempts, call a professional. Some stains, particularly old set-in dye transfers, deep pet contamination, or mold, require professional extraction equipment that reaches the foam padding. For a full interior detailing checklist that covers every surface, Cdcautodetailing provides a detailed resource worth bookmarking.
Key Takeaways
Effective car stain removal requires matching the cleaning method to both the stain type and the interior material, then following a strict blot-first, rinse-last sequence to prevent permanent damage.
| Point | Details |
|---|---|
| Blot, never rub | Rubbing spreads stains and frays fabric; always blot with clean microfiber from the outside edge inward. |
| Vacuum before any liquid | Loose grit grinds into fibers when wet; vacuuming first prevents embedded stains. |
| Match cleaner to material | Leather needs pH-neutral cleaners and conditioning; vinyl needs non-abrasive products; fabric tolerates more agitation. |
| Rinse out all soap residue | Leftover cleaner attracts new dirt and causes stains to reappear within days. |
| Avoid overwetting | Excess liquid reaches foam padding, traps moisture, and causes mold and persistent odors. |
What I’ve learned after years of watching DIY go wrong
The most expensive interior damage I see at Cdcautodetailing does not come from the original spill. It comes from the cleanup attempt. Vehicle owners pour cleaner directly onto a stain, scrub hard, and repeat until the fabric looks worse than when they started. The stain is now set, the fibers are frayed, and the foam underneath smells like mildew.
Patience is the real skill in stain removal. Letting baking soda sit for 15 minutes, giving enzyme cleaners their full dwell time, and allowing the interior to air-dry completely are the steps most people skip. Those pauses feel unproductive, but they are where the chemistry actually works.
Regular vacuuming also changes the game more than most vehicle owners realize. A car that gets vacuumed weekly has far fewer embedded stains because loose debris never gets the chance to work its way into fibers. Prevention is cheaper than treatment.
DIY has real limits, though. Old stains, pet contamination that has reached the foam, and mold require professional extraction. No spray bottle and microfiber cloth will pull moisture out of seat padding. Knowing when to stop and call a professional saves the interior from further damage. The cost of a professional detail is almost always less than reupholstering a seat.
Conditioning leather after every cleaning session is the step most vehicle owners skip entirely. Leather that gets cleaned but never conditioned dries out and cracks within a year. A quality leather conditioner applied after cleaning extends the life of the seat by years. That is money saved, not spent.
— Charles
When professional detailing makes the difference
DIY stain removal handles most fresh spills well. Older, set-in stains and deep contamination are a different situation.

Cdcautodetailing provides mobile interior detailing that comes directly to your location in South Jersey, which means no dropping off your vehicle and waiting. The team identifies stain type and material before selecting the right treatment, uses professional-grade extraction equipment that reaches foam padding, and conditions surfaces after cleaning to protect them long-term. For a full breakdown of what professional interior care covers, the auto detailing services guide at Cdcautodetailing explains each service in detail. When DIY has reached its limit, professional treatment protects the investment you have already made in your vehicle.
FAQ
What is the first step in removing a car stain?
Blot the stain immediately with a clean, dry microfiber cloth, working from the outer edge inward. Never rub, as rubbing spreads the stain and pushes it deeper into the fabric.
Can I use household cleaners on car upholstery?
Diluted white vinegar and baking soda work safely on most fabric and carpet surfaces. Avoid ammonia-based cleaners on leather, vinyl trim, or tinted windows, as they cause cracking and surface damage.
How do I remove a blood stain from a car seat?
Use cold water only. Heat permanently sets blood proteins into fabric fibers. Blot with a cold, damp cloth and apply a small amount of hydrogen peroxide to fresh stains on light-colored fabric.
Why does my car seat look dirty again after cleaning?
Soap residue left in the fabric acts as a surfactant that attracts new dirt. Always rinse the cleaned area with a small amount of clean water and blot dry after every treatment.
When should I call a professional detailer instead of cleaning myself?
Call a professional when a stain does not respond after two or three careful attempts, when you detect a persistent odor after cleaning, or when the stain involves deep pet contamination or mold that has reached the seat padding.