Every parent faces sudden spills during hectic drives around South Jersey, leaving stubborn stains lurking on car seats. Quick, safe cleaning matters when kids and pets ride along daily. Smart families can rely on simple kitchen staples like baking soda, vinegar, and microfiber cloths to tackle most accidents, while knowing that professional mobile detailing is only a call away for tougher cases. This guide shows how to fight stains fast, keep your upholstery fresh, and choose the best option for your busy life.
Table of Contents
- Step 1: Gather Essential Cleaning Supplies
- Step 2: Vacuum and Pre-Treat Stained Areas
- Step 3: Apply Natural Cleaning Solutions
- Step 4: Scrub and Extract Stains Thoroughly
- Step 5: Inspect Seats and Repeat as Needed
Quick Summary
| Key Point | Explanation |
|---|---|
| 1. Gather essential cleaning supplies | Prepare white vinegar, baking soda, and a microfiber cloth before starting to clean car seats for efficient stain removal. |
| 2. Vacuum thoroughly before cleaning | Remove loose debris from car seats using a vacuum to enhance the effectiveness of your cleaning solutions. |
| 3. Pre-treat stains carefully | Apply the vinegar and baking soda solution directly on stains, allowing it to sit for 5-10 minutes before scrubbing. |
| 4. Use gentle agitation for scrubbing | Scrub with a soft-bristled brush in circular motions to lift stains without damaging the fabric fibers. |
| 5. Inspect and repeat as necessary | After drying, check for any remaining stains and repeat the cleaning process to achieve the best results. |
Step 1: Gather Essential Cleaning Supplies
Before you tackle those stubborn stains on your car seats, you need the right tools in your arsenal. Gathering your cleaning supplies upfront saves time and frustration, so you’re not scrambling mid-project.
Start with the basics that work together. White vinegar and baking soda form the backbone of natural stain removal, proven effective for breaking down dirt and discoloration without harsh chemicals. Sustainable stain removers like baking soda mixed with vinegar outperform many commercial options when used correctly.
Here’s what you should have on hand:
- White vinegar (5% acidity works fine)
- Baking soda (multi-purpose powerhouse)
- Warm water (for diluting solutions)
- Microfiber cloths (trap dirt without scratching fabric)
- Soft-bristled brush (gently agitates without damage)
- Spray bottle (applies solutions evenly)
- Essential oils like tea tree or lemon (optional but adds disinfectant power)
For South Jersey families balancing busy schedules, having these supplies ready means you can address spills immediately rather than letting them set. Most of these items already live in your kitchen, so you’re probably halfway there.
Microfiber cloths deserve special mention because they’re game-changers for car seat cleaning. Unlike regular towels, they absorb moisture effectively and won’t leave lint behind. Grab a few extras so you have clean ones throughout the job.
Here’s a quick comparison of natural vs. commercial stain removers for car seats:
| Attribute | Natural Solutions | Commercial Products |
|---|---|---|
| Ingredients | Vinegar, baking soda | Synthetic chemicals |
| Effectiveness | Excellent for fresh stains | Effective on tough, set-in stains |
| Safety | Safe for kids and pets | May require ventilation |
| Environmental Impact | Biodegradable, low impact | Can pollute water, non-renewable |
| Cost | Under $10 total | $10-$30 per bottle |
Keep your spray bottles labeled clearly so you know which solution is which and grab the right one when you need it fast.
A soft-bristled brush (an old toothbrush works in a pinch) prevents you from accidentally damaging upholstery fibers while scrubbing. The key is gentle agitation, not aggressive scrubbing.
This summary helps you choose the right brush for cleaning upholstery:
| Brush Type | Recommended Use | Risk to Fabric | Ease of Cleaning |
|---|---|---|---|
| Soft-bristled | Fabric, gentle scrubbing | Low risk | Easy to rinse and reuse |
| Toothbrush (old) | Small, tight spots | Minimal risk | Compact for spot cleaning |
| Synthetic scrub pad | Heavy stains, synthetic fabrics | May cause abrasion | Easy, but can retain odors |
| Natural fiber pad (coir/luffa) | Eco-friendly, stubborn stains | Very gentle | Biodegradable, easy disposal |
Pro tip: Store your cleaning supplies in a plastic caddy under the car seat so they’re ready whenever a spill happens, turning quick cleanups into a five-minute task instead of a weekend project.
Step 2: Vacuum and Pre-Treat Stained Areas
Now that you have your supplies ready, it’s time to prepare the seats for deep cleaning. This step removes loose debris and prepares stains for treatment, making your actual cleaning work far more effective.
Start by thoroughly vacuuming your car seats with a standard vacuum cleaner. Use the upholstery attachment to reach into crevices, seams, and under cushions where dirt hides. This removes surface-level debris that would otherwise muddy your cleaning solution and reduce its effectiveness.
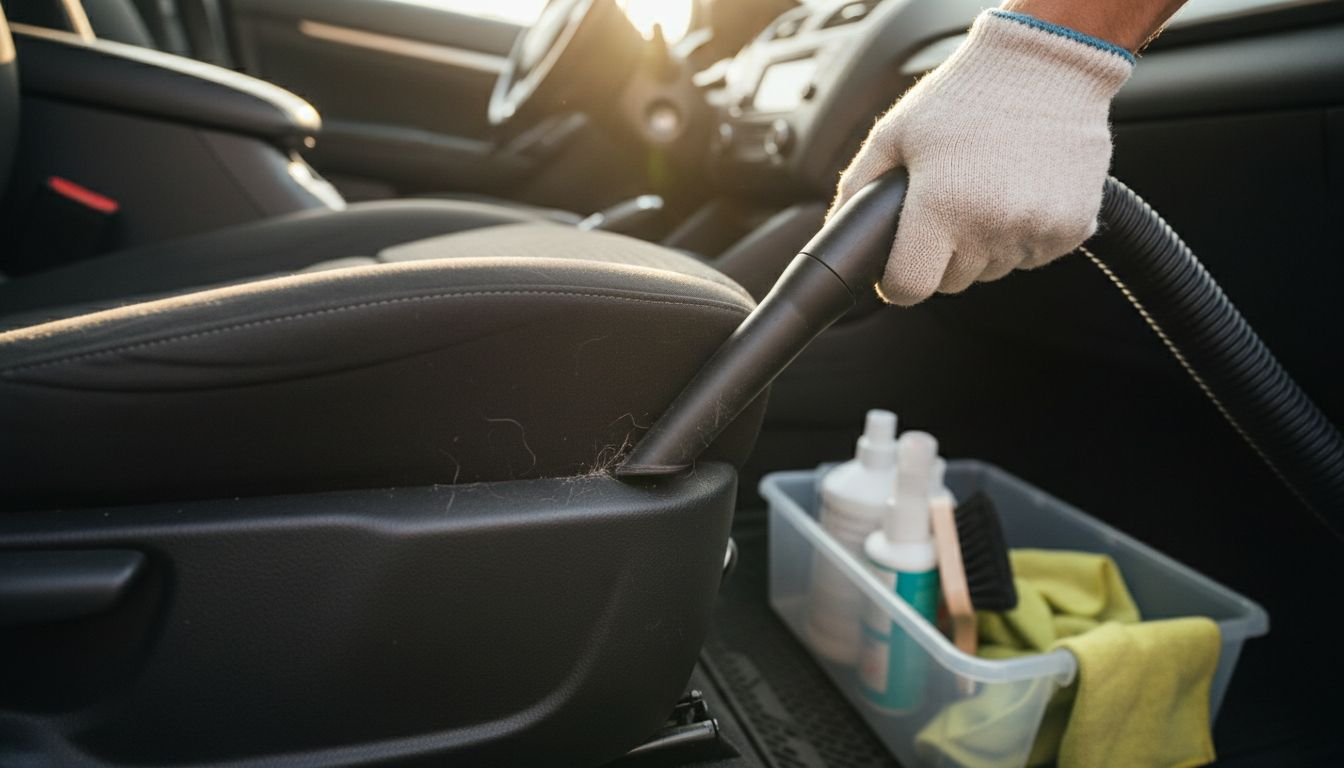
Vacuuming matters more than you might think. Loose crumbs, dust, and pet hair can mix with your cleaning solutions and create a paste that’s harder to remove. Spend a full minute on each seat, working systematically from top to bottom.
Once vacuuming is complete, locate your stained areas. Pre-treatment techniques for fabric stains work best when you apply them strategically to problem spots rather than the entire seat. This saves time and concentrates your natural cleaning power where it’s needed most.
For each stain, follow this approach:
- Blot the area gently with a dry microfiber cloth to absorb any remaining moisture
- Apply your vinegar and baking soda solution directly to the stain using a spray bottle
- Let it sit for 5 to 10 minutes so the natural agents can penetrate the fabric
- Use gentle pressure with your soft-bristled brush to loosen the stain without aggressive scrubbing
The waiting period is crucial. Your vinegar and baking soda need time to break down the stain from within, not just attack it from the surface. Patience here prevents you from having to scrub harder later.
Apply your pre-treatment solution generously but not soaking—the fabric should be damp, not dripping wet.
For stubborn stains like coffee, chocolate, or pet accidents, you might need a second application. Don’t worry; this is normal and doesn’t mean anything is wrong with your approach.
Pro tip: Test your vinegar and baking soda solution on a hidden car seat area first to ensure it won’t discolor your upholstery, then proceed confidently with the full treatment.
Step 3: Apply Natural Cleaning Solutions
Your pre-treatment is done, and now comes the main event. This step transforms your natural ingredients into powerful stain fighters by applying them strategically to break down discoloration and restore your seats.
Start with your vinegar and baking soda solution in the spray bottle. Spray it lightly over the pre-treated stain area, making sure the fabric is damp but not soaked. The solution should penetrate the fibers without pooling on the surface, which wastes your cleaner and takes longer to dry.
For fabric seats, baking soda mixed with apple cider vinegar works exceptionally well against the types of stains that plague busy families. Coffee spills, juice accidents, and pet mishaps all respond to this combination because it targets both enzymatic and oxidizable stains simultaneously.
Let the solution sit for another 5 to 10 minutes after spraying. This contact time is what separates effective cleaning from just moving dirt around. The longer your solution sits, the harder it works on breaking down stain compounds.
After the waiting period, here’s how to apply pressure:
- Use your soft-bristled brush in circular motions
- Work from the outside edges of the stain toward the center
- Avoid aggressive scrubbing that damages fabric fibers
- Repeat the circular motion 8 to 12 times per stain area
If you’re dealing with leather seats instead, use a much gentler approach. Spray your solution lightly and allow longer contact time before wiping with a damp cloth. Leather is more delicate than fabric and doesn’t respond well to scrubbing.
Multiple light applications work better than one heavy-handed attempt at removing stubborn stains.
You might notice the stain beginning to lighten after your first round. This is progress. Some stubborn stains need a second or even third application, so don’t give up if the first pass doesn’t completely remove everything.
Pro tip: Apply your solution in the morning and let it work throughout the day before scrubbing, giving you deeper penetration and easier removal of set-in stains.
Step 4: Scrub and Extract Stains Thoroughly
Now it’s time to do the actual work. Scrubbing removes the loosened stain particles while extraction pulls moisture and residue from deep within the fabric fibers, leaving your seats noticeably cleaner.
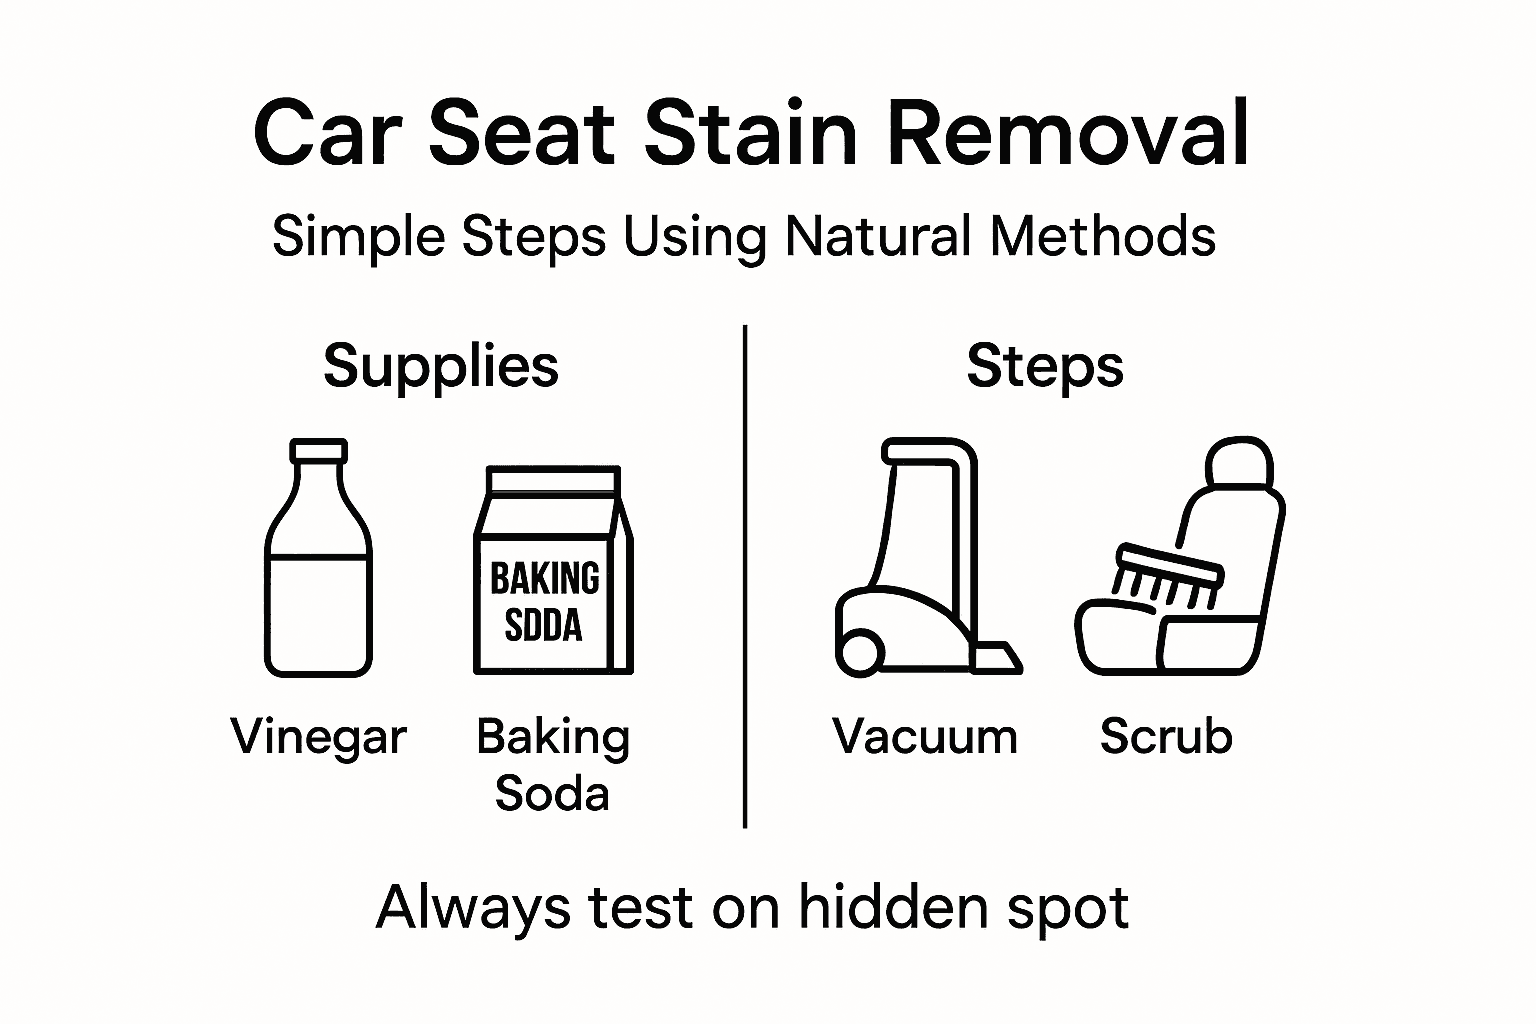
Start scrubbing with firm but controlled pressure. Your soft-bristled brush should make contact with every part of the stained area, working in small circular motions. Avoid the temptation to scrub aggressively—this actually drives stain particles deeper into the fabric rather than lifting them out.
Focus on one small section at a time. Work an area about the size of your palm for 30 to 60 seconds before moving to the next section. This concentrated approach ensures thorough cleaning rather than spreading effort too thin across the entire stain.
As you scrub, you’ll notice the solution becoming darker. This means the stain is being lifted from the fabric. Keep scrubbing until the solution no longer darkens significantly, indicating most of the stain has been extracted.
For tougher stains, consider using eco-friendly scrub pads made from natural fibers like coir or luffa. These biodegradable options provide excellent abrasion resistance while being gentler on your upholstery than synthetic alternatives. They’re particularly effective for set-in stains without damaging fabric integrity.
Once scrubbing is complete, extraction becomes critical:
- Use a clean, damp microfiber cloth to blot the area repeatedly
- Press firmly to absorb the dirty solution from the fabric
- Rinse your cloth frequently in clean water
- Continue blotting until the cloth comes away with minimal discoloration
- Do a final pass with a slightly damp cloth to remove any residual cleaning solution
This extraction step prevents sticky residue from drying on your seats, which would attract new dirt and cause discoloration over time.
The darker your cloth becomes during extraction, the more stain material you’re successfully removing from the fibers.
Don’t rush extraction. South Jersey humidity means your seats will take time to dry anyway, so spend the extra few minutes ensuring you’ve removed as much moisture as possible. This reduces drying time and prevents mildew or odors.
Pro tip: Use a clean, dry cloth afterward to blot away excess moisture, then crack your windows to allow airflow and faster drying while preventing that damp car smell.
Step 5: Inspect Seats and Repeat as Needed
Before you celebrate your clean seats, take a careful look at what you’ve accomplished. This inspection determines whether your stain is truly gone or needs another round of treatment.
Wait until the seat is completely dry before inspecting. Wet fabric looks darker, which can trick you into thinking the stain is still there when it’s actually just moisture. Give your seats at least 2 to 3 hours of drying time, or overnight if possible.
Once dry, examine the stained area in natural sunlight. Artificial car lighting can mask remaining discoloration. Tilt your head at different angles to catch any subtle remnants of the stain that flat lighting might hide.
If the stain is completely gone, you’re finished. But if traces remain, don’t be discouraged. Older or set-in stains often require repeated treatment to fully fade, especially those that have been baked in by heat or sun exposure over time.
Repeat your cleaning process with these considerations:
- Don’t dry the fabric completely between treatments
- Reapply your vinegar and baking soda solution to remaining stain areas
- Give the solution 10 to 15 minutes contact time on the second application
- Scrub gently but thoroughly using the same circular motions
- Extract moisture again with clean, damp cloths
Most stubborn stains respond within two or three applications. If you’ve repeated the process three times and the stain persists, you’re dealing with a particularly tough case. Some stains require professional intervention to avoid potential damage from over-treating.
Patience and repetition work better than intensity—gentle, repeated treatment beats one aggressive attempt.
After each application, allow full drying time before assessing results. This prevents you from re-treating areas that are already clean, wasting your time and cleaning solution.
If stains simply won’t budge despite your best efforts, this is exactly when professional mobile detailing becomes your smart option. CDC Auto Detailing’s specialists have access to advanced extraction equipment and commercial-grade solutions that can tackle cases where natural methods reach their limits.
Pro tip: Mark the treated area with a piece of tape before drying so you can easily locate it later for inspection and know exactly where to reapply solution if a second treatment is needed.
Restore Your Car Seats with Expert Care From CDC Auto Detailing
Struggling with stubborn stains despite your best natural cleaning efforts can be frustrating and time-consuming. Whether it is coffee spills, pet accidents, or set-in discoloration, you want a solution that truly brings your car seats back to life without risking damage or repeated scrubbing. This is where professional mobile car detailing shines. CDC Auto Detailing in Pitman, New Jersey, offers premium deep-cleaning services that use expert techniques and advanced equipment to remove tough stains safely and effectively.

Take the worry out of tackling persistent stains yourself. With CDC Auto Detailing, you get convenient at-home service tailored for South Jersey vehicle owners who demand high-quality interior care. Visit our professional detailing services page to learn how we can help restore your upholstery’s pristine condition. Ready for results you can trust? Schedule your appointment through our easy contact and booking form today and experience the difference of expert mobile detailing
Frequently Asked Questions
What are the essential cleaning supplies for removing stains from car seats naturally?
Start with white vinegar, baking soda, warm water, microfiber cloths, and a soft-bristled brush. Assemble these items before you begin to streamline your cleaning process and maximize effectiveness.
How do I pre-treat stained areas of my car seats before cleaning?
Blot the stained area gently with a dry microfiber cloth, then apply a vinegar and baking soda solution from a spray bottle. Let the solution sit for 5 to 10 minutes to penetrate the fabric and loosen the stain before scrubbing gently with a brush.
What is the best method for scrubbing car seats after applying a cleaning solution?
Use a soft-bristled brush to scrub in small circular motions, focusing on one area at a time for 30 to 60 seconds. Be gentle to avoid damaging the fabric, and make sure to work from the outside of the stain towards the center for the best results.
How can I ensure that my car seats are completely dry after cleaning?
After scrubbing and extracting the moisture, use a clean, dry cloth to soak up excess moisture and then crack the windows to allow airflow. Give your seats plenty of time to dry—ideally at least 2 to 3 hours or overnight—before checking for any remaining stains.
What should I do if stains remain after my first clean?
If traces of the stain persist, reapply the vinegar and baking soda solution and repeat the cleaning process, allowing 10 to 15 minutes of contact time after the second application. Most stubborn stains will respond within two to three rounds; if not, consider professional help for more advanced cleaning techniques.
How can I store my car cleaning supplies for quick access?
Store your cleaning supplies in a plastic caddy under the car seat for easy access whenever a spill occurs. Keeping your supplies organized will help you turn cleanups into quick tasks instead of lengthy projects.