Every New Jersey commuter knows how quickly clutter and grime can take over a car interior. Between busy work schedules and family errands, even the most passionate car enthusiast can find regular cleaning a challenge. By focusing on a methodical process and having the right automotive-specific cleaning supplies ready, you create a truly fresh, protected interior without damage or wasted time—a difference you can feel every time you drive.
Table of Contents
- Step 1: Gather And Organize All Cleaning Supplies
- Step 2: Remove Clutter And Vacuum Interior Surfaces
- Step 3: Clean And Treat Upholstery And Mats
- Step 4: Wipe And Disinfect Dashboard And Controls
- Step 5: Inspect And Refresh Hard-To-Reach Areas
- Step 6: Review Overall Results And Ensure Satisfaction
Quick Summary
| Key Insight | Explanation |
|---|---|
| 1. Organize Cleaning Supplies | Gather all necessary cleaning tools and products before starting to ensure a smooth and efficient cleaning process. |
| 2. Thoroughly Vacuum First | Remove all clutter and vacuum the car’s interior thoroughly to lay the groundwork for deep cleaning. |
| 3. Clean and Treat Interiors | Use appropriate cleaners for different surfaces and apply treatments to protect upholstery for longevity. |
| 4. Wipe and Disinfect Controls | Regularly clean and disinfect high-touch areas to reduce germs and improve hygiene in your vehicle. |
| 5. Inspect Hard-to-Reach Areas | Pay attention to hidden spaces in your car where debris accumulates, ensuring a comprehensive cleaning effort. |
Step 1: Gather and organize all cleaning supplies
Before you start vacuuming or wiping down surfaces, take time to assemble everything you need. This single step determines whether your cleaning session flows smoothly or leaves you scrambling for supplies midway through. When you have everything at hand, you work faster, stay focused, and actually finish the job instead of abandoning it halfway.
Start by thinking about what surfaces exist inside your vehicle. Your car has carpets, fabric or leather seats, vinyl door panels, plastic cup holders, glass windows, and hard plastic trim. Each surface type demands slightly different treatment. You would not use the same brush on delicate leather that you use on carpeted floor mats. That approach leads to scratches and damage. According to comprehensive guidance on car cleaning supplies, you should have upholstery tools, vacuum attachments, microfiber cloths, mild automotive-specific cleaners, leather conditioners, and soft brushes ready. This means gathering items that actually work for automotive interiors, not household cleaners that might damage your dashboard or fade your upholstery.
Here is what an organized supply station looks like. Grab your vacuum with its upholstery attachment and crevice tool. Pull out your microfiber cloths, which are gentle on surfaces and trap dust without scratching. Collect your cleaning products: a dedicated interior detailer for hard surfaces, upholstery cleaner for fabric seats, and leather conditioner if your car has leather. Add soft brushes for scrubbing stubborn stains without gouging surfaces. Keep a trash bag nearby because you will generate debris during vacuuming. Arrange these items in your car’s trunk or on the driveway where you are working, grouped by type. All vacuum attachments together. All cloths together. All liquids together away from anything that could be damaged by spills.
Why organize before you start? Think of it this way: a surgeon does not open a patient and then hunt for surgical tools. Every minute spent searching for supplies is a minute your interior sits partially cleaned or drying unevenly. When everything is within arm’s reach, your cleaning rhythm stays unbroken. You move from vacuuming to upholstery cleaning to detailing hard surfaces without stopping. This continuity matters because it helps products work their best. Some cleaners need contact time to break down grime, and that only happens when you apply them in sequence, not when you pause for ten minutes to find the leather conditioner you swear you placed somewhere in your garage.
Pro tip: Store all your regular car interior supplies in a labeled plastic caddy or bucket you keep in your trunk year-round, so gathering supplies becomes grabbing one container rather than hunting through your garage.
Step 2: Remove clutter and vacuum interior surfaces
Now that your supplies are organized, it’s time to clear out the debris that accumulates in every vehicle. Your car collects more junk than you probably realize, from loose change wedged between seats to crumbs hidden under the floor mats. Removing all this clutter and thoroughly vacuuming creates the foundation for everything else you’ll do. Without this step, you’re just cleaning around dirt instead of actually removing it.
Start by taking out everything loose from your interior. Pull out floor mats, seat cushions if they’re removable, and any personal items stored in cup holders, door pockets, and under seats. Open your glove compartment and visor storage areas. Grab a trash bag and dump out obvious garbage, then set aside anything you want to keep but belongs elsewhere. This process takes longer than you’d think because stuff hides in the most unexpected places. Coins hide in cup holders. Pens roll under seats. Old receipts jam into door pockets. Give yourself permission to be thorough here because you cannot vacuum effectively around clutter.
Once your interior is cleared, it’s time to vacuum strategically. Begin at the top of your vehicle and work downward because dust falls as you disturb it. Start with the dashboard, steering wheel, and upper seat areas using the upholstery attachment. Move to the seats themselves, paying attention to seams and crevices where dirt accumulates. Use the crevice tool for tight spots between cushions and along the seat backs. Now tackle the floor, vacuuming under the front and back seats where most debris settles. Do not skip the sides and corners of the floorboard. Flip your floor mats outside and beat them to release trapped dust, then vacuum them separately before replacing them. Finally, vacuum air vents and any other crevices you can reach. This systematic approach from top to bottom ensures nothing gets missed.
Your goal is thorough coverage, not speed. Spend extra time in areas where your family sits most or where crumbs tend to accumulate. If you have kids or pets, you’ll notice significantly more debris hiding in your vehicle than you expected. Take your time here because this vacuuming step removes the surface dirt that would otherwise interfere with deep cleaning products later. When you finish, your interior should look noticeably fresher and you’ll be ready to tackle stains and detailed cleaning.
Pro tip: Run your vacuum over each section twice, the second time using slower, overlapping passes to catch debris your first pass might have missed, which is especially effective under seats and in corners.
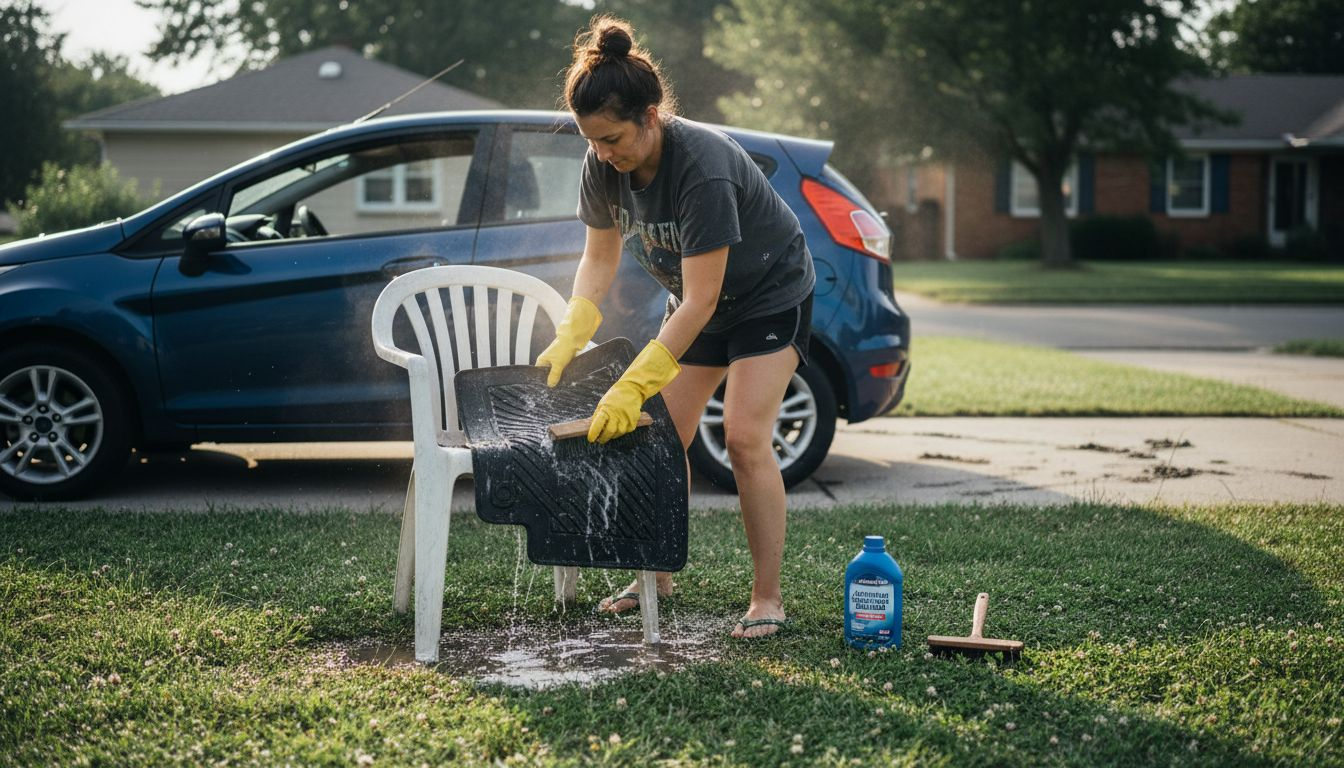
Step 3: Clean and treat upholstery and mats
Your seats and floor mats take the biggest beating in your vehicle. They absorb spills, hold dust, collect pet hair, and accumulate the wear and tear of daily life. Cleaning and treating them properly restores their appearance and extends their lifespan. This step separates a car that looks maintained from one that looks neglected.
Start with your floor mats since you already removed them during vacuuming. Take them outside or to a well ventilated area and spray them down with a hose to remove loose dirt. For stubborn stains, apply an automotive approved upholstery cleaner appropriate for the mat material, let it sit for a few minutes, then scrub with a soft brush and rinse thoroughly. Lay them flat to dry completely before returning them to your car. While your mats dry, turn your attention to the seats themselves. The type of upholstery you have determines your approach. For cloth seats, use mild soap and water or a dedicated upholstery cleaner designed for automotive use. Apply the cleaner with a soft brush using circular motions on stained areas, then wipe away excess moisture with a microfiber cloth. Work in small sections and avoid over saturating the fabric since excess moisture can lead to mildew. For leather upholstery, skip the harsh cleaners entirely. Use only products designed specifically for automotive leather, as household cleaners can strip the protective coating. Apply cleaner gently with a soft cloth, work it in with light circular motions, then wipe clean with a separate microfiber cloth. Vinyl seats fall somewhere between these two, responding well to mild soap solutions and soft brushes without the conditioning requirements of leather.
After cleaning comes the treatment phase, which many people overlook. This is where you actually protect and preserve your upholstery. Leather needs a quality conditioner to maintain its suppleness and prevent cracking. Apply it according to product instructions, usually with a soft cloth in thin, even coats. Cloth seats benefit from a fabric protectant spray that repels future stains and spills. Use these products sparingly and follow the manufacturer’s directions to avoid over application. Vinyl seats can be treated with a vinyl protectant that restores color depth and adds UV protection. Once you apply any treatment, give it the time needed to set according to the product label. Do not use your car immediately afterward.
Your newly cleaned and treated interior is almost there. These seats and mats will now resist stains more effectively and maintain their appearance longer than untreated surfaces. You will notice a significant difference in how fresh your interior looks and feels.
Here’s a quick reference showing the best cleaning method and treatment for each interior car surface:
| Surface Type | Recommended Cleaner | Tool/Accessory | Aftercare Product |
|---|---|---|---|
| Carpet | Upholstery cleaner | Soft brush, vacuum | Fabric protectant spray |
| Cloth seats | Mild soap/upholstery cleaner | Soft brush, microfiber | Fabric protectant spray |
| Leather seats | Automotive leather cleaner | Soft cloth, microfiber | Leather conditioner |
| Vinyl panels | Mild soap solution | Soft brush, cloth | Vinyl protectant |
| Glass/windows | Glass cleaner (auto-safe) | Microfiber cloth | None needed |
| Plastic trim | Interior detailer | Microfiber cloth | None needed |
Pro tip: Test any cleaning product on a hidden area of your upholstery first, like the underside of a seat or a floor mat corner, to ensure it does not cause discoloration or damage before applying it to visible surfaces.
Step 4: Wipe and disinfect dashboard and controls
Your dashboard and steering wheel are the most frequently touched surfaces in your vehicle. Every time you grab the steering wheel, adjust the climate control, or press buttons on your infotainment system, you transfer oils, dirt, and germs. Cleaning and disinfecting these areas makes your interior look polished while reducing the spread of illness. This step takes only minutes but delivers visible results that transform how fresh your car feels.
Begin with a clean microfiber cloth slightly dampened with water or a mild interior cleaner. Wipe down your entire dashboard, paying special attention to dust accumulation in crevices and air vents. Work methodically from left to right across the dashboard, then move to the steering wheel. Use gentle circular motions to avoid streaking the surface. For stubborn grime, apply a bit more cleaner to your cloth, but never spray cleaner directly onto electronics or plastic surfaces as liquid can seep into vents or buttons and cause damage. Get into the smaller details like air vent slats, the gap between your dashboard and windshield, and around your gauge cluster. These overlooked spots collect surprising amounts of dust. Now shift focus to all the controls you touch regularly. Wipe down your steering wheel thoroughly, including the spoke sides where hands grip it. Clean your gear shift, parking brake, turn signal and wiper controls, window buttons, and climate control knobs. Do not skip your door handles, both on the interior and exterior where you grab them. All these high-touch areas accumulate bacteria and viruses that can spread illness, especially during cold and flu season.
Once your surfaces are clean, it is time to disinfect. Disinfectant wipes containing at least 70 percent isopropyl alcohol are effective for sanitizing these areas without damaging vehicle interior materials. Use individual wipes for each area to prevent cross-contamination, starting with your steering wheel and moving through all controls. Allow the disinfectant to sit on surfaces for the time specified on the product label, usually around 30 seconds, to kill germs effectively. This contact time matters. Rushing through disinfection defeats the purpose. Pay special attention to steering wheel crevices, button tops, and shift lever grooves where germs hide. One final pass with a dry microfiber cloth removes any residual moisture. Avoid harsh disinfectants containing bleach or hydrogen peroxide since these can damage plastic, rubber, and painted surfaces in your vehicle. Stick to products specifically formulated for automotive interiors or those approved by your vehicle manufacturer.
Your dashboard and controls now sparkle with a clean, professional appearance while harboring significantly fewer germs. This attention to hygiene matters especially if you share your vehicle or worry about cold and flu transmission during winter months.
Pro tip: Keep a small pack of automotive approved disinfectant wipes in your glove compartment so you can quickly wipe down your steering wheel and controls between professional cleanings, maintaining hygiene during cold and flu season.
Step 5: Inspect and refresh hard-to-reach areas
Your car has plenty of hidden spaces where dirt, dust, and allergens accumulate out of sight. Under the seats, inside air vents, between seat crevices, and along the trunk floor collect debris that affects both appearance and air quality. These overlooked areas require specialized attention and the right tools. Spending time here prevents mold growth, reduces allergens, and ensures your interior cleaning is truly complete from top to bottom.
Start by getting under your seats where the most debris hides. Use a flashlight to inspect what you cannot see, then grab your crevice tool attachment to vacuum underneath thoroughly. Pay attention to the area where seats meet the floor, as this junction collects crumbs, pet hair, and dust that regular vacuuming misses. Move to the spaces between seat cushions and seat backs. Coins, food particles, and debris wedge into these crevices constantly. Use your crevice tool to loosen debris, then vacuum it up. If you have removable seat cushions, take them out and vacuum underneath. Now tackle your dashboard air vents, which trap alarming amounts of dust and can harbor mold if moisture gets trapped inside. Use specialized dusting brushes and compressed air to remove dirt and debris from these tight spaces effectively. If you have access to compressed air, use short bursts to dislodge dust from vent slats, then vacuum up what falls. For vents without compressed air access, use a thin dusting brush to carefully work through each slat. Do the same for air vents on your dashboard sides and any other ventilation openings. These areas directly affect your cabin air quality and the smell of your vehicle, so do not skip them.
Move to often ignored spaces like the space under your dashboard and around your steering column where wires and components hide. A thin brush and careful vacuuming here removes dust without damaging anything. Check your trunk floor thoroughly, especially corners and under the spare tire area if accessible. Wipe down trunk walls with a microfiber cloth to remove dust and grime. If your vehicle has a sunroof, inspect the tracks and glass for debris and dust. Use a soft brush to clean tracks gently, then wipe the glass with a microfiber cloth. Do not forget the gap between your windshield and dashboard, which collects surprising amounts of debris. A thin, soft brush works well here to dislodge dust for vacuuming. Take time to visually inspect areas as you go. If you notice moisture, discoloration, or mold smell coming from a particular area, investigate further. Mold growth requires different treatment than simple dust, and catching it early prevents it from spreading. Your entire interior now receives thorough attention, not just the visible surfaces.
Pro tip: Keep a can of compressed air and a set of soft detail brushes in your cleaning kit specifically for hard-to-reach areas, since these tools make accessing and cleaning tight spaces dramatically faster and more effective than trying to improvise with standard brushes.
The table below highlights common cleaning mistakes and their recommended solutions:
| Mistake | What Can Happen | How to Avoid |
|---|---|---|
| Using household cleaners | Fading, damage | Use automotive-specific products |
| Skipping clutter removal | Missed dirt, hidden debris | Always clear out interior first |
| Over-saturating fabric with water | Mildew, odors | Use damp—not wet—cloths |
| Ignoring hard-to-reach zones | Accumulated dust | Use crevice tools and brushes |
| Rushing disinfection | Ineffective germ removal | Allow proper contact time |
Step 6: Review overall results and ensure satisfaction
You have invested time and effort into cleaning your car’s interior thoroughly. Now comes the moment to step back and verify that your work delivers the pristine results you envisioned. A final inspection catches any missed spots, ensures all products have dried properly, and gives you the satisfaction of knowing your vehicle is genuinely clean. This review process takes only minutes but makes a significant difference in your overall experience.
Walk through your vehicle slowly with fresh eyes. Start at the driver’s side front and work systematically through each area. Look at your seats from different angles and lighting to catch any remaining stains or damp spots. Run your hand across the dashboard to feel for any dust or residue you might have missed. Check that all your microfiber cloths have dried the surfaces completely, especially upholstery and leather which can show water spots if they dried unevenly. Open your door and inspect the door panels, handles, and jamb areas where you wiped down. Lean down and visually inspect under the seats to confirm your vacuuming was thorough. Look at your floor mats to verify they are dry and properly placed. Examine your air vents to confirm they are free of visible dust. Conduct a sensory check by opening your windows to air out any moisture and evaluate any lingering odors from cleaning products or mustiness from moisture. Your vehicle should smell fresh and clean, not chemical or damp. If you detect any musty smell, leave windows open longer or run your air conditioning with fresh air intake to circulate air through the cabin. Pay attention to how the car feels to sit in. Your seats should feel fresh and comfortable without any stickiness from cleaning products. Your steering wheel should feel smooth and responsive. All controls should operate smoothly without any residue affecting their function.
If you discover any missed spots during your inspection, address them immediately while you have your supplies nearby. A quick touch-up takes seconds and makes a meaningful difference. For any persistent stains that resisted cleaning, make a mental note for your next detailing session or consider reaching out to a professional service for specialized treatment. Your South Jersey mobile detailing team can address stubborn stains that typical home cleaning cannot resolve. Think about establishing a regular cleaning schedule to maintain these results. Vacuuming your interior monthly and wiping down surfaces every few weeks keeps your car looking fresh between deep cleanings. This routine maintenance preserves your vehicle’s value and ensures a consistently pleasant driving experience. Your interior now reflects the care you invest in your vehicle, and maintaining this standard protects your investment long term.
Pro tip: Take before and after photos of your cleaned interior with your phone to document your results and create motivation for maintaining cleanliness, plus you have a reference for what truly clean looks like when you wonder if a touch-up is needed.
Keep Your Car Interior Pristine Without the Hassle
Cleaning your car’s interior step by step can be time-consuming and physically demanding. From gathering the right supplies to reaching the hard-to-clean areas, many vehicle owners struggle to achieve that flawless finish. If you find yourself overwhelmed by clutter removal, upholstery care, or disinfecting sensitive dashboard controls, you are not alone. Achieving a truly clean and protected interior requires professional-grade products, expert techniques, and the right timing to maintain your car’s appearance and value.

Let the experts at CDC Auto Detailing handle the tough work for you. With our mobile auto detailing service based in Pitman New Jersey, we bring premium interior cleaning directly to your doorstep. Our trained professionals use automotive-specific cleaners and tools to remove stubborn stains, protect leather and fabric upholstery, and sanitize every crevice with precision. Don’t spend your free time chasing supplies or struggling to clean hard-to-reach spots. Schedule your appointment today to experience convenient, high-quality interior detailing that restores your vehicle’s freshness and comfort like new. Visit CDC Auto Detailing now and see why South Jersey drivers trust us for reliable and thorough detailing solutions.
Frequently Asked Questions
How do I organize my car cleaning supplies effectively?
To organize your car cleaning supplies, gather everything you need before you start. Place items in categories, such as cleaning liquids, microfiber cloths, and vacuum attachments, and consider using a labeled plastic caddy for convenience.
What surfaces should I prioritize when vacuuming my car’s interior?
Prioritize vacuuming the dashboard, seats, and floor when cleaning your car’s interior. Start from the top and work your way down to ensure dust falls into areas you’ll clean next, and don’t forget to check under seats for hidden debris.
How can I effectively treat and clean my upholstery and mats?
Clean your upholstery and mats by using products designed specifically for automotive use. Apply a suitable cleaner with a soft brush, scrub lightly, and allow them to dry completely before returning them to your car.
Why is it important to wipe down and disinfect my dashboard and controls?
Wiping down and disinfecting your dashboard and controls is essential for maintaining hygiene and eliminating germs. Use disinfectant wipes to regularly clean high-touch areas, ensuring you allow the product to sit for the recommended time to kill germs effectively.
What steps should I take to clean hard-to-reach areas in my car?
To clean hard-to-reach areas, use a crevice tool attachment to vacuum underneath and between seats. Additionally, employ a soft brush to tackle dust in places like air vents and dashboard corners, ensuring thorough cleaning of your vehicle’s interior.