
Ceramic coating cure time breaks into five stages: flash in minutes, initial surface dry in 12 to 24 hours, safe-to-touch by 24 to 48 hours, functional hydrophobic protection at 5 to 7 days, and full molecular cure at 2 to 4 weeks. Keep the car dry and out of direct sun during that first window. Always check the product’s technical data sheet (TDS) for exact numbers, since formulas vary, and if you want the schedule handled correctly the first time, Professional installers often build every install around it.
TL;DR:
- Shorter curing times require careful control over temperature and humidity, especially avoiding cold conditions below 50°F that delay full cure by weeks.
- Professional-grade coatings like DuraSlic 1500 XtremeHG cure faster and reach rain readiness in about one day, but consumer products may need up to four weeks for full strength.
- Water exposure during the first 24 hours can cause permanent damage, making garage storage and careful washing essential during the initial cure window.
- Applying panels in direct sunlight or onto hot surfaces accelerates flash times and increases high spots, risking uneven curing and defects.
- Consistent adherence to product-specific cure schedules and conditions ensures maximum durability, making professional application with controlled conditions the safest approach.
Table of Contents
- How Long Does Ceramic Coating Take to Cure? The Full Timeline
- What Changes Ceramic Coating Drying Time?
- What’s Safe to Do While Your Ceramic Coating Cures?
- Application Habits That Set Up a Clean Cure
- What CDC Auto Detailing’s Process Means for Your Cure
- Fast Cures Sell. Discipline Protects the Paint.
- Book a Professional Ceramic Coating Install With CDC Auto Detailing
- Sources
- FAQ
How Long Does Ceramic Coating Take to Cure? The Full Timeline
Every ceramic coating moves through the same five stages, but the clock resets depending on the product you use. Missing any single stage doesn’t ruin the coating outright, but it invites defects that are far harder to fix than they are to avoid.
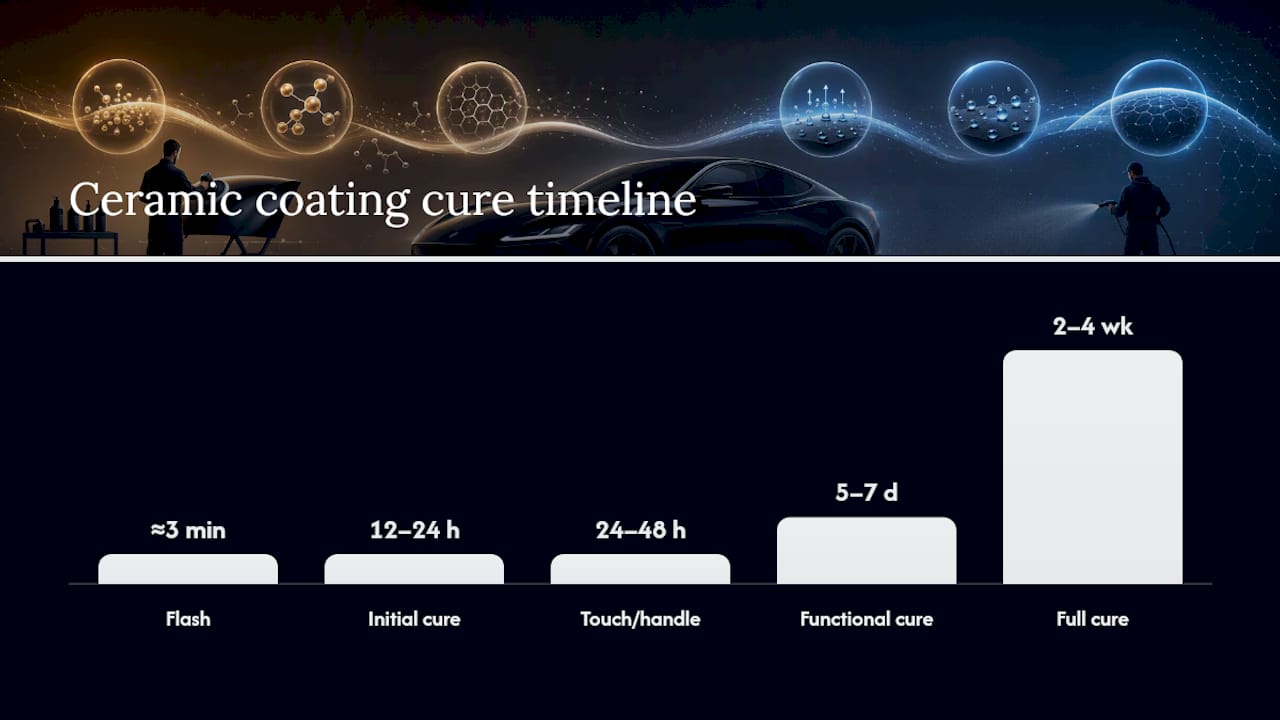
Flash time comes first and lasts only 1 to 5 minutes per panel for most wipe-on consumer coatings. This is your leveling window. Miss it and excess product sets into high spots that require correction, which usually means a claying or polishing redo before you can move forward.
Initial cure runs around a day. The surface feels dry to the touch, but the chemical bond underneath is still forming, so it’s easily disrupted by moisture or debris.
Touch and handle stage covers roughly one to two days. You can drive the car carefully, but water contact is still the enemy here.
Functional cure lands at the 5 to 7 day mark. This is when hydrophobic performance actually kicks in and a proper hand wash becomes safe.
Full cure takes 2 to 4 weeks. Molecular crosslinking finishes during this stretch, and the coating reaches its maximum hardness and chemical resistance.
- Flash: 1 to 5 minutes per panel
- Initial: 12 to 24 hours (surface dry, chemically fragile)
- Touch/handle: 24 to 48 hours (limited driving, no water)
- Functional: 5 to 7 days (safe for a real wash)
- Full cure: 2 to 4 weeks (maximum hardness and resistance)
Manufacturer specs can shift these numbers considerably. The DuraSlic 1500 XtremeHG TDS, for example, lists tack-free in 20 to 30 minutes, 7H hardness at 18 hours, and full cure to 10H in about 3 days at room temperature, with the panel rated “rain ready” in 24 hours. That’s a genuinely faster schedule than most consumer wipe-on products, and it shows why reading the actual sheet for your product matters more than any general rule.
What Changes Ceramic Coating Drying Time?
Temperature and humidity do more to shift your cure window than anything else you control. Cold air is the biggest saboteur: work below 50°F and you can stretch full cure out to 10 to 14 days, sometimes longer. The ideal temperature range many manufacturers target is roughly from moderate to warm conditions, generally around 60 to 80°F, with relative humidity between about 30 and 60 percent. Humidity influences curing similarly; too little slows the reaction, and too much can cause surface issues before proper bonding.
Cure factors that speed things up or slow them down:
- Temperature: ideal range 60 to 80°F; below 50°F significantly delays cure
- Humidity: 30 to 60% is the workable band for most coatings
- Airflow: too much stirs up dust and contaminants; too little traps solvents
- Product chemistry: consumer wipe-on, spray-on, and professional polysilazane/SiO2 blends all cure on different clocks
- Number of coats: each additional layer needs its own recoat window before the next goes on
Quick fact: spray-on “quick” ceramics can often accept water in as little as 2 to 4 hours, but that speed comes with a durability tradeoff compared to slower-curing, pro-grade wipe-on systems built to last years, not months.
That’s why installers push for a controlled indoor space whenever possible. Direct sun heats panels unevenly, wind kicks up dust that embeds in the wet coating, and neither problem shows up until you’re looking at a finished, ruined result.
What’s Safe to Do While Your Ceramic Coating Cures?
The first 24 hours matter more than any other stretch of the entire curing process. Most coating failures trace back to water exposure in this window, and it’s rarely a rainstorm that causes it. Dew overnight and a neighbor’s sprinkler running at dawn are the quiet culprits that catch owners off guard.
- Hours 0 to 24: No water, no sprinklers, no rain exposure. Garage the car if you can.
- Hours 24 to 72: Careful daily driving is fine, but skip automatic car washes and pressure washers entirely.
- Day 5 to 7: A normal hand wash is typically safe unless the product’s TDS says otherwise.
- Anytime during cure: If bird droppings or sap land on the panel, lift them with a damp microfiber towel and minimal pressure. Skip chemical removers and never use a pressure washer.
- Watch for trouble: Permanent etching or a persistent haze usually means something contacted the surface too early. Light haze sometimes buffs out after full cure; deep etching often means a redo.
Pro Tip: Keep a spray bottle of plain water and a clean microfiber towel in the trunk during the first week. If something lands on the paint, a gentle blot beats letting it sit until you get home.
Application Habits That Set Up a Clean Cure
A rushed application creates curing problems before the clock even starts. Work in small panels and always run a test spot first, especially on a paint type or coating brand you haven’t used before.
Panel temperature matters as much as ambient air. Applying to a hot hood after the car sat in direct sun causes the product to flash almost instantly, leaving streaks and high spots you won’t fully see until later. Move the vehicle into shade or a garage before you start, and give painted surfaces time to cool if they’ve been sitting outside.
- Work panel by panel and level within the product’s specified open time
- Never apply directly under sun or onto a hot surface
- Space multiple coats according to the product’s recoat window, often 30 to 60 minutes for professional-grade layers
- Inspect finished panels in raking light to catch high spots or haze before they cure in place
- Keep the workspace indoors with stable temperature, clean towels, and dedicated applicators
Application SOPs from manufacturers like 3M back this up directly, recommending specific dwell times between coats and stressing controlled conditions over convenience. A proper prep wash before any of this starts also determines how evenly the coating bonds in the first place.
What CDC Auto Detailing’s Process Means for Your Cure
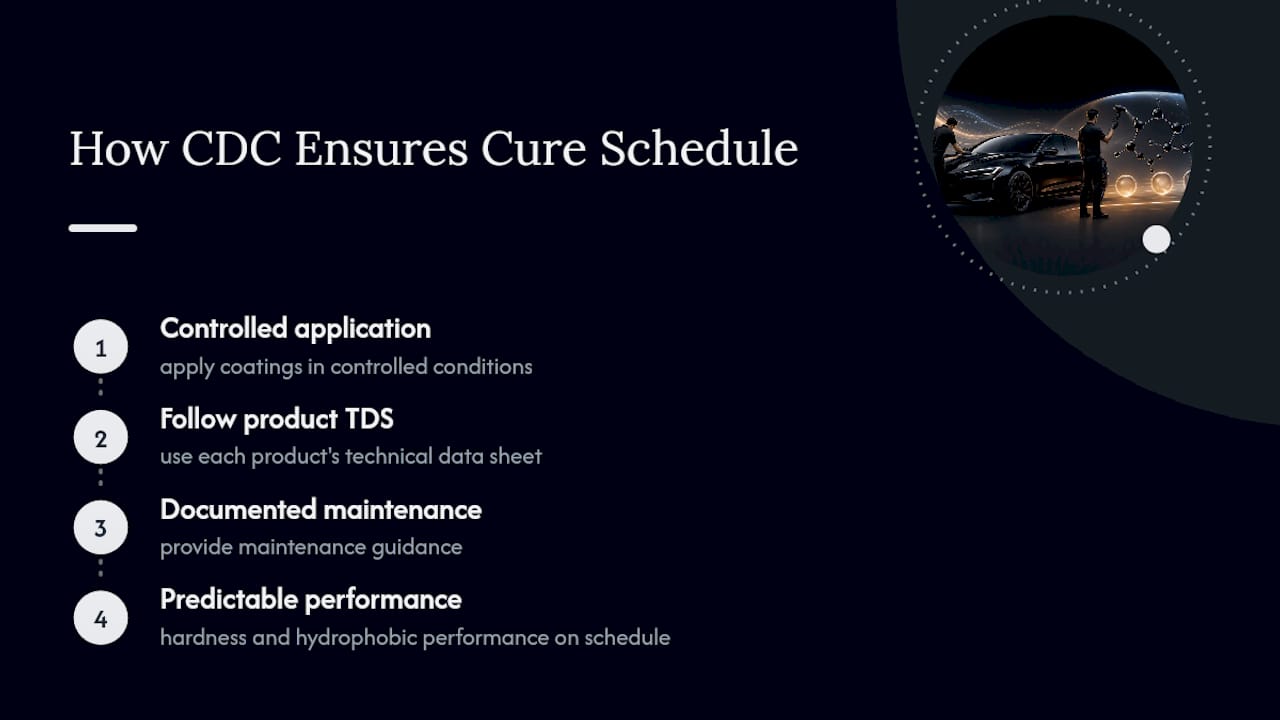
Cdcautodetailing applies ceramic coatings in controlled conditions and follows each product’s TDS rather than a generic timeline, which is the same discipline reflected in our application process guide. That approach, paired with documented maintenance guidance, is what keeps a coating’s hardness and hydrophobic performance on schedule instead of guessing.
Fast Cures Sell. Discipline Protects the Paint.
Marketing loves a quick-cure headline, but speed and long-term durability pull in opposite directions. Pro-grade systems that need a longer, controlled cure tend to outlast the fast sprays. Fast cures earn their place for short-term convenience, not for a finish you expect to protect a car for years.
— Charles
Book a Professional Ceramic Coating Install With CDC Auto Detailing
Getting the cure window right isn’t just about patience. It’s about controlling the variables an at-home garage can’t always manage: stable temperature, clean airflow, and strict adherence to the product’s TDS from flash time to full cure. Cdcautodetailing builds every ceramic coating appointment around that discipline, whether you choose the 3 Year Package, 5 Year Package, or 8 Year Package.

Packages typically include a controlled application process and follow-up guidance intended to help the coating reach its rated hardness and hydrophobic performance. The full detail packages lineup breaks down what’s included at every tier. For a firm timeline for your vehicle instead of guessing at cure windows, consider scheduling a consultation to coordinate your coating around conditions that favor a full cure.
Sources
Cure times vary by formula, so confirm the numbers against your product’s own documentation. Useful references include manufacturer TDS sheets like DuraSlic’s, the 3M application SOP, and installer timelines from Liquid Laboratories and Denver Auto Shield. For ongoing upkeep once cure is complete, Diamondbrite’s maintenance guide is a solid outside reference.
- Ceramic Coating Cure Time: Full Guide (2026)
- 3M ceramic coating application SOP
- Ceramic Coating Cure Time Explained – Liquid Laboratories
FAQ
How long after ceramic coating can I drive?
You can typically drive carefully within 24 to 48 hours, once the coating passes the initial cure stage. Avoid highway speeds, rain, and automatic car washes until you’re past the 72 hour mark.
Can ceramic coating get wet after 24 hours?
Light water exposure is usually tolerable after 24 hours, but most installers recommend waiting until the 5 to 7 day functional cure mark before a real wash. Rain or dew in the first 24 hours is the riskiest exposure and the most common cause of early coating failure.
How long do you let ceramic coating sit before wiping?
Most wipe-on consumer coatings need to sit for only 1 to 5 minutes per panel before leveling, though this “flash time” varies by product and temperature. Always confirm the exact window on your coating’s TDS, since some professional-grade formulas flash faster or slower.
What is the downside of ceramic coating?
The biggest downside is that it doesn’t forgive a rushed cure. Coating exposed to water, dust, or chemicals too early can etch or haze permanently, and unlike wax, a failed ceramic application often requires professional correction rather than a quick reapplication. Working with an installer that controls the application environment reduces that risk considerably.