Driving through South Jersey traffic and unpredictable weather can leave even the most cherished ride exposed to scratches and fading. Protecting vehicle paint with a expertly applied ceramic coating matters for anyone seeking lasting shine and durability. By following proper surface preparation standards and careful application techniques, car owners can achieve a flawless finish that resists environmental damage and keeps their investment looking its best long after leaving the driveway.
Table of Contents
- Step 1: Prepare The Car Surface For Ceramic Coating
- Step 2: Apply The Ceramic Coating Evenly And Precisely
- Step 3: Cure The Coating For Optimal Durability
- Step 4: Inspect And Test The Finished Ceramic Layer
Quick Summary
| Key Takeaway | Explanation |
|---|---|
| 1. Prepare Surface Thoroughly | Complete washing, decontamination, and paint correction enhance coating adhesion and durability. |
| 2. Apply Coating with Precision | Utilize proper techniques and tools to ensure even and uniform application for optimal protection. |
| 3. Control Curing Environment | Maintain ideal temperature, humidity, and dry conditions to allow proper bonding and curing of the coating. |
| 4. Conduct a Detailed Inspection | Look for gloss consistency and perform water beading tests to verify the quality and effectiveness of the coating. |
| 5. Follow Post-Application Care | Avoid washing or exposing the coating to moisture for 24-48 hours to preserve its integrity and strength. |
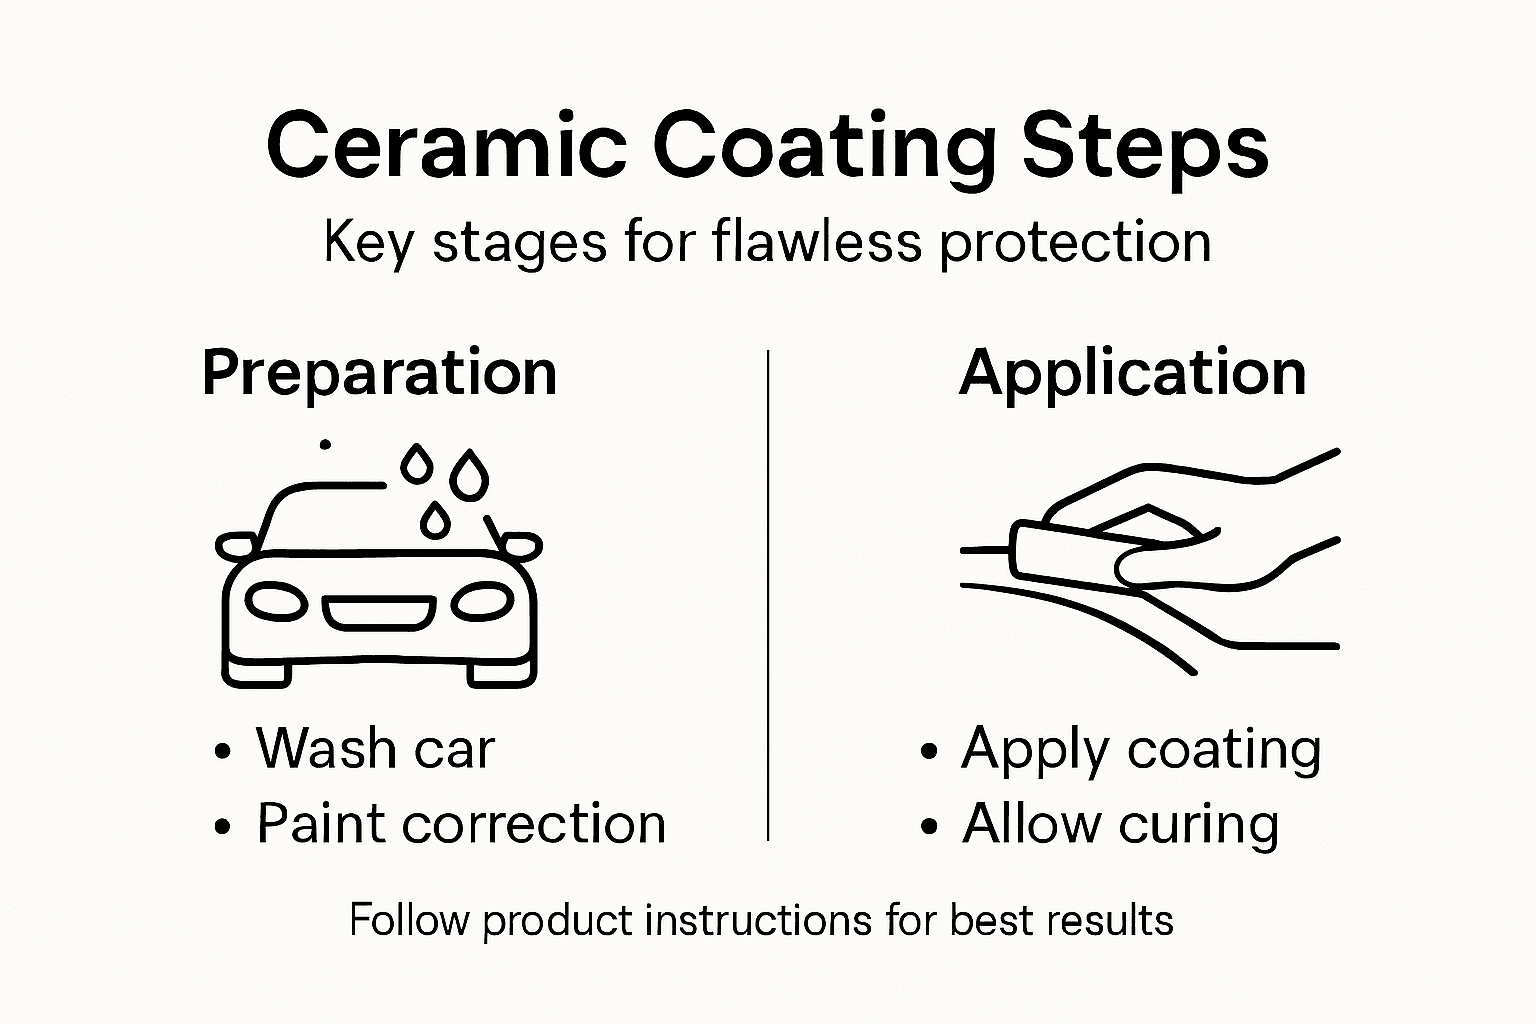
Step 1: Prepare the car surface for ceramic coating
Preparing your vehicle’s surface is the most critical step in achieving a flawless ceramic coating that provides long-lasting protection. A meticulous surface preparation ensures the ceramic coating bonds perfectly, creating a durable shield against environmental damage.
Begin by thoroughly washing your car to remove loose dirt and debris. Use a two-bucket washing method with a high-quality car shampoo, starting from the top and working downward to prevent introducing new scratches. After washing, you’ll need to perform a comprehensive decontamination process that involves several key stages:
- Clay bar treatment to remove embedded surface contaminants
- Chemical decontamination using iron removers and tar eliminators
- Mechanical surface preparation to create an ideal bonding surface
Professional surface preparation standards emphasize the importance of creating a clean, smooth substrate for optimal ceramic coating adhesion. This means completely eliminating any existing waxes, sealants, or previous protective layers that might interfere with the new coating.
Next, perform paint correction to address any imperfections. This involves using specialized polishing compounds and machines to remove light scratches, swirl marks, and oxidation. The goal is to create a perfectly smooth surface that will allow the ceramic coating to bond directly and uniformly.
Here’s a summary of common paint imperfections and their impact on ceramic coating results:
| Imperfection Type | Visual Effect | Impact on Ceramic Bond |
|---|---|---|
| Swirl marks | Dull, uneven finish | Weakens coating adherence |
| Light scratches | Fine lines visible | Reduces glossiness |
| Oxidation | Cloudy or hazy look | Prevents uniform bonding |
| Water spots | Circular residue | Can lead to coating failure |
A single missed contaminant can compromise the entire ceramic coating application, so patience and thoroughness are key.
Pro tip: Use a bright, direct light source like a LED work light to carefully inspect the surface for any remaining imperfections before applying the ceramic coating.
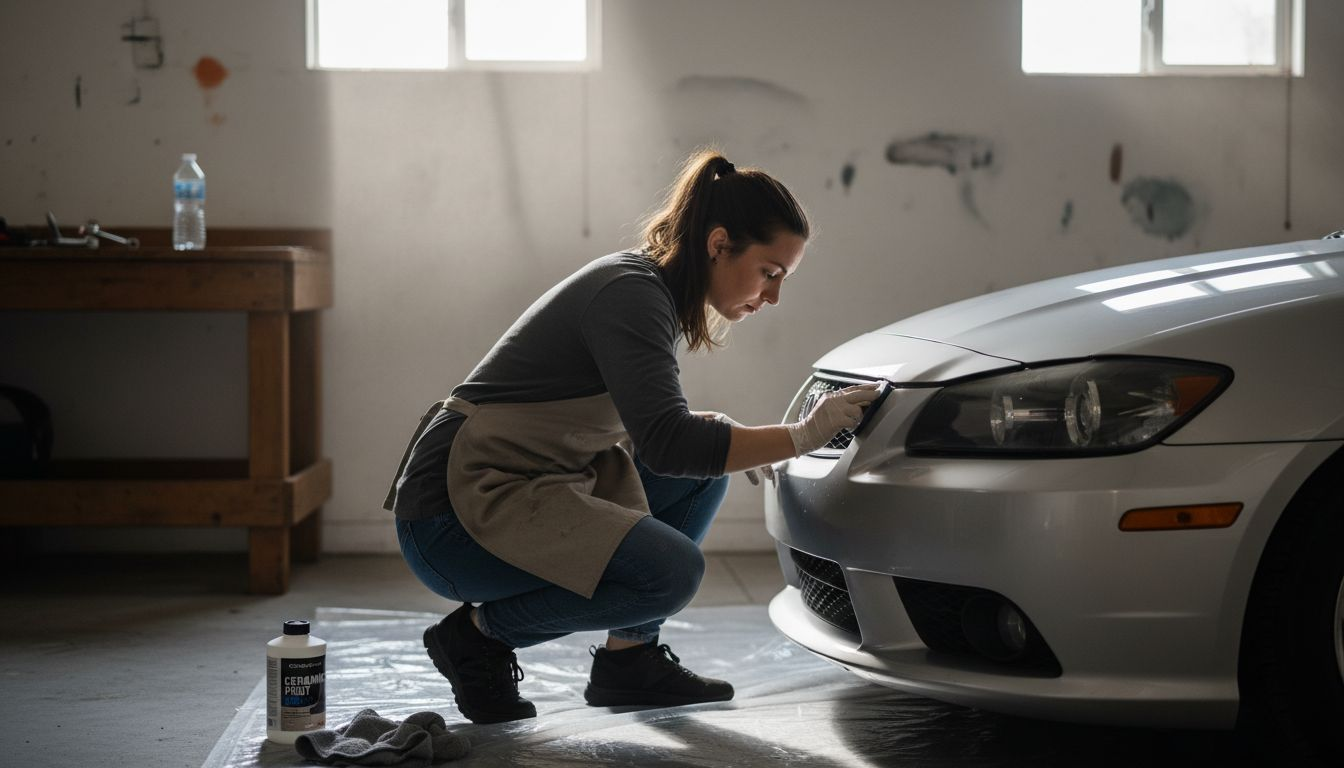
Step 2: Apply the ceramic coating evenly and precisely
Applying ceramic coating requires precision, patience, and the right technique to create a flawless protective layer for your vehicle. Your goal is to achieve a uniform, smooth finish that provides maximum paint protection and creates a stunning, glossy appearance.
Begin by selecting a clean, dust-free environment with stable temperature and low humidity. Work in small sections to ensure consistent coating application and prevent uneven coverage. You’ll need specialized tools:
- High-quality microfiber applicator pad
- Lint-free microfiber towels
- Ceramic coating solution
- Nitrile gloves
- Work light for proper visibility
Apply the ceramic coating using a controlled, systematic approach. Use light, overlapping circular motions with minimal pressure. The technique is crucial: too much pressure can cause uneven application, while too little might result in insufficient coverage. Work in small 2×2 foot sections, ensuring complete and uniform distribution of the coating.
Precision during application determines the final quality and durability of your ceramic coating.
After applying each section, allow the coating to flash and bond for the manufacturer’s recommended time. This typically ranges from 30-60 seconds. Use a clean microfiber towel to carefully buff and remove any excess product, creating a smooth, consistent finish.
Pro tip: Always work in a cool, shaded area and avoid direct sunlight during ceramic coating application to prevent premature drying and potential high spots.
Step 3: Cure the coating for optimal durability
Curing is the critical final stage that transforms your ceramic coating from a liquid application to a durable, long-lasting protective layer. Understanding and executing the proper coating curing processes will determine the ultimate performance and longevity of your vehicle’s protection.
The curing process involves carefully managing environmental conditions and allowing sufficient time for the ceramic coating to fully bond with your vehicle’s paint surface. Key considerations include:
Review these environmental factors and their influence on ceramic coating curing:
| Factor | Effect on Curing | Best Practice |
|---|---|---|
| Temperature | Affects curing speed | Maintain 60-75°F |
| Humidity | Can cause uneven drying | Keep below 60% |
| Sunlight | Triggers premature drying | Always shade vehicle |
| Moisture | Disrupts bonding process | Ensure vehicle stays dry |
- Maintaining consistent temperature
- Keeping the vehicle completely dry
- Avoiding direct sunlight
- Preventing moisture exposure
- Allowing recommended curing duration
Immediate post-application care is crucial. Avoid washing your vehicle or exposing it to water for at least 24-48 hours after application. The initial curing period is sensitive, and any moisture can compromise the coating’s integrity and bonding process.
Patience during the curing phase determines the long-term effectiveness of your ceramic coating.
Depending on the specific ceramic coating product, complete curing can take up to 7-10 days. During this time, minimize touching the surface and keep the vehicle in a controlled environment. The coating will continue to harden and develop its full protective properties throughout this period.
Pro tip: Track the curing time using a dedicated smartphone timer and avoid parking near sprinklers or in areas with high humidity during the initial bonding phase.
Step 4: Inspect and test the finished ceramic layer
Completely inspecting your ceramic coating ensures that your vehicle has received a professional-grade protective treatment. Coating inspection involves precise evaluation techniques that help you verify the quality and uniformity of the application.
To thoroughly inspect the ceramic coating, you’ll need to conduct a comprehensive visual and tactile assessment:
- Check for uniform glossiness across all surfaces
- Look for any uneven spots or inconsistent coverage
- Test water beading and surface tension
- Examine edges and complex contours carefully
- Verify complete surface treatment
Use bright, direct lighting to reveal any imperfections that might be invisible under normal conditions. Hold your hand at a 45-degree angle and slowly move across the surface, watching how light reflects. Subtle variations in coating thickness or small missed areas will become apparent during this careful examination.
A meticulous inspection now can prevent potential protective failures later.
Perform a water beading test by lightly misting the surface. High-quality ceramic coatings should create tight, uniform water beads that quickly roll off without leaving residue. If water does not bead consistently or appears to stick to the surface, you might need professional reapplication.
Pro tip: Photograph the surface under consistent lighting conditions to document your coating and create a baseline for future comparisons and maintenance.
Achieve the Perfect Ceramic Coating with Professional Mobile Detailing
Applying a flawless ceramic coating requires expert surface preparation, precise application, and careful curing. If you want to avoid common pitfalls like uneven coverage, weak bonding, or premature coating failure described in the article, trusting professionals can make all the difference. At CDC Auto Detailing, we specialize in premium ceramic coatings combined with expert paint correction and surface preparation to ensure your vehicle’s protection lasts longer and looks stunning.

Experience the convenience of mobile detailing services in South Jersey tailored to your schedule and location. Our detailers use industry-leading techniques to guarantee uniform coating application and a deep gloss that stands up to environmental damage. Don’t risk wasted time or compromised results from DIY attempts. Book your appointment today through our easy contact and booking form and protect your investment with confidence and expert care.
Frequently Asked Questions
How do I properly prepare my car’s surface for ceramic coating?
To prepare your car’s surface for ceramic coating, start with a thorough wash using the two-bucket method to avoid scratching. Then, follow up with a clay bar treatment and perform chemical decontamination using iron removers and tar eliminators.
What techniques should I use to apply ceramic coating evenly?
For an even application of ceramic coating, work in small sections with light, overlapping circular motions using minimal pressure. This approach helps ensure uniform coverage and enhances the durability of the coating.
How long does the curing process for ceramic coating take?
The curing process for ceramic coating typically takes about 7-10 days for complete bonding. During this time, avoid washing your vehicle or exposing it to moisture to ensure the coating sets properly.
What should I check during the inspection of my ceramic coating?
During the inspection of your ceramic coating, check for uniform glossiness, any missed spots, and perform a water beading test. This will confirm the coating’s effectiveness and indicate if further professional reapplication is needed.
How can I ensure the best results when applying ceramic coating?
To ensure the best results when applying ceramic coating, maintain a clean, dust-free environment with stable temperatures and low humidity. This sets up ideal conditions for application and helps enhance the performance of the coating.
Recommended
- How Often Should You Wash a Ceramic Coated Car? – CDC Detailing
- How to Apply Ceramic Coating for Long-Lasting Car Protection
- Complete Guide to Ceramic Coating Application for Cars
- Ceramic Coatings: How They Safeguard Car Paint
- PPF Versus Ceramic Coating: Best Choice for Automotive Pros 2025 – AEONCUT PPF Pre-cut Cutting software