
The sequence that makes or breaks a ceramic coating has nothing to do with the coating itself. Strip wash → chemical decontamination (iron remover + tar remover) → clay bar → inspect and measure → polish only if needed → panel-prep wipe with IPA or a dedicated panel prep product. That’s it. Do every step in that order, in shade, between 59–77°F (15–25°C), and your coating bonds to bare paint instead of to wax residue, iron particles, or polishing oils.
According to experienced installers, preparation quality has a greater impact on coating performance than the coating product itself. A $200 coating applied to poorly prepped paint will fail faster than a $50 coating applied to surgically clean paint.
Before you start, have these three product categories on hand:
- Strip wash (wax-free, gloss-free shampoo): Chemical Guys Clean Slate or equivalent
- Iron remover + tar remover: for chemical decontamination
- Panel prep product: Adam’s Surface Prep, Stoner Ceramic Prep, or 70–99% isopropyl alcohol (IPA)
Pro Tip: Work in a shaded garage or carport. Even mild direct sun causes products to dry before they work and creates heat-related bonding failures during coating application.
Key Takeaways
A proper ceramic coating prep wash follows six stages in sequence: strip wash, chemical decon, clay, inspect, polish only if needed, and panel wipe with IPA or a dedicated prep product.
| Point | Details |
|---|---|
| Strip wash is non-negotiable | Use a wax-free, gloss-free stripping shampoo to remove sealants before coating. |
| Chemical decon before clay | Iron remover and tar remover loosen bonded particles; clay removes what’s left. |
| Polish conservatively | Start with the least aggressive product, test-spot first, and stop when defects are corrected. |
| Panel wipe is the last step | IPA (70–99%) or a branded prep like Adam’s Surface Prep or Stoner Ceramic Prep removes polishing oils immediately before coating. |
| Cdcautodetailing for complex prep | Mobile service in South Jersey covers full decon, correction, and controlled coating application. |
Table of Contents
- What does a proper ceramic coating prep wash actually involve?
- How do you remove bonded contamination with chemical decontamination?
- Why clay bar decontamination matters before any coating
- How do you inspect paint and decide if polishing is needed?
- When and how to polish paint before coating
- How to do the final panel prep wipe before coating
- What environment and timing conditions does coating application require?
- Common prep mistakes and how to fix them
- Your ceramic-coating readiness checklist
- When should you hire a professional vs. doing it yourself?
- How to choose prep wash products for different paint types
- How to test surface contamination levels before and after decontamination
- Tools and equipment you need for an effective prep wash
- What pros actually prioritize (and where most DIYers get it wrong)
- CDC Auto Detailing handles the full prep and coating process for you
- Sources
What does a proper ceramic coating prep wash actually involve?
The wash stage removes loose contamination — road grime, bird dropping residue, traffic film, and any existing wax or sealant layer sitting on top of the paint. A regular car shampoo won’t do that last part. You need a wax-free, gloss-free stripping shampoo specifically formulated to strip sealants and glazes so the coating bonds directly to clear coat.
Dedicated strip-wash products are purpose-built to be residue-free. Household dish soap can strip wax, but it also leaves behind surfactant residue and can damage rubber trim and paint over time. Stick with purpose-made products.
The wash sequence, step by step
- Pre-wash (contactless): Apply a snow foam or prewash spray to the entire car. Let it dwell 3–5 minutes to loosen surface contamination. Rinse thoroughly before any contact.
- Wheels first or last: Wash wheels separately with a dedicated wheel cleaner before the main wash to avoid cross-contamination. Some detailers do wheels last to prevent brake dust from landing on freshly washed paint.
- Two-bucket wash or foam cannon: Fill one bucket with your stripping shampoo solution, one with clean rinse water. Use a clean wash mitt. Rinse the mitt in the rinse bucket before reloading with shampoo.
- Wash top-down: Roof → hood → trunk → upper doors → lower panels. The lower third of a car carries the heaviest contamination; save it for last.
- Rinse frequently: Don’t let shampoo dry on the panel. Rinse each section before moving to the next.
- Final rinse and dry: Use a filtered hose or pressure washer for the final rinse. Dry with a clean, high-GSM microfiber towel or a leaf blower to avoid water spots.
Pro Tip: Use lukewarm water for the wash, not hot. Hot water accelerates product evaporation on panels, especially in summer. Cold water reduces foam performance. Aim for room temperature.
Choosing between a pH-neutral shampoo and a stripping shampoo depends on what’s already on the paint. For a car with an existing wax or sealant, you need the stripping formula. For a car that’s already been stripped and you’re just doing a maintenance wash before reapplication, a pH-neutral car shampoo is the right call to avoid disturbing any existing protection.
How do you remove bonded contamination with chemical decontamination?
Washing removes what sits on top of the paint. It does nothing for iron particles, industrial fallout, and tar that have physically bonded to the clear coat. Those need chemistry.
Iron fallout removers react visibly as they work: the product turns purple or red as it dissolves embedded ferrous particles. That color change is confirmation the product is doing its job. Apply on a wet panel, spray evenly, and allow 2–5 minutes of dwell time depending on contamination level. Never let it dry. Rinse thoroughly with a pressure washer.
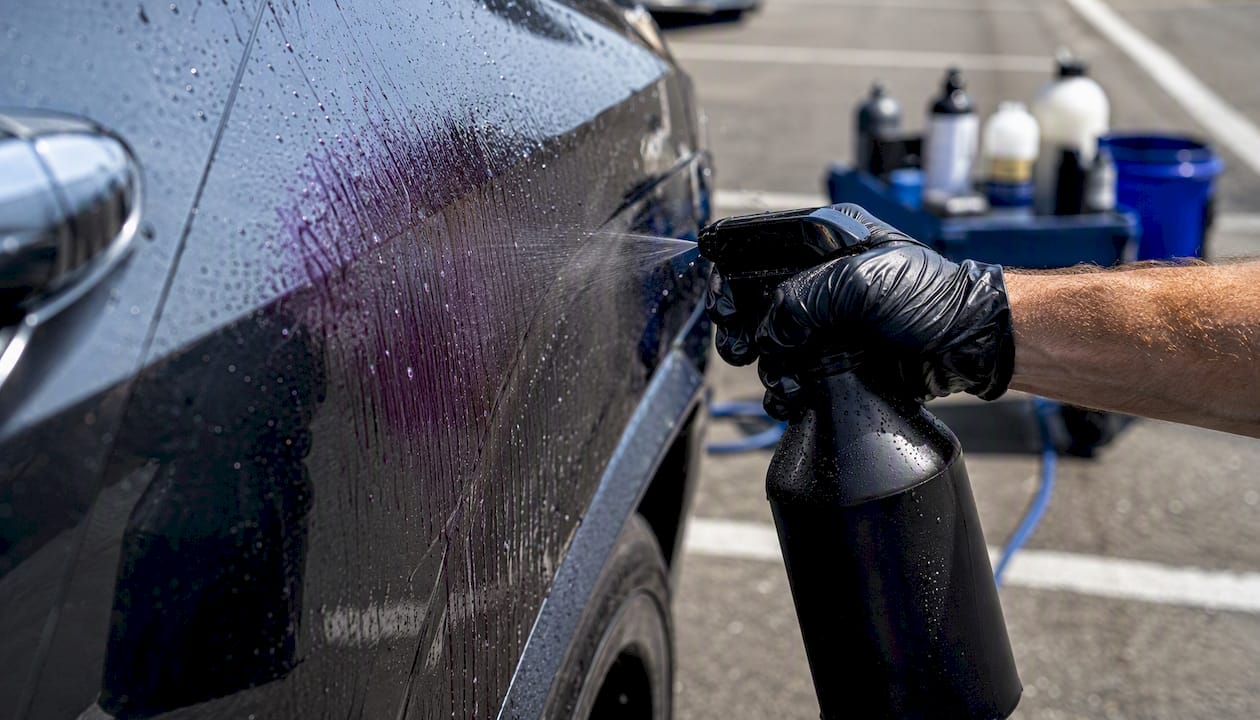
Tar removers handle petroleum-based deposits: road tar, adhesive residue, and asphalt splatter. Apply with a microfiber applicator or spray directly, let it dwell briefly, then wipe gently. Test a small inconspicuous area first on older or single-stage paint.
Key product categories for this stage:
- Iron remover (pH-balanced, color-changing): safe for most painted surfaces and trim
- Tar dissolver (solvent-based): avoid contact with rubber seals and plastic trim; rinse quickly
- All-purpose cleaner (APC) or degreaser: useful for heavily soiled lower panels and wheel arches
Safety: Wear nitrile gloves and eye protection for both iron removers and tar solvents. Work out of direct sun. Rinse all chemicals completely before moving to the next step. On previously coated surfaces, use gentler iron removers and check manufacturer compatibility first.
Pro Tip: Do your chemical decontamination pass before claying, not after. Chemicals soften and loosen bonded particles; clay then physically lifts what’s left. Reversing the order makes clay work harder and wears it out faster.
Why clay bar decontamination matters before any coating
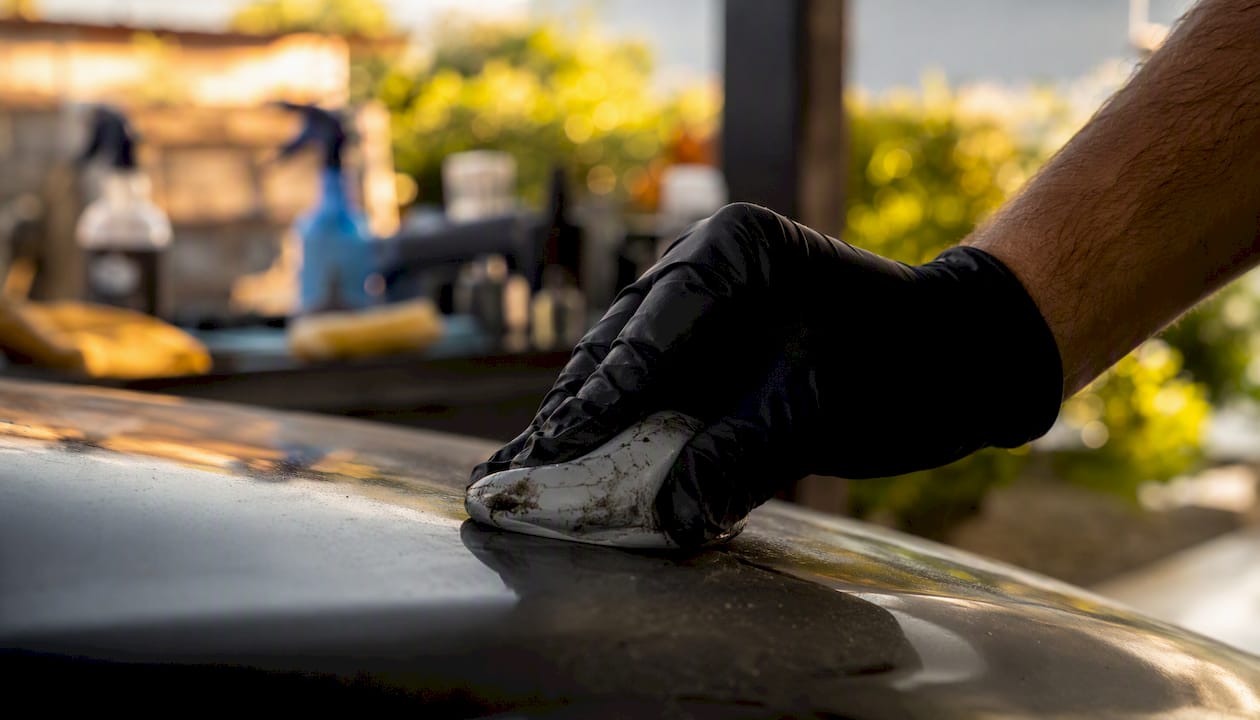
After chemical decon, run your fingertips across a clean, dry panel. If it feels like 80-grit sandpaper instead of glass, you still have bonded contamination. That’s what clay removes: overspray, rail dust, fine industrial fallout, and anything the iron remover couldn’t fully dissolve.
Clay bar, clay mitt, and synthetic clay sponge each work on the same principle — mechanical abrasion with lubrication — but they differ in speed and aggressiveness. A traditional clay bar gives the most tactile feedback and is easiest to fold and re-use. A clay mitt covers large panels faster and works well on moderately contaminated cars. A synthetic clay sponge sits between the two.
Clay decontamination process
- Lubricate the panel with a clay lubricant spray or a diluted quick detailer. Never clay a dry surface.
- Work one panel at a time using light, overlapping back-and-forth strokes. Don’t press hard.
- Feel for resistance as you work. Contamination creates drag; a clean surface feels slick.
- Fold or replace the clay every 2–3 panels, or immediately if you drop it. A contaminated clay bar will scratch paint.
- Wipe residue with a clean microfiber after each panel.
- Verify with the finger-drag test: wrap your hand in a clean plastic bag and drag it across the panel. Smooth = ready. Gritty = clay again.
A clay bar or synthetic alternative removes bonded contamination left after chemical decon; the paint should feel uniformly smooth before you move to polishing or panel prep. Skipping this step means contaminants get sealed under the coating permanently.
Pro Tip: Use a clay mitt on large flat panels (hood, roof, trunk) for speed, then switch to a clay bar for curved areas and door jambs where control matters more.
How do you inspect paint and decide if polishing is needed?
After claying, you have a clean surface. Now you need to decide whether it’s a good surface. Ceramic coatings lock in whatever is underneath them, so swirl marks, water-spot etching, and holograms become permanent features if you coat over them.
Inspect under a bright LED inspection lamp held at a 45° angle to the panel. Work in a dark or semi-dark space so the light reveals defects clearly. Look for:
- Swirl marks (circular scratches from improper washing)
- Holograms (buffer trails from previous machine polishing)
- Water-spot etching (mineral deposits that have etched into the clear coat)
- Random isolated scratches
- Orange peel texture (factory or respray texture)
After visual inspection, run your fingers across the panel. Even after claying, some surfaces feel rough from micro-marring. A paint thickness gauge tells you how much clear coat you have to work with.
Decision framework:
- No visible defects, smooth feel: skip polishing entirely; go straight to panel prep
- Light swirls, minor water spots: one-step finishing polish with a dual-action (DA) polisher
- Heavy swirls, holograms, moderate etching: two-stage correction (medium cut + finishing polish)
- Deep scratches, severe etching, thin clear coat: professional multi-stage correction or accept the defects
When and how to polish paint before coating
Polish only what needs it. Every polishing pass removes a thin layer of clear coat. The goal is correction, not perfection, and starting with the least aggressive approach protects the clear coat you’ll be relying on for years.
Paint correction workflow
- Test spot first: pick a 12-inch section on a less visible panel. Apply your finishing polish with a foam finishing pad on a DA polisher. Inspect the result before committing to the whole car.
- Match pad to product: foam cutting pad + medium-cut compound for heavier defects; foam finishing pad + finishing polish for light swirls. Start with the finishing combo and escalate only if needed.
- Work in sections no larger than 18 x 18 inches. Keep the polisher moving; don’t dwell in one spot.
- Wipe residue after each section with a clean microfiber. Inspect under the lamp before moving on.
- Finish with a finishing polish on every corrected panel, even if you used a cutting compound first. This refines the surface and removes any micro-marring from the cutting stage.
- Final inspection: check every panel under the lamp at multiple angles before moving to panel prep.
Pro Tip: Keep a paint thickness gauge reading before and after each correction pass. If you’re removing more than 5–8 microns per pass on a thin panel, stop and accept the remaining defects. Thin clear coat is a bigger problem than swirl marks.
How to do the final panel prep wipe before coating
This is the step most DIYers underestimate, and it’s where coating failures most often start. Polishing compounds contain oils and fillers that temporarily fill micro-scratches and make paint look better than it is. Those oils will block the coating from bonding to bare clear coat.
The panel-prep wipe removes polishing oils, silicone residue, and any remaining contamination. After the wipe, the paint should be bare, uniform, and ready for coating.
IPA vs. dedicated panel prep products:
- Isopropyl alcohol (70–99%): widely available, inexpensive, effective. Higher concentrations (91–99%) evaporate faster and leave less residue. Dilute to 70% for sensitive single-stage paint.
- Adam’s Surface Prep: a dedicated panel prep solution formulated to remove polishing oils without the harshness of straight IPA. Ready to use, residue-free.
- Stoner Ceramic Prep (Stoner Car Care): designed specifically as a pre-coating wipe. Removes wax, silicone, and polish residue; leaves no film.
Both IPA and branded panel prep products work. The branded options are slightly more forgiving on sensitive paint and trim, and they’re formulated to leave zero residue, which matters when you’re coating immediately after.
Final panel-prep checklist
- Work one panel at a time. Don’t prep the whole car and then coat; prep a panel and coat it before moving on.
- Fold a clean microfiber into quarters. Apply IPA or panel prep to the cloth, not the panel.
- Wipe in a cross-hatch pattern (horizontal pass, then vertical pass) across the panel.
- Flip or replace the cloth after every panel. A contaminated cloth redeposits what you just removed.
- Inspect immediately after wiping. The panel should look matte and uniform, with no oily sheen.
- Repeat the wipe if any residue remains. On stubborn polish oil, a second pass with fresh IPA usually clears it.
Safety: Work in a ventilated space when using IPA at high concentrations. Wear nitrile gloves. Keep away from open flame.
Pro Tip: Some installers use an infrared (IR) lamp after the IPA wipe to reveal persistent water-spot etching that wasn’t visible before. If the IR pass shows etching you missed, re-polish that area before coating.
What environment and timing conditions does coating application require?
The coating goes on after the panel-prep wipe, and the environment at that moment determines whether it flashes and cures correctly.
Ideal application conditions:
- Temperature: 59–77°F (15–25°C). Below 50°F, the coating cures too slowly and may not bond properly. Above 85°F, it flashes too fast and leaves high spots.
- Humidity: below 70% when possible. High humidity slows flash time and can cause water marks in the coating.
- Location: indoors or in deep shade. Direct sun heats panels unevenly and causes the coating to cure before you can level it.
- Dust control: close garage doors, turn off fans, and let dust settle for 30 minutes before starting.
Timing between prep and application:
- Apply the coating within 30–60 minutes of the final panel-prep wipe. The longer you wait, the more airborne contamination settles on the prepped surface.
- Flash time per section (the time between application and leveling) varies by product, but most consumer-grade coatings flash in 1–3 minutes per small section at 70°F.
Post-application cure windows (general guidance):
- Avoid water contact for the first 24 hours.
- Avoid automatic car washes for at least 7 days.
- Full cure typically takes 2–4 weeks depending on temperature and humidity; avoid harsh chemicals during that period.
Pro Tip: Stage your work. Prep and coat one panel completely before moving to the next. This prevents prepped panels from sitting exposed to dust while you work on the other side of the car.
Common prep mistakes and how to fix them
Most coating failures trace back to one of these errors. Catching them before you apply the coating saves you from stripping and restarting.
Relying on a single wash: One pass with regular shampoo leaves wax, sealant, and traffic film on the paint. Fix: rewash with a dedicated stripping shampoo before any other step.
Skipping iron and tar removal: Bonded contamination under a coating creates adhesion failures and visible bumps. Fix: complete iron remover and tar remover passes before claying, even on new cars.
Insufficient claying: If the finger-drag test still feels rough, clay again. One pass isn’t always enough on heavily contaminated paint.
Skipping the panel-prep wipe: Polishing oils on the surface will prevent the coating from bonding. Fix: always wipe with IPA or a dedicated panel prep product immediately before coating, even if you didn’t polish.
Applying in direct sun or a dusty environment: Sun causes uneven flash times; dust embeds in the wet coating. Fix: move to shade or indoors, let dust settle, and check panel temperature before applying.
Signals that a panel needs professional intervention:
- Deep scratches that catch a fingernail
- Water-spot etching that remains after two polishing passes
- Paint thickness gauge reading below 80 microns (insufficient clear coat for safe correction)
- Peeling or flaking clear coat
Your ceramic-coating readiness checklist
Use this before you apply any coating. Check each item as complete or mark it for rework.
Readiness tests before coating:
- Surface feels like glass under the plastic-bag drag test
- No visible polish oil sheen under inspection lamp
- No visible contamination, swirls, or etching you’re not willing to live with permanently
Once a panel passes the checklist, coat it immediately. Don’t prep all panels and then walk away for an hour. Airborne dust settles fast.
When should you hire a professional vs. doing it yourself?
The honest answer depends on four factors: your car’s value, its paint condition, the tools you have, and how much time you’re willing to spend.
DIY is reasonable when:
- The car is lightly used with minimal swirls and no etching
- You have access to a DA polisher, paint thickness gauge, and a clean indoor space
- The paint is in good condition and only needs a strip wash, decon, clay, and panel wipe
Book a professional when:
- The car is high-value or has soft, thin paint that punishes mistakes
- There’s heavy swirl damage, water-spot etching, or holograms that need multi-stage correction
- You don’t have a DA polisher or paint thickness gauge
- You want a documented inspection and a controlled application environment
Cdcautodetailing offers mobile ceramic coating services in South Jersey, including full multi-stage decontamination, paint correction if needed, and controlled coating application. For older vehicles, demo cars, or any paint with significant defects, professional prep removes the guesswork and the risk of sealing problems permanently under the coating. The professional ceramic coating process also includes documented inspection and aftercare guidance, which matters when you’re investing in a coating that’s meant to last years.
How to choose prep wash products for different paint types
Not every car needs the same approach. The right product depends on what’s on the paint and how old or sensitive it is.
New cars (under 2 years old): Focus on stripping dealer-applied products. New cars often arrive with spray wax, glaze, or paint sealant applied at the dealership. A stripping shampoo like Chemical Guys Clean Slate removes those layers without aggressive chemistry. Light polishing may be needed for transport scratches, but multi-stage correction usually isn’t.
Older cars with single-stage paint: Single-stage paint (no separate clear coat) is more sensitive to solvents and aggressive polishes. Test every product on a hidden panel first.
Cars with existing ceramic coatings: If you’re recoating over an old ceramic coating, the prep process changes. You may need a coating-specific strip wash or a light machine polish to remove the degraded coating layer before applying fresh product. Standard wax-stripping shampoos often aren’t aggressive enough to remove a failed ceramic coating.
Dark-colored paint: Dark paint shows swirl marks and water spots more visibly than light paint. Budget more time for the inspection and correction stages. Use a finishing polish as the final correction step to minimize micro-marring.
Lightly contaminated paint: If the car has been garaged and regularly maintained, you may be able to skip the clay stage after confirming with the finger-drag test. Don’t skip chemical decon, though. Iron fallout is invisible until it bleeds through a coating.
How to test surface contamination levels before and after decontamination
You can’t rely on visual inspection alone to confirm a surface is clean enough for coating. Two tests give you reliable, repeatable feedback.
The plastic bag (finger-drag) test: Stretch a thin plastic sandwich bag over your hand and drag it slowly across a dry, clean panel. Contamination creates a gritty, rough sensation. A properly decontaminated surface feels smooth and almost frictionless. Do this test after washing, after chemical decon, and after claying. Each stage should feel progressively smoother.
The water-sheet test: After washing and rinsing, watch how water behaves on the panel. Water that sheets off in a flat film indicates a clean, wax-free surface. Water that beads up tightly means wax or sealant is still present. This test is most useful after the strip wash to confirm the stripping shampoo did its job.
Run both tests after each decontamination stage. If the plastic bag test still feels rough after claying, clay again. If water still beads after the strip wash, rewash with a higher concentration of stripping shampoo or let it dwell longer.
Tools and equipment you need for an effective prep wash
Having the right tools makes each step faster and reduces the risk of introducing new defects.
Washing tools:
- Two buckets with grit guards (one wash, one rinse)
- Foam cannon or snow foam lance (for contactless pre-wash)
- High-quality microfiber wash mitt (replace if it touches the ground)
- Pressure washer or strong garden hose with a jet nozzle
Decontamination tools:
- Iron fallout remover spray
- Tar and adhesive remover
- Clay bar kit or clay mitt with lubricant spray
- Nitrile gloves and safety glasses
Inspection and correction tools:
- Bright LED inspection lamp (swirl finder light)
- Paint thickness gauge (digital, magnetic induction type)
- Dual-action (DA) polisher with foam cutting and finishing pads
- Medium-cut compound and finishing polish
Panel prep tools:
- Adam’s Surface Prep, Stoner Ceramic Prep, or 91–99% IPA
- High-GSM microfiber towels (dedicated, clean, never used for anything else)
- Spray bottle for IPA dilution
Drying and finishing:
- Large, plush microfiber drying towel or waffle-weave drying towel
- Leaf blower or dedicated car dryer (avoids contact marring during drying)
What pros actually prioritize (and where most DIYers get it wrong)
Most guides treat every step as equally important. They’re not.
The three things that actually determine whether a coating performs are: absolute surface cleanliness, conservative correction, and a controlled application environment. Everything else is in service of those three.
The tradeoff I see most often is time versus thoroughness. A full professional prep on a moderately contaminated car takes 6–8 hours before a single drop of coating goes on. Most DIYers compress that to 2–3 hours and skip the iron remover or do a single panel-prep pass with a contaminated cloth. The coating goes on, looks fine for a few weeks, then starts delaminating at the edges or shows contamination bumps under direct light.
The one thing I’d add that most guides skip: photograph every panel before and after correction. If a defect shows up after coating, you need to know whether it was there before prep or whether it happened during application. Documentation protects you and helps you learn what to do differently next time.
CDC Auto Detailing handles the full prep and coating process for you
Doing this right takes the better part of a day, the right tools, and a clean indoor space. If any of those are in short supply, Cdcautodetailing’s mobile ceramic coating service in South Jersey covers the entire process: multi-stage decontamination, paint inspection, correction where needed, panel prep, and controlled coating application at your location.

The mobile setup means you don’t need to drop your car off or work around a shop schedule. Cdcautodetailing brings the controlled environment to you, documents the inspection, and walks you through aftercare so the coating lasts. For anyone dealing with older paint, heavy contamination, or a high-value vehicle, that level of prep is worth more than the coating itself.
Book your ceramic coating service in South Jersey or check the full paint correction and coating packages to find the right fit for your car.
Sources
- How to Prep for Ceramic Coating – Chemical Guys
- How to Prep Your Car for Ceramic Coating – Ceramic Pro
- How to Prep a Vehicle for Ceramic Coating – FEYNLAB®
- Surface Prep Before Ceramic Coating – Removes Polishes …