
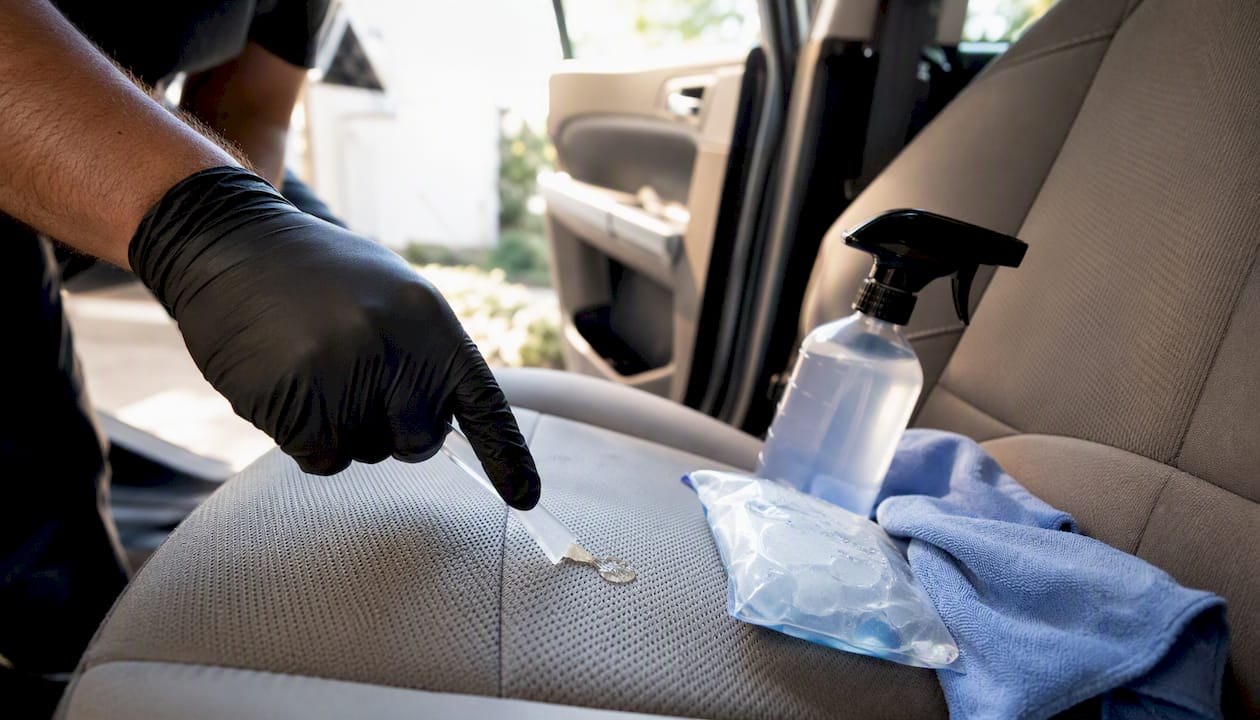
Freeze the gum solid, lift it with a plastic scraper, then clean the residue with isopropyl alcohol or an automotive upholstery cleaner. That’s the whole playbook for gum removal in a car interior, and it works on fabric, carpet, vinyl, and most plastics. Before you grab anything from under the sink, know this: Consumer Reports warns that bleach, ammonia, and hydrogen peroxide can bleach finishes, crack leather, and damage screen coatings. Stick to automotive-specific products.
Here’s the quick sequence:
- Clear loose debris and vacuum the area around the gum.
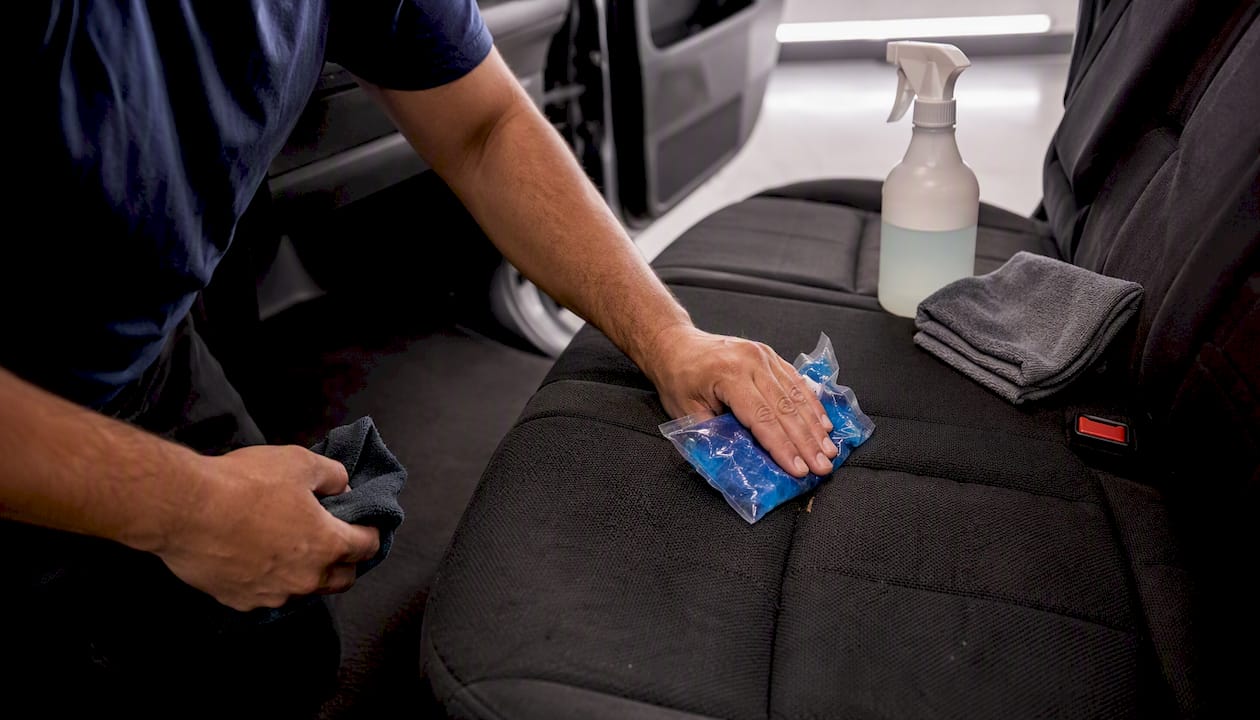
- Press a sealed bag of ice against the gum until it hardens completely.
- Chip away the brittle pieces with a plastic scraper or old credit card.
- Blot any residue with a cloth dampened with 70–91% isopropyl alcohol.
- Follow up with a diluted automotive upholstery cleaner, then blot dry.
Pro Tip: Always spot-test your cleaner on a hidden seam or under the seat before applying it to the visible surface. Some dyes and coatings react badly even to mild solvents.
When DIY feels risky — delicate materials, baked-in gum, or a failed first attempt — CDC Detailing LLC offers mobile interior detailing across South Jersey that handles exactly these situations.
Key Takeaways
Freezing gum solid before scraping, using plastic tools, and finishing with isopropyl alcohol and an automotive upholstery cleaner removes gum from car interiors safely without damaging the surface.
| Point | Details |
|---|---|
| Freeze first, always | Hold a sealed ice bag on the gum for 2–3 minutes before attempting any scraping. |
| Plastic tools only | Metal scrapers cut fibers and scratch vinyl; use a credit card or guitar pick instead. |
| Spot-test every cleaner | Test on a hidden seam before applying isopropyl alcohol or any cleaner to the visible surface. |
| Avoid harsh chemicals | Bleach, ammonia, and hydrogen peroxide damage finishes and leather; use automotive-specific products only. |
| Cdcautodetailing for tough cases | Mobile interior detailing in South Jersey handles baked-in gum, delicate materials, and failed DIY attempts. |
Table of Contents
- How does the freeze-and-lift method work for gum removal?
- What if the gum is old and dried? Try the heat method
- Which solvents are safe for removing gum residue?
- How do you remove gum from different car interior surfaces?
- What tools and products should you actually buy?
- How do you finish the job and protect the area afterward?
- When should you call a professional detailer instead of doing it yourself?
- Why trust this guide?
- The one thing most people get wrong
- Cdcautodetailing handles gum removal when DIY isn’t worth the risk
- Sources
How does the freeze-and-lift method work for gum removal?
Freezing is the industry-standard first step because cold temperatures make gum’s polymer chains brittle. Fresh gum that’s still pliable and sticky becomes rigid enough to chip off in pieces without smearing deeper into fibers.
What you need:
- Ice cubes in a zip-top bag (sealed to prevent water dripping onto upholstery)
- A soft plastic scraper, old credit card, or guitar pick
- Paper towels or a clean microfiber cloth
Steps:
- Hold the sealed ice bag firmly against the gum until it feels solid to touch.
- Test the gum’s hardness with a fingernail. It should feel solid, not springy.
- Work the edge of your plastic scraper under one corner of the gum.
- Apply steady, low-angle pressure and chip pieces away from the fabric.
- Collect pieces with a paper towel immediately so they don’t re-stick.
- Vacuum the area to pull out any small fragments lodged in fibers.
Never use a metal scraper or knife. The edge will cut fibers on fabric seats and scratch vinyl or plastic trim.
What if the gum is old and dried? Try the heat method
Older, cured gum often needs controlled heat before it will release. Rubber floor mats and some hard plastics also respond better to gentle warmth than to freezing, which can make rigid plastics even more brittle.
- Set a hair dryer to medium heat. Hold it 3–4 inches from the gum.
- Move it in slow circles for 20–30 seconds. The gum should turn glossy and soft.
- Press a plastic scraper under the edge and peel slowly, keeping the angle low.
- Reheat briefly if the gum starts to stiffen mid-peel.
- Wipe lifted gum onto a paper towel immediately.
- Follow with isopropyl alcohol on a cloth to remove the sticky film left behind.
Never use a heat gun. Temperatures above what a standard hair dryer produces can melt carpet fibers, warp vinyl, and permanently deform plastic trim panels.
Patience matters here. Rushing the peel when the gum hasn’t softened enough just stretches it back into the fibers.
Which solvents are safe for removing gum residue?
Once the bulk of the gum is gone, a sticky polymer film usually remains. Isopropyl alcohol at 70–91% concentration and automotive adhesive removers dissolve this film effectively, but each needs a follow-up rinse.
- Dampen a clean microfiber cloth with isopropyl alcohol. Never pour it directly onto the surface.
- Blot from the outer edge of the residue toward the center to avoid spreading it.
- Repeat with a fresh section of cloth until the stickiness is gone.
- Apply a small amount of diluted automotive upholstery cleaner to the spot.
- Blot again, then press a dry microfiber cloth onto the area and hold for 30 seconds.
Pro Tip: If you use a commercial adhesive remover like a Goo Gone Automotive-style product, always follow with an upholstery cleaner rinse. These products leave an oily film that attracts dirt fast if you skip that step.
Bleach, ammonia, hydrogen peroxide, gasoline, and nail polish remover are off the table entirely. Consumer Reports’ guidance is clear: these chemicals degrade finishes, crack leather, and can permanently damage screen coatings. The same applies to food-based “hacks” like peanut butter or mayonnaise, which professional detailers warn simply trade a gum stain for a grease stain and a lingering odor.
How do you remove gum from different car interior surfaces?
The method changes depending on what the gum landed on. Using material-specific products and minimal moisture prevents watermarks, headliner sag, and finish damage. Dyson’s car interior guidance also recommends vacuuming first and cleaning top to bottom before any spot treatment.
| Surface | First step | Residue cleaner | Key caution |
|---|---|---|---|
| Fabric & carpet | Freeze, then scrape | Isopropyl alcohol, then upholstery cleaner | Don’t over-wet; blot, never scrub |
| Leather | Gentle freeze (brief) or heat | Leather-specific cleaner, then conditioner | Avoid solvents that dry leather; condition after every clean |
| Vinyl & plastic | Freeze or heat | Mild soapy water or isopropyl alcohol | No abrasive scraping; avoid strong solvents |
| Headliner | Ice method, minimal contact | Spot-treat with diluted upholstery cleaner | Never saturate; moisture loosens adhesive backing |
Never use on any surface: bleach, ammonia, hydrogen peroxide, gasoline, nail polish remover.
For leather specifically, freeze only briefly. Prolonged cold can crack the surface. Always follow any cleaning with a leather conditioner to restore suppleness. For more on leather-safe cleaners, Cdcautodetailing has a dedicated guide.
What tools and products should you actually buy?
A small kit covers nearly every gum incident. Check the best interior car cleaning options for product recommendations, but here’s the core list:
Keep on hand:
- Zip-top bags and ice
- Soft plastic scrapers or an old credit card
- Tweezers (for pulling lifted pieces from tight seams)
- Microfiber towels (several — you’ll go through them)
- Hair dryer
- 70–91% isopropyl alcohol
- pH-neutral automotive upholstery cleaner
- Leather cleaner and conditioner (if you have leather seats)
- Automotive adhesive remover (Goo Gone Automotive or equivalent — check the label for “automotive-safe” and “non-bleaching”)
Skip entirely: household bleach, ammonia-based glass cleaners, hydrogen peroxide, gasoline, nail polish remover. These are all documented interior killers. For vacuum tool recommendations that also help pull gum fragments from carpet fibers, pet hair removal techniques for cars cover the same crevice and upholstery attachments that work well here.
How do you finish the job and protect the area afterward?
Removing the gum is step one. Leaving the spot clean, dry, and protected is what keeps it from becoming a dirt magnet or a source of odor.
- Apply a diluted automotive upholstery cleaner to the treated spot and blot with a clean microfiber cloth.
- Press a dry towel onto the area and hold for 30 seconds to pull out remaining moisture.
- Let the spot air-dry completely. Point a fan at it if you’re in a hurry.
- Once dry, vacuum to lift any fibers that flattened during cleaning.
- If a sugary odor lingers, sprinkle a small amount of baking soda on the dry spot, leave it for 15–20 minutes, then vacuum. An enzyme cleaner works for persistent odors.
- Apply a fabric protectant or leather conditioner once the surface is fully dry.
Pro Tip: Spot-test any fabric protectant on a hidden area first and wait until it’s completely dry before using the vehicle. A wet protectant can transfer to clothing and create a new problem.
Car and Driver recommends seat covers and regular vacuuming as the simplest long-term prevention. Kick mats behind front seats are worth every dollar if you have kids. For a full aftercare workflow, the car fabric protection guide covers the clean-then-protect sequence in detail.
When should you call a professional detailer instead of doing it yourself?
Some situations make DIY the wrong call:
- Multiple gum deposits or a large area affected
- Gum baked in by summer heat (it bonds differently to fibers)
- Delicate materials: suede, Alcantara, perforated leather
- A DIY attempt that left a stain or spread the gum further
- Headliner involvement, where moisture risk is highest
Professional detailers handle difficult cases with hot-water extraction and commercial-grade adhesive removers that aren’t available to consumers. The outcome is cleaner, the risk of permanent damage is lower, and odor removal is part of the process. For a sense of what a full interior detail covers, Cdcautodetailing’s detailing service overview lays it out clearly.
Why trust this guide?
This guide draws on guidance from Consumer Reports, Good Housekeeping, Dyson, Car and Driver, The Mobile Buff, and Cardetox — all cited inline. The steps reflect what professional detailers actually do, not what sounds plausible.
- Spot-test recommendation: backed by Good Housekeeping and Dyson lab guidance
- Chemical avoidance list: sourced directly from Consumer Reports’ automotive interior testing
- Freeze-first method: confirmed by professional mobile-detailing how-tos
- Author: Charles, professional detailer at CDC Detailing LLC, which provides mobile interior detailing, ceramic coatings, and fleet services across South Jersey
- Professional escalation: aligned with The Mobile Buff’s guidance on when hot-water extraction is necessary
The one thing most people get wrong
Most car owners reach for whatever cleaner is closest. That’s usually a glass cleaner with ammonia or a multi-surface spray with bleach. Both will remove the gum smell and leave behind something worse: a bleached patch on fabric or a cracked leather seam that no conditioner fully fixes.
The other mistake is skipping the spot-test. A quick dab on the underside of the seat takes 30 seconds. Skipping it and discovering your cleaner pulls the dye out of your seat takes considerably longer to accept.
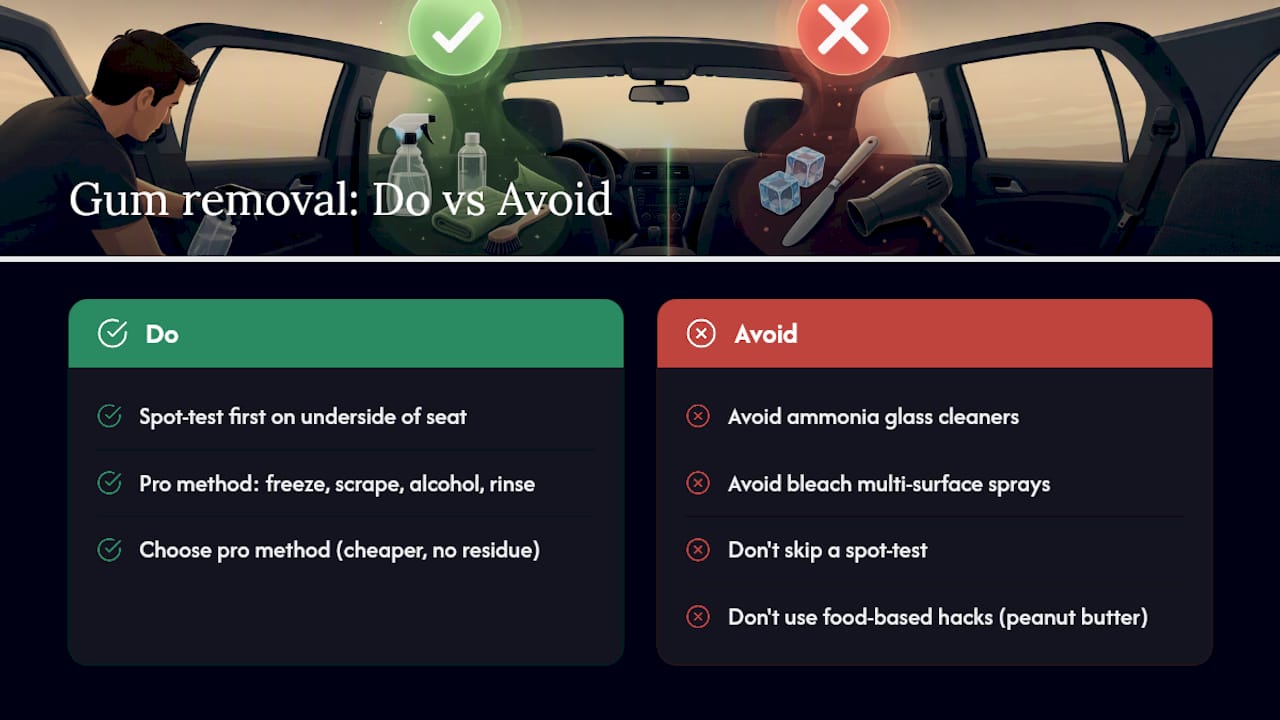
Food-based hacks are the third trap. Peanut butter works, technically, but you’re trading a gum stain for a grease stain that smells like a deli counter on a warm day. The professional approach — freeze, scrape, alcohol, rinse — costs less and leaves nothing behind.
Cdcautodetailing handles gum removal when DIY isn’t worth the risk

Cdcautodetailing’s mobile interior detailing service comes to you anywhere in South Jersey, which means no driving to a shop with a gum-covered seat. Charles and the team assess the material on-site, choose the right extraction method (including hot-water extraction for stubborn or baked-in gum), and leave the surface clean, dry, and protected. Gum removal can be handled as a standalone spot service or as part of a full interior detail. To see what a professional interior service covers, visit the mobile detailing service page and schedule a visit.
Sources
- How to Clean Your Car’s Interior – Consumer Reports
- How to Remove Gum from Car Upholstery: The Professional’s Guide – The Mobile Buff
- How to Get Gum Out of Car Carpet (Step-by-Step Guide) – Cardetox
- How to Clean a Car Interior: A Step-by-Step Guide | Dyson US
- How to Deep Clean a Car Interior, According to Experts – Good Housekeeping