
The safest way to handle headliner stain removal is a low-moisture “mist-and-blot” method: lightly dampen a microfiber towel with a 50/50 white vinegar and distilled water mix (or an upholstery-safe cleaner), press it against the stain, and lift straight up. Never spray liquid directly onto the fabric, never soak it, and never scrub in circles. If the headliner sags, smells musty, or a stain keeps coming back after it dries, stop and call a professional before you make things worse.
TL;DR:
- Using a low-moisture mist-and-blot method with a microfiber towel prevents damage and ensures effective stain removal without soaking the headliner.
- Always test cleaning solutions on a hidden area to check for fabric or adhesive reactions and avoid aggressive scrubbing that can cause sagging or fiber damage.
- For water stains, blot with distilled water first, then apply a vinegar-water mixture if needed, but never spray directly onto the fabric.
- Treat grease, nicotine, and ink stains with specific steps such as absorbing powders or alcohol, and avoid all-purpose or harsh cleaners that can worsen the damage.
- If the fabric begins to pull away, soften, sag, or the stain recurs after cleaning, stop immediately and call a professional to prevent further harm.
Table of Contents
- What You Need for Headliner Stain Removal
- How Do You Clean Stains Off a Car Headliner Step by Step?
- What’s the Best Way to Treat Different Types of Headliner Stains?
- When Should You Stop Cleaning and Call a Professional?
- What Do Professional Detailers Know That Most Guides Skip?
- How to Prevent Future Headliner Stains
- Why Most Headliner Advice Gets the Timing Wrong
- Get Professional Help With Stubborn Headliner Stains
- Sources
- FAQ
What You Need for Headliner Stain Removal
Gathering the right supplies before you start prevents the two mistakes that ruin most headliners: too much liquid and too much pressure. The thin foam backing behind the fabric absorbs moisture fast, and once it’s saturated, the glue holding the headliner to the roof can let go, leading to sagging that no amount of cleaning fixes.
Here’s what belongs in your kit:
- Microfiber towels (at least two or three): one for misting and blotting, others for drying and buffing.
- A soft, unused paint brush for gentle agitation on stubborn spots, since a soft brush provides agitation without the twisting motion that damages fibers.
- A fine-mist spray bottle for applying diluted cleaner to a towel, not the fabric itself.
- A lint roller to lift dust and debris before you introduce any moisture.
- Cotton swabs for tight seams, edges, and small stains like ink dots.
- Distilled water, mixed 50/50 with white vinegar, or a fabric-safe upholstery cleaner formulated for automotive interiors.
- A small fan to speed drying and keep air moving across the fabric after you clean it.
Distilled water matters more than most people realize. Tap water carries minerals that can leave faint rings behind once it dries, which defeats the purpose of cleaning a stain in the first place. Skip ammonia-based glass cleaners, strong all-purpose cleaners, and anything with bleach. Those products break down the adhesive faster than they break down the stain.
How Do You Clean Stains Off a Car Headliner Step by Step?
This is the part where patience pays off. Rushing through headliner cleaning is how a coffee stain turns into a sagging ceiling. The whole process, according to detailing guides, typically takes 30 to 60 minutes of active cleaning, plus drying time on top of that.
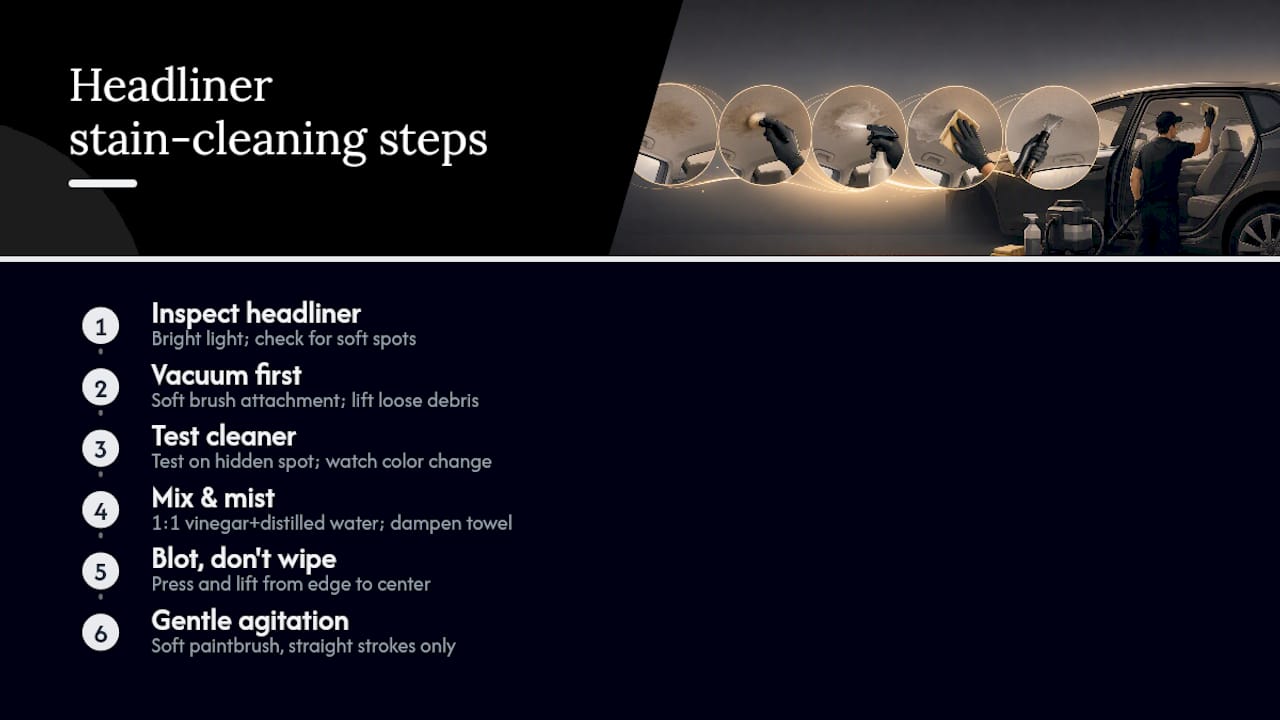
1. Inspect the headliner in good light.
Park somewhere bright, or use a work light, and look closely at the fabric before you touch it. Run your hand gently over the area. Soft spots, sagging, or a fabric that feels loose from the backing are signs you’re dealing with more than a stain, and cleaning could make it worse rather than better.
2. Vacuum first, always.
Use a soft brush attachment to lift loose dirt, dust, and debris. Skipping this step means you’ll be grinding grit into the fabric during the blotting process, which can leave micro-scratches on lighter-colored headliners.
3. Test your cleaner on a hidden spot.
Pick a small area near the edge, behind a sun visor, or close to a trim panel. Apply a tiny amount of your cleaning solution to a towel, dab it on the test spot, and wait several minutes. Watch for color change, fabric puckering, or any lifting at the seams. If everything looks normal, you’re clear to proceed. Professionals treat this step as non-negotiable, since testing in an inconspicuous area first is standard practice for a reason: headliner fabric reacts differently depending on age, sun exposure, and the adhesive underneath.
4. Mix your solution.
Combine equal parts white vinegar and distilled water in your spray bottle. If you’re using a commercial upholstery cleaner instead, check the label for “safe on automotive fabric” language. Either way, the rule stays the same: apply the product to a cloth, never spray it directly onto the headliner.
5. Mist the towel, not the ceiling, following expert advice on how to clean a car dashboard properly which highlights the importance of minimal-moisture techniques for delicate surfaces.
Lightly spray your microfiber towel until it’s damp, not wet. You want just enough moisture to lift the stain, not enough to seep through the fabric into the foam backing.
6. Blot, don’t wipe.
Press the damp towel firmly against the stain and lift it straight up. Repeat this motion, working from the outer edge of the stain toward the center, which keeps you from spreading it wider. Rotate to a clean section of towel every few passes so you’re not just smearing the stain back into the fabric.
7. Add gentle agitation only if needed.
For dried or set-in stains, use the soft paint brush in short, straight back-and-forth strokes. Avoid circular scrubbing entirely. Circular motion braids the short fibers in headliner fabric, and once that happens, the texture change is permanent. A worn patch that looks fuzzy or matted usually started as someone’s well-meaning scrub session.
8. Dry immediately after each pass.
Follow every misting and blotting cycle with a dry towel to pull out excess moisture right away. Don’t let the area sit damp while you decide what to do next.
9. Keep air moving.
Point a small fan at the treated area once you’ve finished blotting. Crack the windows or leave the doors open if weather allows. Full drying can take a few hours depending on humidity, and rushing this part by using a hair dryer or heat gun does more harm than good, since heat can push moisture deeper into the foam rather than pulling it out.
Pro Tip: Use two fingers of pressure when blotting, about what you’d use to press a doorbell. Anything harder pushes moisture into the foam backing instead of pulling the stain out of the fabric.
What’s the Best Way to Treat Different Types of Headliner Stains?
Not every mark on your ceiling responds to the same fix. Matching the technique to the stain saves you time and keeps you from over-treating fabric that only needed a light touch.
- Watermarks and water rings: Blot with plain distilled water first, then follow with the vinegar and water mix if the ring persists. If the mark keeps returning after the headliner dries, you likely have an active leak, and cleaning won’t solve that until the water source gets fixed.
- Grease and oil stains: Skip all-purpose cleaners and degreasers. They tend to soak fast and spread the oil sideways instead of lifting it. Start with an absorbent powder like cornstarch pressed onto the spot to pull grease out, then follow with a light dab of upholstery cleaner on a cloth.
- Smoke and nicotine residue: These stains respond best to several light passes with a foam-based cleaner rather than one heavy application. Foam sits on the surface and blots away cleanly, which controls moisture delivery better than a liquid spray. Keep windows cracked during and after cleaning to help odor lift out of the fabric.
- Ink stains: Dab a small amount of isopropyl alcohol onto a cloth, never onto the fabric itself, and blot from the outside of the stain inward after testing on a hidden spot. Ink spreads easily, so patience beats speed here.
- Chewing gum: Fill a sealed plastic bag with ice and hold it against the gum until it hardens, then gently peel it away. Scraping or picking at gum tears fibers and often leaves a bigger mess than the gum itself.
When Should You Stop Cleaning and Call a Professional?
Some headliner problems aren’t cleaning problems at all. Knowing the difference saves you from turning a $20 supply run into a full headliner replacement.
A surface stain sits on top of the fabric and lifts with blotting. Foam or adhesive failure looks different: the fabric feels soft or spongy, it visibly sags away from the roof, or you notice a musty smell that clings even after the area dries. Mold or a recurring stain that returns after drying usually points to trapped moisture or an active leak, not dirt you missed.
Stop cleaning immediately if the fabric starts to pull away from the backing, softens under light pressure, or the stain spreads rather than shrinks. Continued cleaning at that point accelerates the damage.
Before contacting a detailer, have ready:
- Clear photos of the stain and any sagging, taken in good light
- Notes on when the stain appeared and whether it’s grown or returned
- Any history of leaks, spilled liquids, or prior cleaning attempts
- The approximate age of the vehicle and headliner, if known
A straightforward cleaning job runs 30 to 60 minutes of hands-on work. Re-gluing a sagging headliner or replacing the panel entirely is a far more involved job, both in time and cost, which is exactly why catching the early warning signs matters.
What Do Professional Detailers Know That Most Guides Skip?
The gap between amateur and professional results usually comes down to restraint, not equipment. Detailers stop at the first sign of fabric softening rather than pushing for one more pass, because continued cleaning after that point accelerates adhesive failure rather than lifting more of the stain.
A few habits separate a clean result from a damaged one:
- Rotate to a fresh section of towel every two or three blots so you’re never pressing a stain back into fabric you just lifted it from.
- Cap agitation at three or four gentle brush passes per spot before switching to patience and a second drying cycle instead of more scrubbing.
- Treat any headliner older than eight or ten years with extra caution. Older adhesive holds less margin for error.
For readers who want the full interior routine once the headliner is handled, the interior car cleaning workflow covers the rest of the cabin using the same minimal-moisture philosophy. If you’re weighing DIY against hiring it out, what car detailers use to clean interior surfaces breaks down the professional-grade tools that make the difference on stubborn jobs.
One-line checklist before calling a pro: if the stain returns after drying, the fabric feels loose, or you smell mildew that wasn’t there before, those are the three signs that mean it’s time for a professional look rather than another cleaning attempt.
How to Prevent Future Headliner Stains
Prevention takes far less effort than removal, and it starts with habits rather than products.
- Keep food and drinks away from headliner contact, especially with kids or passengers riding in the back seat.
- Ask passengers to keep hands, feet, and sticky snacks down and away from the ceiling fabric.
- Treat spills the moment they happen using the same mist-and-blot approach outlined above. A fresh stain lifts in one pass; a week-old stain might take five.
- Consider a fabric protectant spray once the headliner is completely clean and dry, never on damp fabric, and always test it on a hidden section first.
Protectants can reduce how deeply future spills soak in, but they’re not a substitute for quick cleanup. A protected headliner with a spill left overnight will still stain. If you’re dealing with fabric stains elsewhere in the cabin too, the guide on removing stains from car seats uses the same vinegar and distilled water approach with seat-specific adjustments.
Why Most Headliner Advice Gets the Timing Wrong
Most DIY guides treat headliner cleaning like carpet cleaning: scrub harder, use more product, repeat until it’s gone. That instinct is exactly backward. The fabric and foam underneath punish aggression, and by the time sagging shows up, the damage already happened days or weeks earlier from a cleaning session that felt fine at the time.
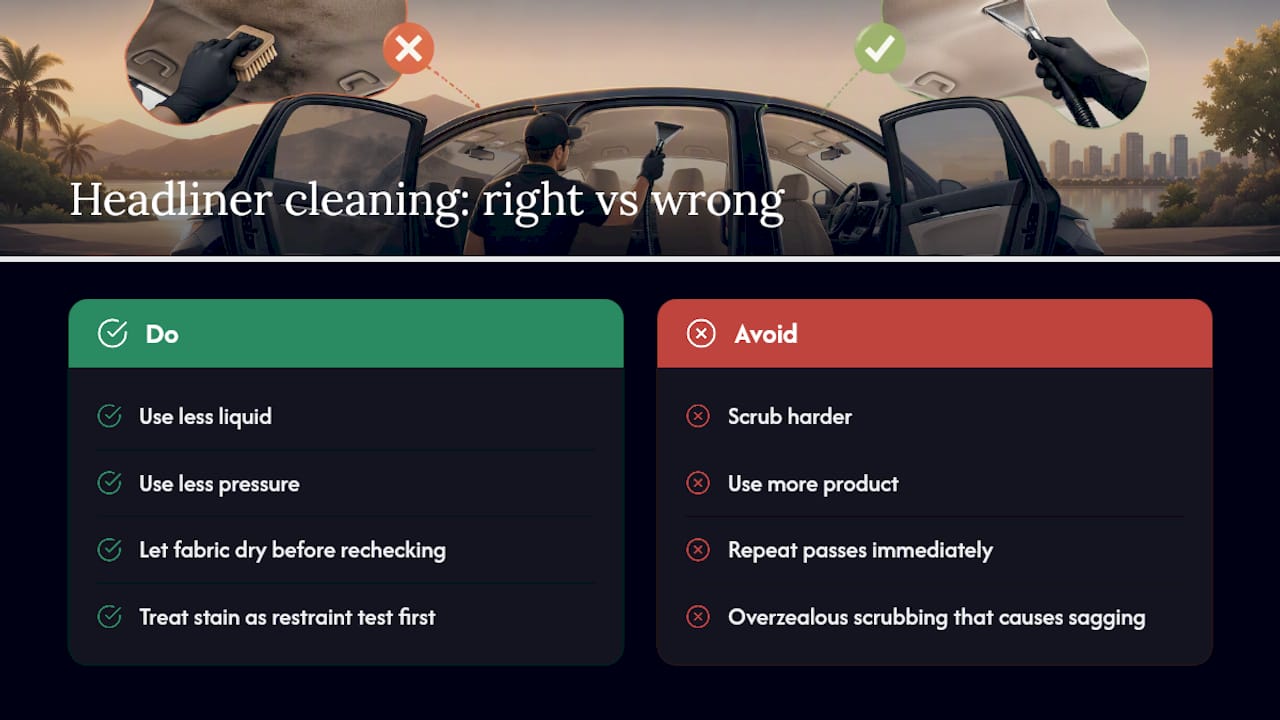
The advice that actually holds up under scrutiny is almost boring in its simplicity: less liquid, less pressure, more patience. Readers consistently underestimate how much a single overzealous scrubbing pass can cost them, both in dollars and in the visible dip that never fully goes away. The judgment call that matters most isn’t which cleaner to buy. It’s knowing exactly when to put the towel down and let the fabric dry before deciding whether another pass is even necessary.
If there’s one thing worth prioritizing above every product recommendation, it’s this: treat every headliner stain as a test of restraint first, and a cleaning problem second. Readers who follow that order rarely end up needing a replacement panel. Readers who don’t usually do.
— Charles
Get Professional Help With Stubborn Headliner Stains
Some stains are DIY-friendly. Others, especially set-in grease, nicotine buildup, or a headliner that’s already showing early sag, need hands that have done this hundreds of times. Professional mobile interior detailing services can bring expert care straight to your driveway, helping you avoid guesswork and damage.

The Interior Detail service starts at $275 and covers headliner care alongside the rest of the cabin, using the same low-moisture techniques outlined in this guide but with commercial-grade equipment that pulls stains without oversaturating the fabric. If your vehicle needs a fuller refresh inside and out, the detail packages starting at $375 bundle interior and exterior work into one appointment. Book a visit and let a professional look at the stain before it becomes a bigger repair.
Sources
- How to Clean a Car Headliner | AutoZone
- How to Clean Your Car’s Headliner | Capital One Auto Navigator
- How to Safely Clean a Car Headliner (Without the Sag) – Jimbo’s Detailing
- How To Clean Headliner In Car | Chemical Guys
- How To Get Old, Nasty Stains Out Of Your Car’s Headliner | Jalopnik
FAQ
How do you get rid of watermarks on a headliner?
Blot the area with distilled water first, then follow with a 50/50 white vinegar and distilled water mix if the ring remains. If the watermark keeps returning after the fabric dries, check for an active leak before cleaning again, since the water is likely coming from somewhere other than the original spill.
What’s the best water stain remover for car headliners?
A 50/50 mix of white vinegar and distilled water applied to a cloth, never sprayed directly on the fabric, handles most water stains safely. Distilled water avoids the mineral spotting that tap water can leave behind once it dries.
How do you clean a headliner without ruining it?
Use the mist-and-blot method: dampen a towel, press and lift straight up, and always test your cleaner on a hidden spot first. Avoid spraying liquid directly on the fabric, skip circular scrubbing, and stop immediately if the material starts to feel soft or pull away from the backing.
What’s the best fabric cleaner for a car headliner?
An upholstery-safe fabric cleaner labeled for automotive interiors works well, as does the vinegar and distilled water mix for lighter stains. Foam-based cleaners tend to outperform liquid sprays because the foam sits on the surface and blots away without soaking into the foam backing underneath. If a stain resists DIY methods, Cdcautodetailing’s interior detailing service uses professional-grade products suited to headliner fabric specifically.