
Flood-rinse every exposed surface and the full undercarriage first, then follow with a salt-neutralizing pre-soak or pH-neutral soap, a full rinse, and a complete dry. Do this every 7 to 14 days while roads are actively salted, monthly at the very least, and run one deep decontamination wash once winter ends. Skip any step and salt gets a foothold your paint and frame won’t thank you for later.
TL;DR:
- Regularly wash the undercarriage with a low-pressure flood rinse before targeting heavy deposits, especially after snowfalls or every few weeks during winter.
- Use a salt-neutralizing pre-soak with dwell time to dissolve ionic bonds, then wash with neutral soap and dry thoroughly, paying attention to door jambs and seals.
- Focus on cleaning the undercarriage at least every two weeks, avoiding high-pressure damage, and verify salt removal with a conductivity meter or tactile check before finishing.
- Apply specific salt-neutralizing surfactants as a pre-soak, avoiding household cleaners that can damage paint or coatings, and always follow proper sequencing for decontamination.
- Prioritize undercarriage rinsing over cosmetic detailing for the best corrosion protection during winter, and consider professional services for thorough decontamination, especially after prolonged salt exposure.
Table of Contents
- How Do You Remove Road Salt From a Car?
- Why Does the Undercarriage Need Special Attention?
- What Products Actually Neutralize Road Salt?
- How Do You Get Salt Stains Out of Car Carpet?
- How Often Should You Wash Salt Off Your Car in Winter?
- What Do Detailing Professionals Do Differently?
- What Do Most People Get Wrong About Salt Removal?
- Book a Mobile Decontamination Wash With Cdcautodetailing
- Sources
How Do You Remove Road Salt From a Car?
Removing road salt isn’t complicated, but the order of operations matters more than most people think. Salt crystals act like tiny abrasives when you drag a wash mitt across them dry, so the sequence below is built to dissolve salt before anything touches the paint.
Here’s the workflow, start to finish:
- Pre-rinse top to bottom with low pressure, high volume. Use a hose or pressure washer on a wide fan setting to flood the roof, hood, doors, and rocker panels first, then move down to the wheel wells and undercarriage. The goal isn’t to blast salt off. It’s to dissolve it. Salt crystals need water volume and contact time more than force.
- Apply a foam or salt-neutralizing pre-soak and let it dwell. Give it 3 to 5 minutes to break the ionic bonds holding salt to metal and paint. Skipping dwell time is the single biggest reason people re-wash the same car twice in one session.
- Wash using a two-bucket method or a touchless system. Pay extra attention to wheel wells, rocker panels, lower door edges, and the front bumper, since these areas take the heaviest spray from passing traffic.
- Rinse thoroughly, working from the top down again. Any leftover soap or dissolved salt film needs to go, not just get moved around.
- Dry completely, and pop the doors and trunk open for a few minutes. Trapped water in door jambs, trunk seals, and weatherstripping is exactly where hidden corrosion starts.
That last step trips people up constantly. You can do a flawless wash and still leave standing water sitting in a rocker panel drain hole or a trunk seal channel, where it sits against bare metal for days. Modern liquid brine treatments (magnesium chloride and calcium chloride) make this worse than the rock salt your parents dealt with, because these brines are hygroscopic. They pull moisture from the air and reactivate even after they look dry, which is part of why plain water sometimes isn’t enough on its own to fully lift them, according to EngineerSkill’s guide to washing salt off vehicles.
Touchless washes have a place here, particularly for a quick mid-week rinse when you don’t have time for a full wash. But touchless alone rarely gets into wheel well seams or around emblem edges where salt likes to hide. If you’re doing a real decontamination wash, plan on contact cleaning at least once every week or two.
Pro Tip: Wash on a day above freezing, ideally with a few hours of sun or above 40°F ambient air left in the day. A car washed at 25°F just refreezes the water you left behind, and refrozen water in a door seal can crack rubber and force gaps that let salt spray back in.
One detail people miss: the order of wash steps changes depending on how long salt has been sitting. A car washed within a day or two of a snow event just needs the standard routine above. A car that’s gone three or four weeks without a wash, common during a long cold stretch, often has a slight white haze baked into the lower panels. That haze is dried mineral residue, and it usually needs a second foam application and a longer dwell time to fully break down, not more scrubbing pressure. Scrubbing harder on dried salt film is how people put fine scratches into clear coat that wasn’t going anywhere near that dirty to begin with.
If you’re building this into a regular routine rather than a one-off emergency clean, a written checklist helps you keep the sequence consistent even when you’re rushing through it in a cold garage. Cdcautodetailing’s printable car cleaning checklist breaks the quick-clean version down from the full detail version, which is useful for exactly this kind of seasonal split.
Why Does the Undercarriage Need Special Attention?
The undercarriage is where road salt actually wins the fight against your car, not the paint. Frame rails, brake lines, exhaust hangers, and suspension components sit in a low, enclosed space where salt gets trapped against bare or lightly coated metal, then reactivates every time humidity rises. That combination of trapped salt and repeated moisture cycling is exactly what corrodes steel from the inside out, and it happens largely out of sight until a brake line fails or a subframe shows visible rust-through.
NAPA’s guidance for winter maintenance recommends washing regularly every couple of weeks or immediately after heavy snowfall, with the undercarriage as a specific target rather than an afterthought, according to NAPA AutoPro’s winter car care advice. A regular exterior wash that skips the undercarriage is treating half the problem.
Here’s how to actually clean it without damaging anything underneath:
- Start with a wide 40-degree fan nozzle at roughly 800 to 1000 PSI, working front to rear in slow, overlapping passes to dissolve the bulk of the brine film.
- For heavy, caked-on deposits around wheel wells and suspension arms, switch to a narrower 15-degree nozzle at 1200 to 1500 PSI, but keep the wand tip 12 to 18 inches from the surface.
- Use a dedicated undercarriage wand or bar if you have one. Many self-service wash bays include a coin-operated undercarriage spray specifically for this.
- Stay away from CV boots, wheel speed sensors, and any exposed wiring connectors with direct high-pressure spray. These can be forced open or damaged by concentrated pressure at close range.
- Walk the underside afterward with a flashlight, checking wheel well liners, subframe seams, and exhaust hanger brackets for any remaining white or gray film.
Professional detailers sometimes go a step further and check runoff water with a TDS or conductivity meter, a small handheld tool that measures dissolved salts in water. Regular tap water in most areas reads somewhere around 50 to 200 microsiemens per centimeter. If runoff from your undercarriage rinse is still reading well above that, closer to 500 or higher, there’s meaningful salt still coming off, and it’s worth another rinse cycle before calling it done.
Pro Tip: If you don’t own a conductivity meter, run your hand along a cooled, dried section of frame rail after washing. A slightly gritty or tacky feel usually means salt film is still there, even if it looks clean.
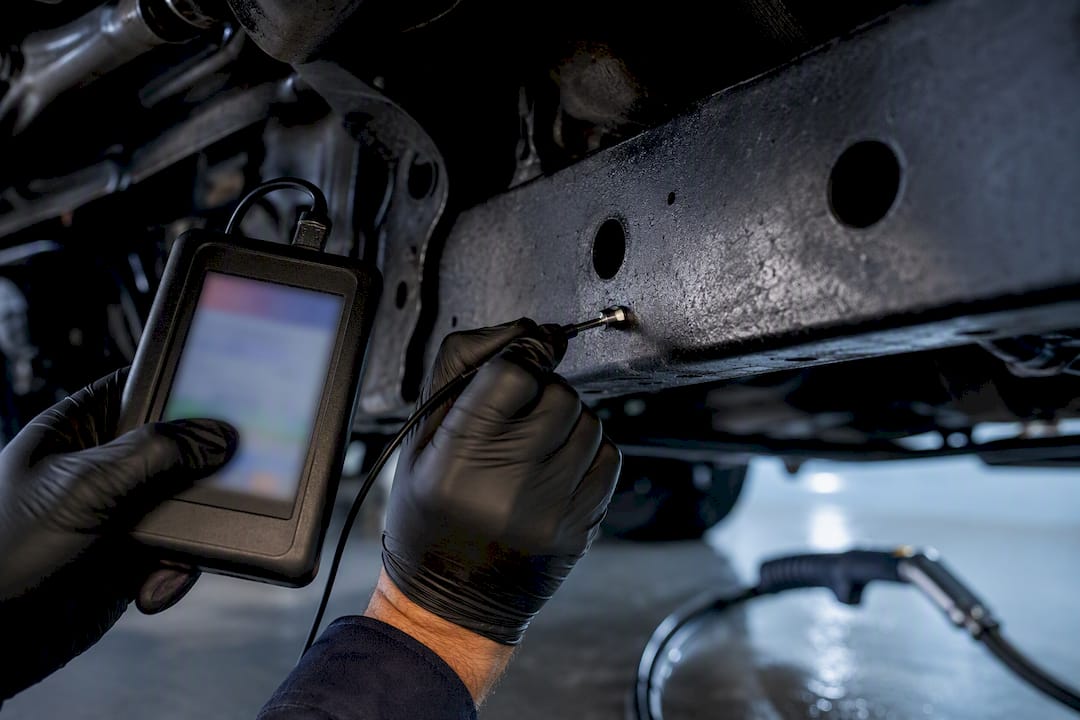
Salt-related undercarriage corrosion isn’t a cosmetic issue you can paint over later. It eats brake lines, fuel lines, and structural rust points that inspection stations specifically look for. Consumer Reports treats the undercarriage rinse as a core part of winter car care, recommending it as part of a regular wash routine, according to Consumer Reports’ guidance on washing off road salt.
What Products Actually Neutralize Road Salt?
Plain water gets most of the salt off. It doesn’t get all of it, and the film it leaves behind is exactly what modern liquid brines are designed to stick to. That gap is where specific product categories earn their place in the trunk.
Salt-neutralizing surfactants are formulated to target the ionic bonds in sodium chloride and calcium chloride brine specifically, lifting the residue rather than just diluting it. These work best as a pre-soak, sprayed on and left to dwell for a few minutes before any rinsing or agitation, because that’s when the chemistry actually does its work.
pH-neutral car soaps are your everyday wash product, and they’re fine for regular cleaning, but they’re not built to break the specific mineral bonds that road brine creates. Think of them as the maintenance layer, not the decontamination layer.
Degreasers solve a different problem entirely: they strip road grime and oily undercarriage buildup, but using a strong degreaser on painted surfaces can strip wax or sealant along with the dirt. Save these for the undercarriage and wheel wells, not the body.
A few practical buying notes worth knowing before you’re standing in an aisle comparing bottles:
- Read the label for caustic warnings. Anything marked as high alkaline or labeled for heavy-duty engine degreasing can dull clear coat or strip a ceramic coating if used on exterior paint.
- Never substitute household dish soap or laundry detergent. Both strip wax and sealants fast and can leave streaking on modern clear coats.
- Foam cannons work well for even coverage of a neutralizing pre-soak across large panels, but a simple pump sprayer does the same job on wheel wells and rocker panels for less money.
- Look for products specifically marketed as “salt remover,” “de-icer wash,” or “winter decontamination,” since these are formulated around brine chemistry rather than general dirt.
The sequencing matters as much as the product choice. Pre-soak with the neutralizer, dwell, then wash with your regular pH-neutral soap, then rinse. Trying to combine steps by mixing a neutralizer into your wash bucket usually dilutes it below an effective concentration.
How Do You Get Salt Stains Out of Car Carpet?
Salt doesn’t stay outside the car. Every time you get in with wet boots, you’re tracking dissolved brine straight into the carpet fibers and floor mats, where it dries into a white, crusty residue that’s genuinely harder to remove than exterior salt film.
Follow this sequence for actual removal, not just surface cleaning:
- Vacuum thoroughly before adding any liquid. Loose salt crystals ground into carpet fibers will drive deeper into the pile if you spray them wet first, so get everything you can with suction alone.
- Pre-spray with a carpet cleaner formulated to target mineral deposits, not a general all-purpose cleaner. Encapsulating formulas work by surrounding the mineral particles so they lift free during extraction rather than smearing.
- Let it dwell for several minutes, then agitate with a soft carpet brush in a circular motion to work the cleaner into the fibers without shredding them.
- Extract with a wet vac or carpet extractor, pulling out the cleaner along with the dissolved salt rather than just blotting it with a towel.
- Repeat the pass on heavily soiled sections. Embedded salt deposits rarely lift completely on the first pass, and detailing professionals typically plan for two or three extraction cycles on driver-side footwells, according to Chemical Guys’ carpet salt removal guide.
- Dry completely before closing the car up, ideally with a fan or with windows cracked for a few hours. Leftover moisture in carpet padding grows mold fast and can wick salt back to the surface as it evaporates.
Prevention beats extraction every time. A set of rubber floor mats designed for winter takes the brine hit instead of your carpet, and they rinse clean with a hose in under a minute. A boot brush by the door and a small towel kept in the car for wiping shoes before you get in sound almost too simple to matter, but they’re the reason some cars never develop that white haze along the floorboards while others need a full extraction every spring.
Pro Tip: If a driver’s-side carpet section keeps coming back stained no matter how well you extract it, check the door seal above it. A worn seal lets slush drip straight onto that spot every time you get in, which means you’re re-staining faster than you’re cleaning.
For a full room-by-room approach to interior care beyond just the carpet, Cdcautodetailing’s 7-step interior detailing checklist covers the rest of the cabin that salt and winter grime tend to reach.
How Often Should You Wash Salt Off Your Car in Winter?
Wash every 7 to 14 days when roads are actively salted, and treat once a month as the absolute floor, not the target. Consumer Reports frames monthly washing as a minimum baseline during snow season, with more frequent washes advised when visible salt is present, according to their guidance on washing off road salt. NAPA’s recommendation suggests washing every couple of weeks or immediately following heavy snowfall.
Timing matters almost as much as frequency. A few things worth building into your routine:
- Wash on days above freezing, ideally with several hours of daylight left so panels and door jambs actually dry instead of refreezing.
- Midday washes beat early morning or evening ones in winter, since ambient temperature is at its highest and drying happens faster.
- Don’t skip a wash just because more snow is forecast. Salt sitting on your car for another week does more damage than getting it wet again tomorrow.
- Plan one deep decontamination wash once winter ends, even if you kept up with regular washes. Residual salt lingers in seams and undercarriage pockets that weekly washing doesn’t always fully clear.
That spring decontamination is its own project, not just a bigger version of the weekly wash. It typically includes an iron and tar remover to strip embedded brake dust and road film, a full strip wash to remove any accumulated wax or sealant along with trapped grime, and then a fresh coat of protective wax or sealant to close the season out clean. Regional reporting on road salt damage consistently flags this post-winter window as the moment corrosion that started months earlier finally becomes visible on rocker panels and wheel arches, according to USA Today’s coverage of road salt and spring car care.
If your DIY wash routine has been solid on the body but you’ve never had the undercarriage professionally flushed, spring is the right time to add that service, particularly if you’re in a region with frequent freeze-thaw cycles that keep reactivating old salt deposits.
What Do Detailing Professionals Do Differently?
A professional decontamination wash follows the same basic logic as a home wash but adds equipment and verification steps most driveways don’t have. Understanding the difference helps you know when your own routine is good enough and when it’s worth booking a deeper service.
The pressure and nozzle sequencing is the first real difference. Professionals typically start with a wide 40-degree fan at 800 to 1000 PSI for a full five to seven minute flood pass across the undercarriage, front to rear, purely to dissolve brine before any targeted cleaning begins. Only after that does the nozzle switch to a narrower 15-degree pattern at 1200 to 1500 PSI for stubborn deposits, always maintained at a safe 12 to 18 inch distance from sensitive components, a sequence detailed in Fanttik’s post-winter road salt removal guide.
Drying gets more attention too. Compressed air or a blower clears water from seams, gaps, and recessed panel joints that a towel or ambient air drying simply can’t reach, and some shops finish with a short highway drive to shake loose any remaining trapped water in wheel wells and rocker channels.
Verification is the piece most DIY washes skip entirely. Rather than eyeballing a panel and calling it clean, professionals often check runoff with a TDS or conductivity meter, continuing the rinse cycle until the reading approaches typical source-water levels rather than stopping at a fixed time. It’s a small habit that catches the difference between “looks clean” and “actually clean,” which matters most in the undercarriage where you can’t easily see what’s left behind.
A checklist for what a solid professional undercarriage service should include:
- A dedicated low-pressure flood rinse before any high-pressure work begins
- Targeted high-pressure passes only on heavy deposit areas, never as a default across the whole undercarriage
- Compressed air or forced-air drying of seams and recessed areas
- A visual and, ideally, conductivity-based check of runoff before calling the job done
Pro Tip: If you’re getting a professional undercarriage service, ask whether they check runoff quality before finishing. It’s a quick question that separates a rinse-and-done service from an actual decontamination.
A professional service earns its cost most clearly when a car has gone weeks without a wash, when you’re prepping for a spring deep clean after a rough winter, or when you’ve noticed visible white residue in wheel wells that a hose at home hasn’t been able to fully clear.
What Do Most People Get Wrong About Salt Removal?
The biggest mistake I see is treating a wash as one job instead of two. People do a great exterior wash, feel good about it, and never touch the undercarriage because it’s out of sight. That’s backward. The undercarriage is where the actual structural damage happens, and it should get more attention than the paint, not less.
The second mistake is drying badly. A rushed towel dry that leaves water sitting in a door jamb or trunk seal for a day or two, in freezing temperatures, does more harm than skipping the wash entirely some weeks. If you can’t dry it properly, wash it on a day when you can.
For readers who want the most corrosion protection per dollar spent, an undercarriage-focused decontamination wash beats a full cosmetic detail almost every time in winter. Paint correction and interior shampooing look great, but they don’t stop rust. A thorough undercarriage flush does. If you’re prioritizing spend, that’s where it goes first.
Before booking any mobile service, clear driveway or curbside access and note any areas of visible rust or damage you want checked. A little prep on your end means the technician spends their time on the car, not figuring out logistics.
— Charles
Book a Mobile Decontamination Wash With Cdcautodetailing
Cdcautodetailing brings the undercarriage flush, carpet extraction, and protective coating work most driveways can’t replicate, directly to you in South Jersey. No trip to a self-service bay with a coin-operated wand and no guessing whether you got the runoff clean enough.

A typical winter decontamination appointment covers the full sequence outlined above: a low-pressure flood rinse, targeted high-pressure work on heavy deposits, undercarriage-focused cleaning, and full drying so no water sits trapped in a seam waiting to freeze. Interior extraction handles carpet and mat salt stains the same visit, and a ceramic coating applied afterward makes future salt exposure genuinely easier to rinse off, since brine has less to grip on a sealed surface. For readers weighing the full range of what a mobile appointment can include, the breakdown of auto detailing service types covers how exterior, interior, and protective work fit together in one visit.
If you’ve gone more than a few weeks without a proper undercarriage rinse this winter, or you’re planning your spring deep clean now, consider making arrangements to have the visit planned around any visible residue, rust spots, or stained carpet.
Sources
For readers who want to dig further into the guidance behind this workflow, a few sources stand out. Consumer Reports lays out the monthly wash minimum and undercarriage rinse recommendation that anchors most winter car care advice. NAPA AutoPro’s winter washing frequency guidance gives a tighter 10 to 14 day window worth following in heavy-salt regions.
USA Today’s reporting on road salt damage and spring washing explains why residual salt outlasts the snow itself, and Chemical Guys’ carpet salt removal walkthrough is worth bookmarking if interior stains keep coming back no matter how often you vacuum.
- How often should you wash road salt off your car? — Consumer Reports
- Should I wash my car when there is still salt on the road? — NAPA AutoPro
- Washing away road salt: when and why to clean your car — USA Today
- How to get salt out of car carpet — Chemical Guys