TL;DR:
- Proper exterior detailing restores vehicle protection and enhances paint durability against environmental damage.
- Using quality supplies and following a systematic process prevents scratches and improves results.
- Regular professional detailing preserves vehicle value, prevents deterioration, and maintains a high-quality appearance.
South Jersey vehicles take a beating year-round. Salt-laden air near the shore, road grit from Route 55, pollen seasons that coat every surface in yellow film, and harsh winter road treatments all work together to strip your car’s finish and dull its shine faster than you’d expect. The good news is that a proper exterior detailing process doesn’t just clean your vehicle, it restores protection and gives your paint real defense against what’s coming next. This guide walks you through every stage of exterior detailing, from what you’ll need before you start to the final inspection that confirms you did it right.
Table of Contents
- What you need for exterior detailing
- Step-by-step exterior detailing process
- Common mistakes and troubleshooting
- How exterior detailing protects and enhances your car
- Our perspective: The truth about professional exterior detailing
- Take your exterior detailing further with local experts
- Frequently asked questions
Key Takeaways
| Point | Details |
|---|---|
| Prep is critical | Organizing tools and prepping your vehicle ensures a smoother, safer detailing process. |
| Step-by-step detailing | Following a structured process delivers consistent results and superior protection. |
| Avoid common mistakes | Knowing what not to do prevents damage and maximizes your investment in car care. |
| Protects and enhances | Proper detailing improves your car’s appearance and shields paint from South Jersey’s harsh elements. |
| Frequent maintenance pays off | Regular detailing preserves value and keeps your car looking its best year-round. |
What you need for exterior detailing
Before touching your car, gathering the right supplies makes the entire process smoother and prevents accidental damage. Think of this like prepping a canvas before painting. The quality of your foundation determines the quality of your result. According to car detailing prep steps, a well-prepped vehicle allows products to bond correctly and gives you a far more consistent finish.
Here’s a solid checklist to have ready before you begin:
- Two wash buckets (one for soapy water, one for rinse water)
- pH-neutral car wash soap formulated for automotive paint
- Microfiber wash mitts (at least two)
- Grit guards for each bucket to trap dirt below the waterline
- Clay bar kit for removing bonded surface contaminants
- Iron remover spray to dissolve embedded brake dust
- Dual-action polisher or hand applicator pads
- Polish and paint sealant or carnauba wax
- Microfiber drying towels (plush, 600+ GSM preferred)
- Tire cleaner and tire dressing
- Glass cleaner formulated for automotive use
- Detailing spray for quick corrections during the process
- Wheel brushes in multiple sizes for lug nuts and barrel cleaning
Basic vs. premium materials comparison
| Supply category | Basic option | Premium option | Why it matters |
|---|---|---|---|
| Wash soap | Generic car soap | pH-neutral foam cannon soap | Protects existing wax layer |
| Drying towel | Terry cloth | Waffle-weave microfiber | Reduces swirl marks significantly |
| Paint protection | Spray wax | Ceramic-infused sealant | Lasts 6-12 months vs. weeks |
| Applicator | Foam pad | Dual-action machine polisher | Consistent, even product distribution |
| Tire dressing | Water-based spray | Long-life gel formula | Resists sling and UV fading |
Upgrading even one or two of these categories makes a real difference in your results. Most South Jersey detailers will tell you that the jump from a terry cloth towel to a quality microfiber alone eliminates a huge portion of the micro-scratches people blame on their polish.
Workspace matters too. Always detail your car in the shade or indoors. Direct sunlight causes wash soap and drying agents to flash-dry on paint before you can work them properly, leaving water spots and streaky residue. If you’re working outside, early morning is ideal, especially in summer when South Jersey temperatures climb fast.
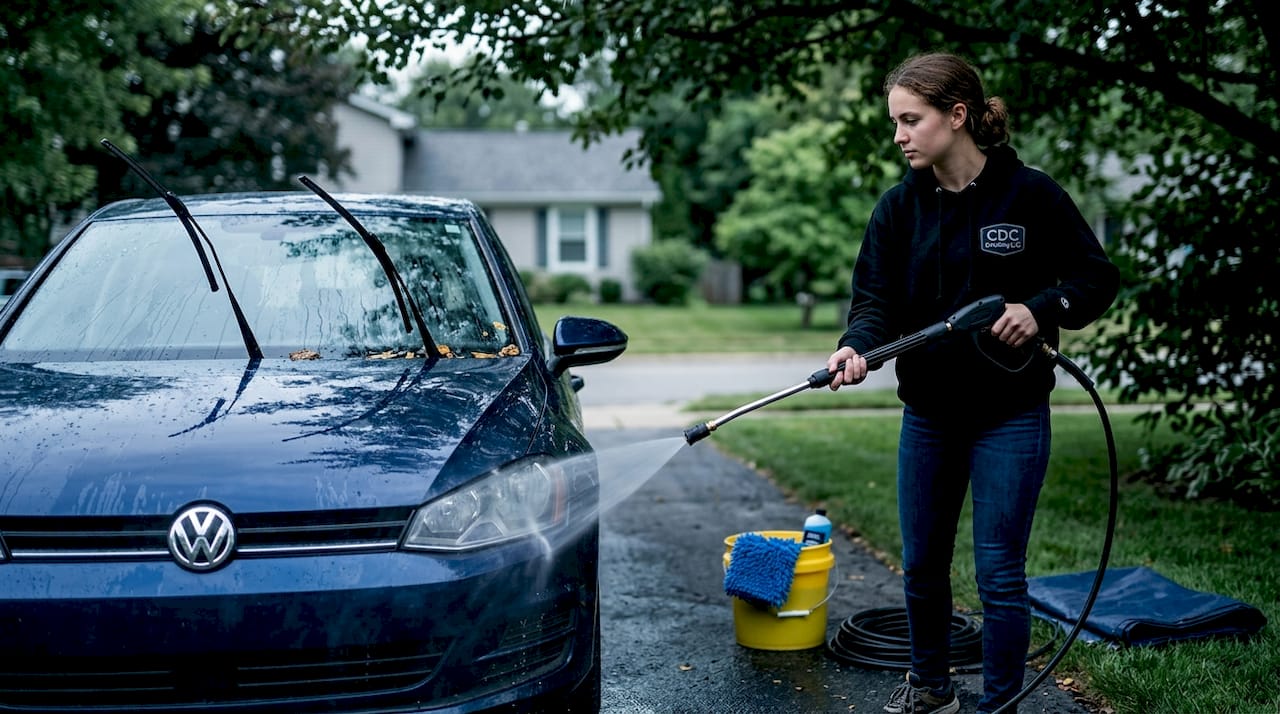
Pro Tip: Rinse your entire vehicle thoroughly with a hose or pressure washer before applying any soap. This removes loose dirt that would otherwise scratch the paint as soon as your wash mitt touches it.
Step-by-step exterior detailing process
With your supplies organized and your workspace set, it’s time to work through the process in sequence. Skipping steps or reversing their order is one of the fastest ways to undo your own work. The step-by-step vehicle cleaning approach used by professional detailers is built around a specific logic: remove the heaviest contamination first, then progressively refine the surface.
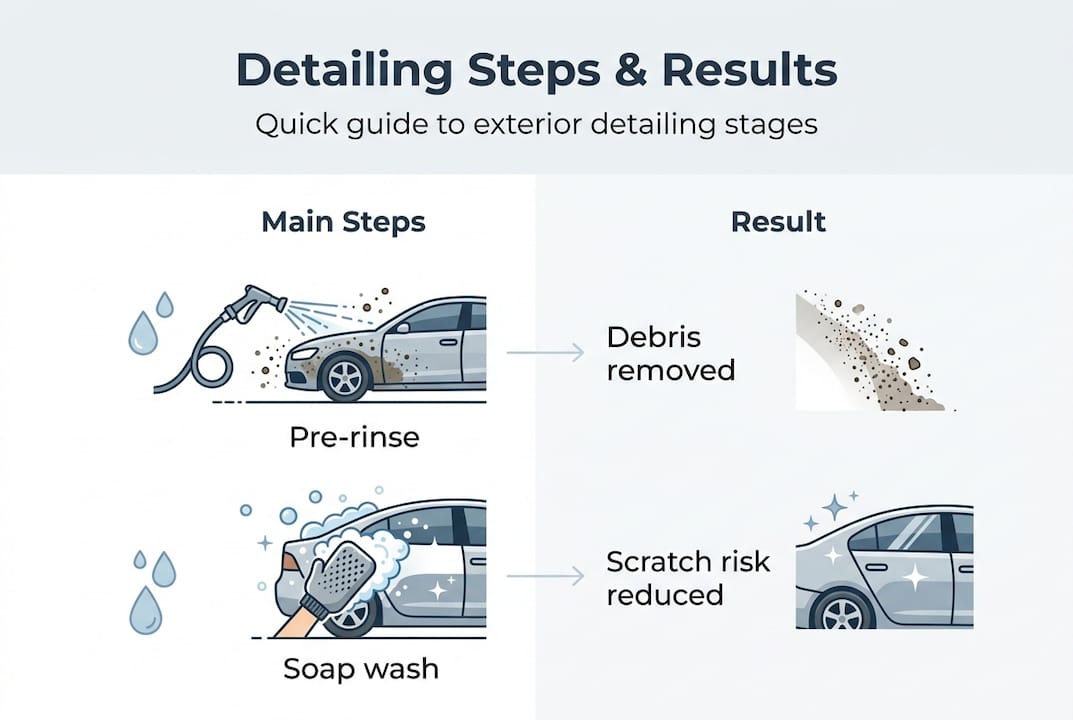
- Pre-rinse the entire vehicle using a pressure washer or garden hose, starting at the roof and working downward to push dirt away from clean panels.
- Apply wheel and tire cleaner to all four wheels first, letting the product dwell while you wash the body. This prevents recontamination and gives the cleaner time to dissolve brake dust.
- Foam or soap the vehicle panel by panel using your pH-neutral car wash soap, starting at the roof again and finishing with the lower door panels and rocker areas, which carry the most road grime.
- Wash with the two-bucket method, rinsing your mitt in the clean water bucket before reloading with soap. This single habit prevents 80% of the swirl marks most people create during a wash.
- Rinse thoroughly to remove all soap residue, then do a final flooding rinse by removing the nozzle from your hose and letting a sheet of water flow across panels to minimize water spots.
- Dry with microfiber towels or a leaf blower to eliminate standing water from mirrors, trim gaps, and panel edges where droplets hide.
- Decontaminate with clay bar and iron remover on any panel that feels rough like sandpaper after washing. This step removes bonded contamination that soap can’t touch.
- Polish as needed using a machine polisher or hand pad to restore gloss and reduce surface defects in the clear coat.
- Apply sealant or wax to lock in the clean surface and add a protective barrier against UV rays, water, and road contamination.
- Dress tires and plastic trim to restore a uniform, clean appearance across all exterior surfaces.
- Clean glass inside and out with an ammonia-free automotive glass cleaner for maximum clarity.
Step outcomes at a glance
| Step | Primary purpose | Result |
|---|---|---|
| Pre-rinse | Remove loose debris | Reduces scratch risk during wash |
| Wheel cleaning | Dissolve brake dust | Clean, safe wheels before body wash |
| Two-bucket wash | Safe paint cleaning | Minimized swirl marks |
| Clay bar | Remove bonded contaminants | Smooth, glass-like surface feel |
| Polish | Correct clear coat defects | Restored gloss and depth |
| Sealant/wax | Protect painted surface | Lasting shine and water beading |
| Tire dressing | UV protection and appearance | Clean, uniform exterior look |
Following best exterior detailing practices means never skipping the decontamination stage, even when the car looks clean after washing. Your hands are the best quality check here; run them across a clean, dry panel after washing. If it feels rough or gritty, the clay bar step is not optional.
Pro Tip: Use the two-bucket method every single time you wash. One bucket holds fresh soapy water. The other holds clean rinse water. After every panel, dunk your mitt in the rinse bucket and wring it out before reloading with soap. The grit guard at the bottom traps the dirt you just removed.
Important: Never use household cleaners, dish soap, or all-purpose degreasers directly on painted panels. These products strip away existing wax and sealant, exposing bare paint to the elements. If you’re unsure about a product, test it on a hidden area first.
Common mistakes and troubleshooting
Even with the right supplies and the right steps, detailing errors are common. Many of them happen because people treat exterior detailing like a standard car wash, and the two are fundamentally different things. Understanding where things go wrong helps you fix problems as they come up and avoid them next time.
Here’s a look at the most frequent mistakes South Jersey car owners make and what to do instead:
- Washing in direct sunlight: Soap dries on the paint before you can rinse it off, leaving water spots and residue. Always move to shade.
- Using one bucket for washing: Contaminated water gets recycled back onto your paint with every pass of the mitt, dragging grit across the clear coat and creating swirl marks.
- Skipping the clay bar: Bonded contaminants like industrial fallout, tree sap, and brake dust don’t rinse off. Applying wax over them seals the contamination in rather than protecting clean paint.
- Applying too much polish: Excess product doesn’t mean better correction. It just makes removal harder and can leave residue in trim crevices.
- Using old or dirty towels: Even one piece of debris in a microfiber towel can scratch a panel. Wash your towels separately from other laundry and inspect them before each use.
- Buffing wax in circular motions by hand: This creates swirl patterns. Use straight, overlapping passes instead.
The distinction between detailing and a car wash is significant. A detailing vs. car wash comparison makes it clear that a standard wash only removes surface dirt, while detailing addresses contamination, paint defects, and protection in a systematic way. One cleans. The other restores and preserves.
Understanding what defines exterior car detailing helps you recognize whether your vehicle actually needs a full correction session or just a maintenance detail to refresh existing protection. If your paint still beads water well and feels smooth after washing, you may only need a light polish and a fresh coat of sealant.
Pro Tip: To test for swirl marks, hold a single light source (like a work lamp or phone flashlight) at a low angle over a panel. Swirls will appear as circular or spiderweb patterns in the paint. If you catch them early, a light polish removes them without machine cutting.
Warning: Never use a clay bar on a dry surface. Always lubricate the panel with a detailing spray or soapy water first. Using clay without lubrication drags it across the paint and causes scratches that require polishing to remove.
How exterior detailing protects and enhances your car
Exterior detailing isn’t just about making your car look good for a weekend. It’s a practical investment in your vehicle’s long-term condition and resale value. Understanding the paint protection benefits of regular detailing shows why it belongs in every vehicle owner’s maintenance schedule, not just before a sale.
Here’s what consistent exterior detailing actually does for your vehicle:
- Prevents paint oxidation by removing UV-damaged clear coat layers and sealing fresh paint with protective products
- Reduces the impact of road salt in winter by creating a barrier between bare metal and corrosive brine
- Maintains surface clarity by eliminating the micro-scratches, water spots, and contaminant buildup that make paint look dull even when it’s clean
- Protects rubber and plastic trim from cracking and fading caused by UV exposure
- Preserves resale value by keeping the exterior in a condition that signals careful ownership to future buyers
Regular detailing also catches issues early. When a professional examines your paint in detail, they notice chips, cracks in clear coat, or rust starting in seams before it spreads. Catching these problems early is far less expensive than addressing them after they’ve grown.
Understanding premium detailing explained reveals that the gap between a basic wash and a full exterior detail isn’t just cosmetic. Premium detailing uses paint thickness gauges, paint depth measurements, and targeted correction stages that a standard wash simply doesn’t address.
Well-maintained paint stays in better condition longer and retains vehicle value more effectively than paint that has been neglected or improperly maintained over time.
Pro Tip: Schedule a full exterior detail at least twice a year, ideally at the start of spring after winter salt exposure and again in the fall before the next cold season. Between those sessions, a maintenance wash with a quick detailer spray every two to four weeks keeps your protection topped up and your car looking sharp.
Our perspective: The truth about professional exterior detailing
Here’s something most guides won’t say directly: the biggest factor separating a mediocre detail from a great one isn’t the products used. It’s diagnosis. Before touching a single panel, an experienced detailer reads the paint condition, identifies whether contamination is bonded or surface-level, and decides what correction the clear coat actually needs. Most DIY attempts skip this step entirely.
South Jersey’s environment specifically creates a combination of salt air, pollen, road construction grit, and summer heat that accelerates paint degradation faster than inland areas. What works for a car in Phoenix doesn’t translate here. A local detailer who understands this environment approaches the process differently, using heavier decontamination stages and longer-lasting protection products built for humidity and temperature swings.
The myth that premium auto detailing is only for luxury vehicles is one we see constantly. In reality, older or higher-mileage vehicles often benefit more from proper exterior care because their paint is already more vulnerable. Protecting what you have is always more cost-effective than repainting it.
Take your exterior detailing further with local experts
Knowing the steps is one thing. Having the right hands apply them is another entirely.

At CDC Auto Detailing, we bring professional-grade exterior detailing directly to your driveway across South Jersey, from Pitman to Glassboro and beyond. Our team uses the exact staged process covered in this guide, plus advanced treatments that go further than any DIY kit can reach. Explore detailing service examples to see what a full exterior session actually delivers, or learn more about mobile detailing premium options that bring expert-level care to your location. Ready to get started? It only takes a moment to book mobile detailing and get your car’s exterior back to its best.
Frequently asked questions
How long does a typical exterior detailing process take?
Most exterior detailing sessions take between 1.5 and 3 hours, depending on the vehicle size and services included. Larger vehicles or those requiring paint correction will naturally take longer.
What’s the difference between detailing and a standard car wash?
Detailing vs. a car wash comes down to depth: detailing offers deeper cleaning, paint correction, and protective coatings, while a car wash only removes surface dirt without restoring or protecting the finish.
How often should I have my car exterior detailed?
For best results and lasting protection, professional detailers recommend exterior detailing every 3 to 6 months, with light maintenance washes in between to preserve your protection layer.
Can mobile detailing handle severe paint defects or contamination?
Mobile detailing can address many exterior issues including swirl marks, light scratches, and surface contamination, but severe defects like deep paint chips or heavy rust sometimes require specialized shop treatments.
Does exterior detailing help maintain my vehicle’s resale value?
Yes, and significantly so. Regular exterior detailing preserves your paint and finish in a way that signals careful ownership, helping maintain vehicle resale value when it’s time to sell or trade in.