
TL;DR:
- The two-bucket hand wash method with proper tools effectively cleans a car without damaging the paint. Preparing correctly, washing in the shade, and using straight strokes prevent swirl marks and streaks. Regular maintenance, including washing every 2 to 4 weeks and promptly drying, preserves the car’s finish and enhances long-term protection.
The best way to wash a car at home is the two-bucket hand wash method, using dedicated car shampoo, soft microfiber mitts, and a deliberate top-to-bottom sequence. This technique protects your paint while removing grime thoroughly. Done right, a full hand wash takes less than 1 hour and delivers results that rival a professional wash. Washing every 2–4 weeks prevents grime from embedding into the clear coat and keeps your finish looking sharp year-round.
1. The best way to wash a car at home starts with preparation
Good preparation prevents most washing mistakes before you touch the car. Skipping this step is why so many home washes leave swirl marks, streaks, or soap scum.
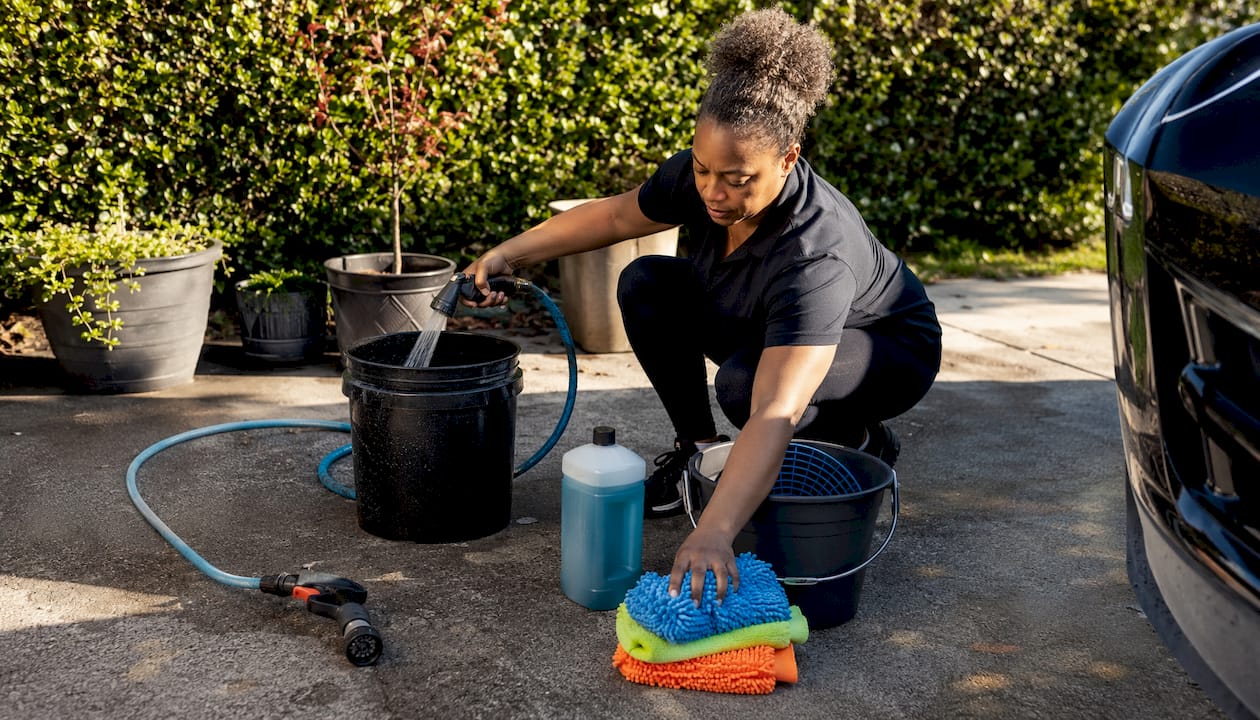
Location and timing matter more than most car owners realize. Washing in shade or on overcast days prevents UV from evaporating soap too fast, which leaves streaks and spots. Direct sunlight is one of the most common causes of a patchy finish after washing.
Let the car cool first. Allow 20–30 minutes after driving before you start washing. A hot surface causes soap to dry almost instantly, leaving scum that bonds to the paint.
Gather everything before you start:
- Two buckets (one for wash solution, one for clean rinse water)
- Grit guard inserts for both buckets
- pH-balanced automotive car shampoo (never dish soap)
- Two soft microfiber wash mitts (one for the body, one for wheels)
- Dedicated wheel brushes
- Multiple microfiber drying towels
- A garden hose with adjustable nozzle
Pro Tip: Wash your car on grass or gravel instead of concrete. This reduces runoff pollution and keeps dirty water from flowing directly into storm drains, which is a simple eco-friendly car wash practice that costs nothing extra.
2. Start with the wheels before anything else
Wheels carry the heaviest contamination. Brake dust, road tar, and grime from wheels will contaminate your wash mitt if you clean the body first. Always tackle wheels with a separate bucket and dedicated brushes before touching the paint.
Spray each wheel with water to loosen loose debris. Apply a wheel-safe cleaner and scrub with a wheel brush, working into the spokes and around the barrel. Rinse each wheel completely before moving to the next. This sequence keeps brake dust out of your main wash water entirely.
3. Pre-rinse the entire vehicle from top to bottom
A thorough pre-rinse removes loose dirt, dust, and debris before any mitt touches the surface. Skipping this step means you drag grit across the paint during washing, which causes the fine scratches known as swirl marks.
Start at the roof and work down to the rocker panels. Use a steady, gentle stream rather than a high-pressure blast, which can force dirt into panel gaps. Pay extra attention to the lower panels, door sills, and front bumper where road debris collects most heavily.
4. Use a foam presoak if you have one
A foam presoak or snow foam applied before contact washing loosens bonded dirt and road film. It does not replace washing, but it reduces the amount of scrubbing your mitt needs to do. Less scrubbing means less friction on the paint.
Apply foam from bottom to top so it has time to dwell on the lower panels, which carry the most contamination. Let it sit for 2–3 minutes, then rinse from top to bottom before picking up your mitt. This step alone significantly reduces the risk of introducing new scratches.
5. Use the two-bucket method with grit guards
The two-bucket method with grit guard inserts is the gold standard for preventing swirl marks during a home wash. One bucket holds your soapy wash solution. The other holds clean water for rinsing your mitt after each panel.
Grit guards sit at the bottom of each bucket and trap dirt particles below the waterline. When you rinse your mitt in the clean bucket, the grit guard stops you from picking that dirt back up. Without grit guards, you reintroduce contamination to your mitt with every rinse.
Pro Tip: Squeeze your mitt against the grit guard rather than just swishing it around. This forces trapped particles down through the guard and keeps them out of your mitt.
6. Wash in sections using straight, overlapping strokes
Load your mitt with soapy water and wash using long, straight overlapping strokes from the roof down. Work one panel at a time: roof, hood, trunk, then doors, and finally lower panels. Never use circular scrubbing motions. Circular motions create the swirl marks you see in sunlight on dark-colored cars.
Rinse your mitt in the clean bucket after every panel, then reload with soapy water from the wash bucket. This discipline is what separates a paint-safe wash from one that slowly degrades your clear coat. For a deeper look at avoiding paint damage, the swirl mark removal guide from Cdcautodetailing explains exactly what causes these marks and how to address them.
7. Rinse each section before soap dries
Rinse each panel immediately after washing it. Do not wash the entire car and then rinse at the end. Soap that dries on paint leaves mineral deposits and can etch the clear coat in warm weather.
Work quickly in warm conditions. If you are washing a larger vehicle like an SUV or truck, split the body into smaller zones: front half, then rear half. Keep a hose nearby so you can rinse each section within 60–90 seconds of washing it.
8. Dry the car promptly with the right tools
Water spots form when minerals in water etch into paint as it evaporates. Never let your car air dry. Use a large, plush microfiber drying towel and work in straight, gentle motions from the roof down.
Key drying practices:
- Use a clean, dedicated drying towel that has never been used for anything else
- Blot or drag gently rather than pressing hard
- Use a leaf blower to clear water from door jambs, mirrors, grilles, and panel gaps before towel drying
- Move the car forward a few feet after drying to dislodge water trapped under door seals and the trunk lip
- Dry windows last using a separate microfiber cloth to avoid transferring wax or soap residue
A leaf blower is one of the most underrated drying tools available. It reaches crevices no towel can access and eliminates the drip marks that appear minutes after you think the car is dry.
9. Apply wax or sealant after drying
A clean, dry surface is the perfect base for a protective layer. Applying a carnauba wax or synthetic paint sealant after washing adds a barrier against UV, water, and road contamination. This step extends the life of your paint and makes the next wash easier because dirt bonds less aggressively to a protected surface.
Apply wax in thin, even coats using a foam applicator pad. Work one panel at a time and buff off with a clean microfiber towel before the product hazes over. For longer-lasting protection, ceramic coating provides a harder, more durable shield than traditional wax and can last years with proper maintenance.
10. Common mistakes to avoid when washing at home
Proper washing technique is the foundation for preserving your car’s paint long-term. These are the mistakes that undo all your effort:
- Using dish soap: Dish soap strips wax and protective coatings from paint. Always use a dedicated, pH-balanced automotive shampoo.
- Washing in direct sunlight: Heat causes soap to evaporate before you can rinse it, leaving spots and streaks.
- Scrubbing in circles: Circular motions create swirl marks. Straight strokes only.
- Using one bucket: A single bucket means you reintroduce dirt to your mitt every time you rinse it.
- Skipping the pre-rinse: Dragging dry dirt across paint with a mitt is one of the fastest ways to scratch a clear coat.
- Using old or rough towels: Household towels and bath towels are too abrasive for automotive paint. Use only automotive-grade microfiber.
“Improper washing causes swirl marks that require expensive polishing to correct. The right technique costs nothing extra and prevents damage that can cost hundreds to fix.” — professional detailing guidance
For a full breakdown of protecting car paint at home, Cdcautodetailing covers the complete routine from washing through long-term protection.
Key takeaways
The two-bucket hand wash method with grit guards, pH-balanced shampoo, and straight-line strokes is the most effective way to clean a car at home without damaging the paint.
| Point | Details |
|---|---|
| Two-bucket method | Use separate wash and rinse buckets with grit guards to prevent swirl marks. |
| Wash in shade | Avoid direct sunlight and hot surfaces to prevent soap scum and streaks. |
| Straight strokes only | Never scrub in circles; straight overlapping motions protect the clear coat. |
| Dry immediately | Use a microfiber towel and leaf blower to prevent mineral etching from standing water. |
| Wax after washing | Apply wax or sealant on a clean surface to extend paint protection between washes. |
What I’ve learned after years of watching people wash their cars wrong
Most car owners focus on the soap they buy and ignore everything else. The shampoo matters far less than the technique, the tools, and the sequence. I have seen brand-new cars with swirl marks so deep they needed machine polishing after just a few months of home washing. Every single time, the cause was the same: one bucket, circular scrubbing, and a rough towel.
The two-bucket method feels like extra effort the first time. After two or three washes, it becomes automatic. The difference in your paint’s appearance after six months is striking. Dark-colored cars especially reward this discipline because swirl marks show up clearly in sunlight on black, navy, and charcoal finishes.
The other thing most guides skip is the environmental side. Washing on a permeable surface and using a biodegradable shampoo takes no extra time and keeps chemical runoff out of local waterways. It is a small habit that adds up over years of washing.
Consistency matters more than perfection. Washing every 2–4 weeks with decent technique beats an occasional “perfect” wash. Regular washing also lets you spot paint chips, rust bubbles, or damage early, before they become expensive repairs. Treat washing as maintenance, not just cleaning.
— Charles
When home washing is not enough
Home washing keeps your car clean, but it does not address paint correction, deep contamination, or long-term protection at the level a professional can deliver.

Cdcautodetailing offers mobile detailing services across South Jersey, bringing professional-grade care directly to your driveway. From ceramic coating services that protect your paint for years to full interior and exterior detailing packages, the results go well beyond what a bucket and hose can achieve. If you want to understand what professional care covers, the auto detailing services guide breaks down every service option clearly. Booking is straightforward, and the mobile format means no drop-off, no waiting, and no driving to a shop.
FAQ
How often should I wash my car at home?
Wash your car every 2–4 weeks to prevent grime from bonding to the paint and to maintain the finish. Cars driven in winter or near the coast may need more frequent washing due to salt exposure.
Can I use dish soap to wash my car?
No. Dish soap strips wax and protective coatings from automotive paint. Always use a dedicated, pH-balanced car shampoo designed for vehicle surfaces.
What is the two-bucket method?
The two-bucket method uses one bucket for soapy wash water and one for clean rinse water, with grit guard inserts in each. This prevents dirt from being transferred back onto the paint via your wash mitt.
How do I prevent water spots after washing?
Dry the car immediately after rinsing using a clean microfiber towel and a leaf blower for crevices. Water spots form when minerals in standing water etch into the clear coat as the water evaporates.
Is hand washing better than an automatic car wash?
Hand washing with the two-bucket method is gentler on paint than most automatic car washes, which use stiff brushes that cause swirl marks and scratches over time. Touchless automatic washes are a safer alternative when hand washing is not possible.