
Dry brush and vacuum the vents, swap the cabin air filter, check that the evaporator drain isn’t clogged, then disinfect the plenum intake. That sequence clears dust and knocks out most musty odors before you spend a dime on repairs. The filter and drain matter because a clogged one feeds the other, turning a $20 fix into a bigger problem. An experienced auto detailer walks through each step below, including exactly when it’s time to stop DIYing and book a pro.
TL;DR:
- Replacing the cabin filter and checking the evaporator drain are essential steps, as a clogged filter traps moisture and promotes mold growth.
- Use gentle tools like soft-bristle brushes and microfiber cloths, avoiding compressed air directly into the duct to prevent pushing debris further inside.
- Disinfecting the plenum intake helps eliminate musty odors caused by condensate sitting on the evaporator, but persistent smells may require professional treatment of the evaporator core.
- Regular maintenance, such as annual filter replacements and quarterly vent cleaning, can prevent odors from reappearing and extend the system’s cleanliness.
- When odors persist after DIY efforts, it is best to consult a professional to inspect and treat microbial growth deep within the HVAC system.
Table of Contents
- Tools and Cleaners You Need Before You Start
- How Do You Clean the Vent Louvers Step by Step?
- What Actually Kills the Musty Smell in Your HVAC?
- When Should You Call a Professional Instead?
- How Often Should You Clean Car Air Vents?
- Field Notes from an Experienced Auto Detailer
- Book a Mobile Fix When DIY Hits Its Limit
- Sources
- FAQ
Tools and Cleaners You Need Before You Start
Grab these before you touch a single louver, because the wrong tool pushes dust deeper instead of pulling it out:
- Soft-bristle detailing brushes in two or three sizes, including one narrow enough to slide between vent slats
- Microfiber cloths, at least two, one dry and one lightly dampened
- A vacuum with a crevice tool attachment
- Compressed air in a can, or a shop compressor set to low pressure
- A mild interior cleaner or a foaming vent cleaner made for automotive plastic
- A dust mask and eye protection if you’re using compressed air or a foaming product
Compressed air feels like the fastest fix, but blasting it straight into a vent can shove debris further into the dash instead of out. Use short bursts from a few inches away, never a continuous stream. Skip anything with ammonia or bleach on vent plastic, and never soak the vents. HVAC housings sit close to electrical connectors and blower motor wiring, and excess moisture finds its way into places it shouldn’t. If you want a broader rundown of what detailers keep in their kit, this interior detailing supply guide covers the full list.
How Do You Clean the Vent Louvers Step by Step?
This is the part most guides skip: order matters. Skip a step and you’re just rearranging dust instead of removing it.
- Turn off the ignition and the fan. Working with the blower running just recirculates the dust you’re trying to remove.
- Remove the cabin air filter if it’s accessible. You’ll need it out anyway for the plenum step later, and it keeps loose debris from getting pulled back into the system while you work.
- Vacuum the vent face first. Use the crevice tool to pull out loose dust before anything touches the louvers with a brush.
- Dry brush every louver, slat by slat. A soft-bristle brush knocks dust free without scratching the plastic fins.
- Wipe with a lightly dampened microfiber wrapped around the brush tip. This is where a safe DIY vent-clean sequence really pays off. Vacuum, then dry brush, then a barely damp cloth removes what dry brushing alone can’t reach.
- Vacuum one more time. This catches whatever the damp cloth loosened but didn’t lift.
- Use compressed air only on stubborn spots, aimed downward or outward, never straight into the duct opening.
If the louvers still look gray after all that, the trim might need to come off. Most vent surrounds pop out with a plastic trim tool, but if yours is held in with screws behind the dash panel, that’s your signal to stop and call a pro rather than crack a clip you can’t replace.
Let everything air dry for a few minutes before reinstalling the cabin filter. Reassembling while surfaces are still damp is how trapped moisture turns into the smell you were trying to get rid of in the first place.
Pro Tip: Dry brush and vacuum before any liquid touches the vents. Skipping straight to a damp cloth just smears dust into a paste that’s harder to remove.
What Actually Kills the Musty Smell in Your HVAC?
Surface cleaning handles dust. It rarely touches the actual source of a musty smell, which almost always lives deeper in the system.
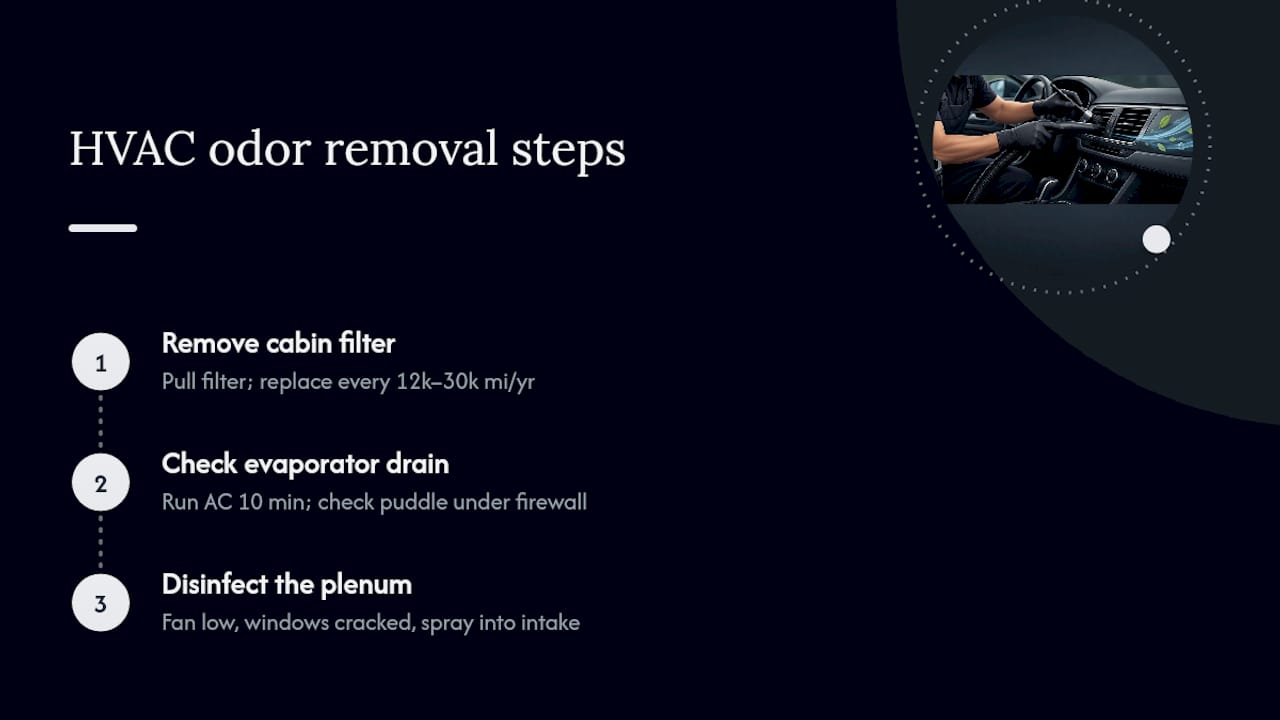
Start with the cabin filter. It typically sits behind the glove box, and most manufacturers call for replacement every 12,000 to 30,000 miles or once a year, whichever comes first. A clogged filter traps moisture against the evaporator core, which is exactly the environment mold and bacteria need to thrive. Pull it before you do anything else in this section.
Check the evaporator drain next. Run the AC for ten minutes, then look under the car near the firewall for a small puddle of water. No puddle usually means the drain tube is clogged, and standing water inside the housing is a direct cause of the smell you’re chasing. A length of stiff wire or a length of aquarium tubing threaded gently up the drain tube from underneath the car often clears it.
Disinfect the plenum last. Most musty odors trace back to condensate sitting on the evaporator, and spraying disinfectant into the plenum intake with the fan running pulls the treatment through the whole system. With the cabin filter still out, crack the windows, spray the disinfectant into the intake opening, and run the fan on a low setting for several minutes to distribute it.
If you’ve done all three and the smell keeps coming back within a week or two, you’re likely dealing with microbial growth on the evaporator core itself, not just condensate. That’s a job for a professional evaporator treatment, not another can of spray.
When Should You Call a Professional Instead?
Some signs mean the fix is beyond what a brush and a can of disinfectant can handle:
- The musty smell returns within days of replacing the filter and disinfecting the plenum
- You see visible mold, black spots, or wet insulation inside any duct opening you can reach
- There’s no water draining under the car after repeated AC use, even after trying to clear the tube
- Airflow feels weak from every vent, not just one, after you’ve already cleaned and reassembled everything
- You hear grinding, clicking, or a burning smell from the blower motor area
A professional detailing service typically starts with a visual inspection of the evaporator and drain, followed by a deeper clean or antimicrobial coating where DIY tools simply can’t reach. If your car has been sitting with a wet interior, our pet-owner odor guide covers similar contamination issues worth reading before you decide.
How Often Should You Clean Car Air Vents?
A little routine maintenance keeps you from ever needing the deeper fixes above.
- Replace the cabin filter every 12,000 to 30,000 miles or once a year, whichever comes first
- Give the vent louvers a quick dry brush pass every one to three months
- Run the fan on low for a minute before shutting the car off during humid months, which helps dry the evaporator instead of leaving it wet overnight
- Avoid leaving wet gym bags, umbrellas, or damp floor mats in the car, since that moisture ends up in the HVAC system too
- Check the evaporator drain after any stretch of unusually humid weather
- Schedule a professional HVAC service if odor keeps recurring, or every couple of years as preventive maintenance
Applying a protectant to the trim around the vents after cleaning also slows how fast dust resettles, which stretches out the time between deep cleans.
Field Notes from an Experienced Auto Detailer
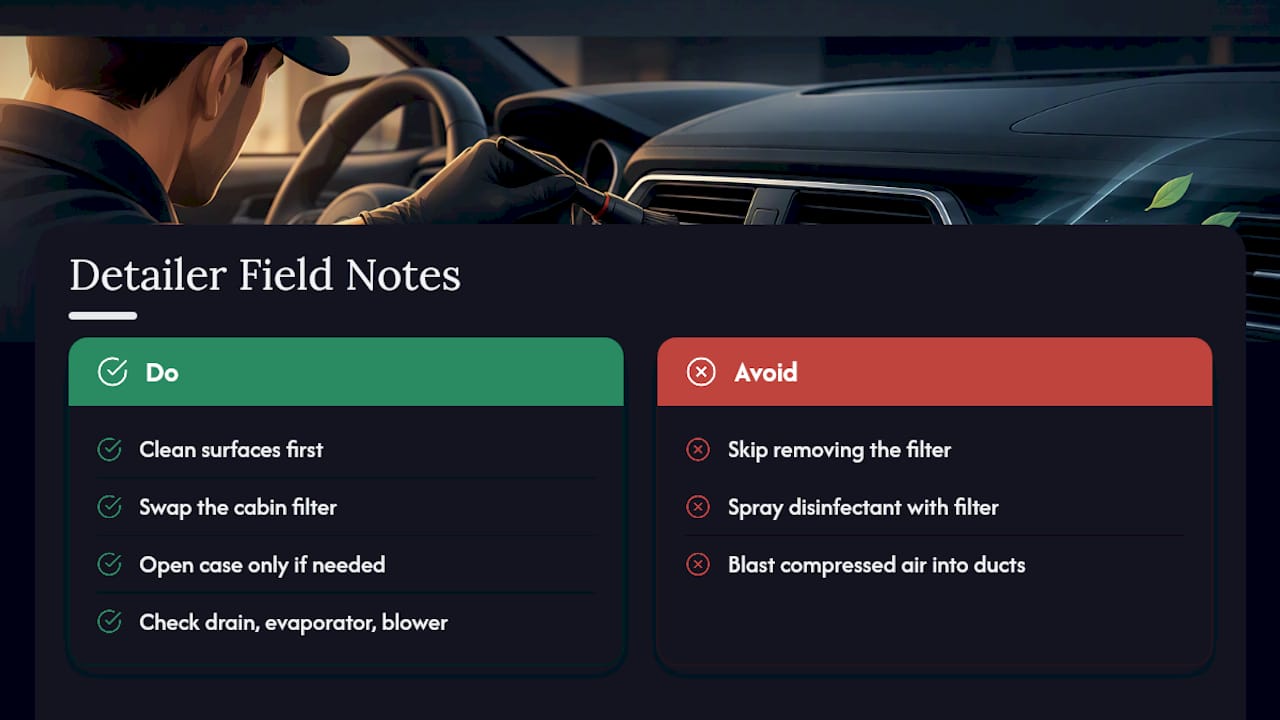
Homeowners skip the filter removal step more than any other, and it’s the one that causes the most damage. Spraying disinfectant into a plenum with the filter still in place just soaks the filter instead of treating the system. The other habit seen constantly is blasting compressed air straight into the duct opening, which drives debris deeper rather than out. On a mobile service call, the case is only opened when surface work and a filter swap haven’t solved it, and the drain, evaporator surface, and blower operation are checked before recommending anything more invasive.
Book a Mobile Fix When DIY Hits Its Limit
You’ve cleaned the vents, swapped the filter, and checked the drain, but the smell keeps coming back. That’s usually the point where a can of spray from the auto parts store stops being the answer. CDC Auto Detailing handles the parts of vent and HVAC cleaning that are hard to reach safely from a driveway, without the guesswork of disassembling trim you’re not sure how to put back together.

Our Interior Detail service covers vent cleaning and odor removal as part of a full interior pass, so you’re not paying for a separate visit just to deal with the HVAC system. For drivers dealing with pet hair, spills, or long-standing odor on top of vent issues, the full detail package lineup bundles interior work with exterior care so the whole vehicle gets attention in one mobile appointment at your home or office. Book a slot through the detail packages page and skip the trial-and-error entirely.
Sources
- How to get rid of musty smell from a car air conditioner (Consumer Reports)
- How to clean car air vents (AutoZone)
- Cabin air filter intervals by make (FilterBuy)
- Car air vent cleaning: pro guide for fresh air (The Mobile Buff)
FAQ
How Do I Clean My Car’s AC Vents at Home?
Turn off the ignition and fan, vacuum the vent face, dry brush each louver, then wipe with a lightly dampened microfiber cloth and vacuum once more. This vacuum, brush, damp cloth sequence removes dust without pushing it deeper into the dash.
How Can I Deodorize My Car’s Air Vents?
Replace the cabin air filter first, then spray a disinfectant into the plenum intake and run the fan on low with the windows cracked. Most musty smells come from condensate sitting on the evaporator, so treating that area directly works far better than spraying air freshener at the vents.
What Is the Best Car Air Vent Cleaner?
A mild interior cleaner or a foaming vent cleaner made for automotive plastic works best, applied with a soft brush rather than sprayed directly into the vent. Avoid anything with ammonia or bleach, since those can damage vent plastic and nearby electrical connectors.
Can I Use Febreze on My Car Vents?
Spraying a fabric refresher into the vents masks odor briefly but doesn’t address the evaporator condensate or clogged drain that usually cause the smell. If the odor returns within days, the fix needs to target the HVAC system itself, not just the air coming out of it. If it keeps coming back after a proper filter change and plenum treatment, that’s when CDC Auto Detailing’s interior service is worth booking.