TL;DR:
- Interior car detailing involves deep cleaning and conditioning of all surfaces to remove dirt and odors effectively. The essential tools include a vacuum with attachments, surface-specific cleaners, microfiber towels, and detailing brushes for the best results. Proper technique and sequence prevent recontamination and ensure long-lasting cleanliness.
Car interior detailing is defined as the systematic deep cleaning and conditioning of every surface inside your vehicle, from the headliner down to the floor mats. Knowing what do I need to detail my car interior saves you money, protects your materials, and produces results that last. The short answer: a strong vacuum with attachments, multiple microfiber towels, surface-specific cleaners, and a set of detailing brushes. Skip any one of these and you will leave dirt behind or risk damaging the surfaces you are trying to clean. This guide covers every tool, product, and technique you need to get it right the first time.
What do you need to detail your car interior?
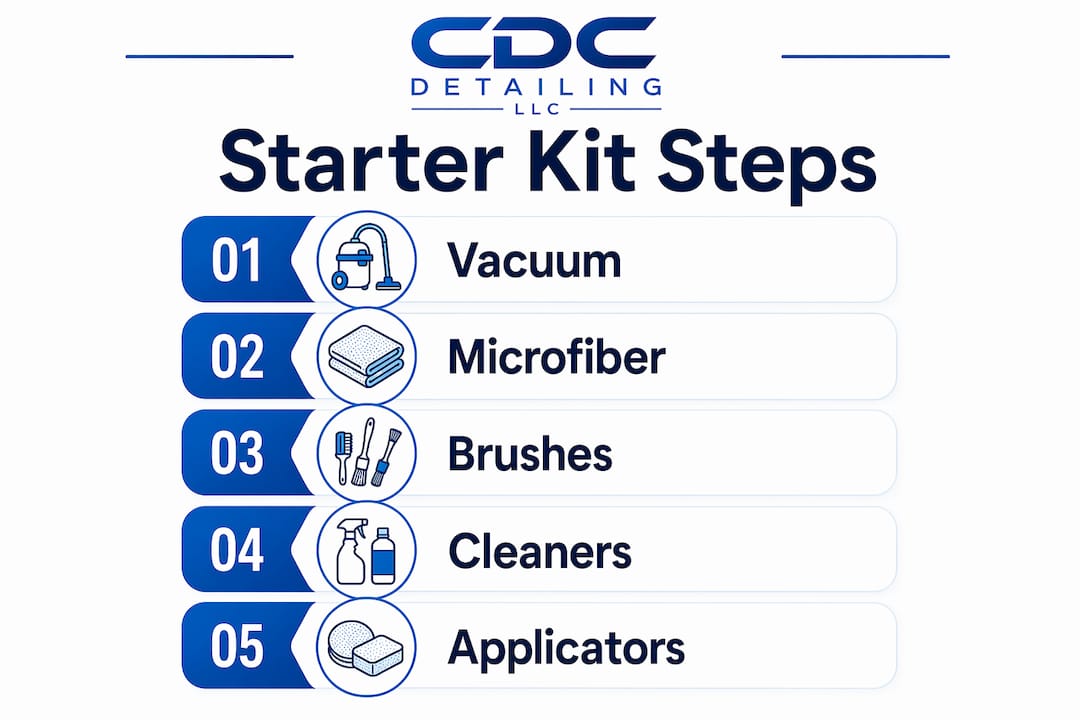
The six product categories that cover a complete interior detail are a vacuum with attachments, an all-in-one interior cleaner, a carpet and upholstery cleaner, microfiber towels, detailing brushes, and a leather cleaner with conditioner if your vehicle has leather seats. A beginner detailing kit built around these six categories covers the needs for comprehensive interior detailing. Each category targets a specific surface type or cleaning task. Trying to substitute one for another is the fastest way to leave residue, cause streaking, or crack a leather seat.
The industry term for this process is “interior detailing,” and it differs from a basic car wash in one key way: it addresses embedded dirt, odors, and surface conditioning, not just surface-level grime. Car owners who treat interior detailing as a single-product job consistently get worse results than those who match the right tool or cleaner to each surface.
What are the must-have tools to detail your car interior?
A high-quality vacuum with appropriate attachments is more critical for detailing effectiveness than expensive sprays, because it removes dirt and odors hidden in crevices. A crevice tool reaches between seat cushions and along door sills. A brush attachment loosens debris from carpet fibers before suction pulls it away. Without these attachments, you are leaving a significant amount of dirt behind regardless of what cleaner you apply afterward.
Detailing brushes are the second most important tool category. Soft-bristle brushes work on air vents and instrument clusters without scratching. Stiff-bristle brushes agitate carpet fibers and floor mats to loosen embedded grit. Narrow brushes reach seams in leather and stitching lines where a cloth cannot fit. Brush agitation removes up to 90% more embedded dirt from textured surfaces than microfiber cloths alone.
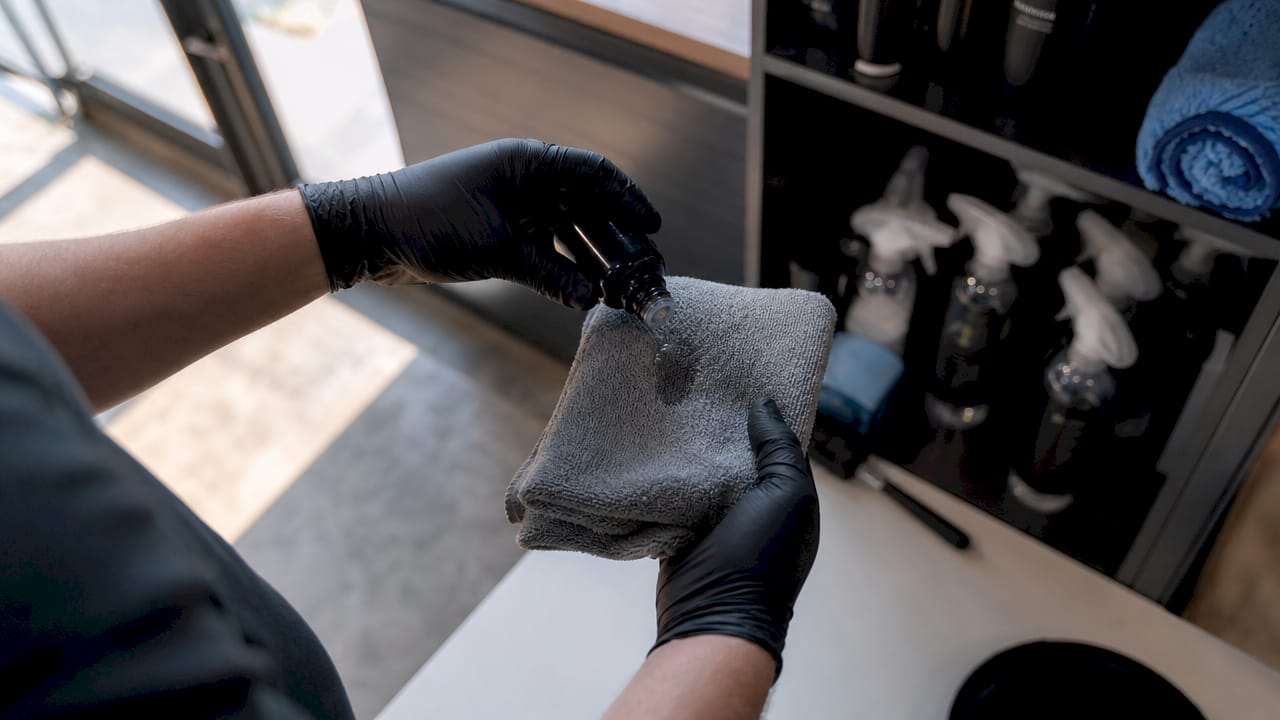
Microfiber towels are not interchangeable. Use a high-pile towel for wiping down soft surfaces and a low-pile, tightly woven towel for glass and hard plastics. Keep separate towels for each surface type to avoid cross-contamination. A minimum of six towels per session is a practical starting point.
- Vacuum: crevice tool, brush attachment, upholstery nozzle
- Detailing brushes: soft for vents, stiff for carpet, narrow for seams
- Microfiber towels: high-pile for soft surfaces, low-pile for glass and hard plastics
- Applicator pads: for spreading conditioners on leather or plastic trim
Pro Tip: Label your microfiber towels by color. Use blue for glass, gray for hard surfaces, and tan for leather. This prevents cross-contamination and keeps your workflow consistent.
Which cleaning products do you need for different car interior surfaces?
Matching cleaning chemistry to specific materials avoids residue buildup and prevents damage like cracking or hazing. A single all-purpose cleaner applied to every surface is the most common beginner mistake. Here is how to match product to surface:
- All-in-one interior cleaner: Safe for hard plastics, vinyl, and rubber trim. Works well on dashboards, door panels, and center consoles.
- Carpet and upholstery cleaner: Formulated to lift stains from fabric seats and floor mats without leaving a soapy residue.
- Leather cleaner and conditioner: pH-balanced formulas clean without stripping natural oils. Follow every leather cleaning session with a conditioner to prevent cracking.
- Automotive glass cleaner: Streak-free formulas designed for tinted windows. Standard household glass cleaners often contain ammonia, which degrades window tint film.
- Avoid entirely: Products containing bleach, ammonia, or hydrogen peroxide. These chemicals damage upholstery and coatings and should never be used inside a vehicle.
Application method matters as much as product choice. Spraying cleaner onto a microfiber towel rather than directly onto the surface prevents oversaturation, a leading cause of streaking failures. Direct spraying on dashboards can push liquid into vents and electronics. Spray onto the towel or applicator pad, then wipe.
Pro Tip: For leather seats, apply conditioner in circular motions with a foam applicator pad. Let it absorb for two minutes before buffing off the excess with a clean microfiber towel. This prevents greasy buildup.
You can find a deeper breakdown of safe interior cleaning products and what to avoid in Cdcautodetailing’s step-by-step guide.
What are the best techniques to detail your car interior effectively?
A proven cleaning sequence prevents recontamination and saves time. Cleaning in a top-down order means starting at the headliner and working down to the floor mats. Dust and debris fall downward, so cleaning from the top ensures you are not dirtying already-cleaned surfaces.
Follow this sequence for every interior detail:
- Remove loose items and floor mats. Take mats outside to beat and brush them separately.
- Vacuum the entire interior. Start at the headliner, move to seats and console, finish with floors. Vacuuming before applying any product prevents dust from turning into smears when wet cleaner is applied.
- Clean the headliner. Use a lightly dampened microfiber towel with a mild interior cleaner. Never saturate the headliner.
- Wipe down the dashboard and panels. Spray cleaner onto your towel, not the surface. Use a soft brush to agitate vents before wiping.
- Clean seats and the center console. Use the appropriate cleaner for fabric or leather. Agitate with a brush before wiping.
- Clean door panels and sills. These collect the most contact grime and often need a second pass.
- Shampoo carpets and floor mats. Apply carpet cleaner, agitate with a stiff brush, then blot with a clean towel.
- Clean all glass surfaces last. Use an automotive glass cleaner on a low-pile microfiber towel.
Moisture control is the most overlooked technique. Oversaturating any surface risks warping trim, growing mold under carpet, or damaging electronics. Spray your towel until it is damp, not wet.
What common mistakes should you avoid when detailing your car interior?
Most detailing failures come from a short list of repeatable errors. Recognizing them before you start protects your interior and your time.
- Using one cleaner on every surface. All-purpose cleaners leave residue on leather and can haze plastic trim. Use surface-matched cleaners for better longevity and appearance.
- Spraying products directly onto surfaces. This causes streaking on glass and pushes liquid into electronics. Always spray onto the applicator or towel.
- Skipping the vacuum step. Applying a wet cleaner over loose dirt creates a paste that grinds deeper into fibers. Vacuum first, every time.
- Using household cleaners. Bleach, ammonia, and hydrogen peroxide degrade upholstery, coatings, and window tint. Stick to automotive-specific products.
- Ignoring brushes and attachments. A vacuum nozzle alone cannot reach seat seams or vent slats. Skipping brushes leaves the most visible dirt behind.
You can find a full breakdown of detailing mistakes to avoid on the Cdcautodetailing blog, including product misuse errors that are easy to overlook.
How can you assemble a practical starter kit for car interior detailing?
A starter kit does not need to be expensive. Tool quality, especially vacuums and brushes, limits results more than product variety. Spend more on the vacuum and less on specialty sprays until you have the basics covered.
| Item | What to look for |
|---|---|
| Vacuum with attachments | Crevice tool, brush nozzle, and upholstery attachment included |
| Microfiber towels (6+) | Mixed pile heights; separate sets by color for each surface type |
| All-in-one interior cleaner | Safe for vinyl, plastic, and rubber; no ammonia or bleach |
| Carpet and upholstery cleaner | Enzyme-based formula for stain lifting without soapy residue |
| Detailing brush kit | Soft, stiff, and narrow brushes covering vents, carpet, and seams |
| Leather cleaner and conditioner | pH-balanced; only needed if your vehicle has leather surfaces |
Budget tip: buy microfiber towels in bulk packs rather than individually. A 24-pack costs roughly the same as four individually packaged towels and gives you enough to keep separate sets for each surface type.
Pro Tip: Store your kit in a small plastic bin with a lid. Keeping tools together means you spend less time searching and more time cleaning. Label the bin so nothing gets borrowed for household use.
For a full interior detailing checklist that walks through each step in order, Cdcautodetailing has a free resource worth bookmarking.
Key Takeaways
A complete car interior detail requires a vacuum with attachments, surface-matched cleaners, microfiber towels in multiple pile heights, and a brush kit covering vents, carpet, and seams.
| Point | Details |
|---|---|
| Vacuum first, always | Vacuuming before applying any product prevents dirt from turning into smears. |
| Match cleaner to surface | Use leather cleaner on leather, carpet cleaner on fabric, and glass cleaner on windows. |
| Spray towel, not surface | Applying cleaner to the towel prevents oversaturation and protects electronics. |
| Brushes beat cloths alone | Brush agitation removes significantly more embedded dirt from textured surfaces than microfiber alone. |
| Top-down sequence wins | Cleaning from headliner to floor mats prevents recontamination of already-cleaned areas. |
Why tools matter more than products in interior detailing
Car owners consistently overspend on specialty sprays and underspend on the tools that actually do the work. I have seen this pattern repeat itself more times than I can count. A $5 bottle of all-purpose cleaner applied with a quality brush and a good vacuum will outperform a $40 specialty kit used with a single rag and no suction.
The vacuum is the single most important purchase in any interior detailing setup. If it cannot reach seat seams, vent slats, and the gap between the center console and the seat, you are cleaning the surface of the dirt, not removing it. Attachments are not optional accessories. They are the difference between a clean car and a car that smells clean for three days.
My honest advice: buy the best vacuum you can afford, pick up a $15 brush kit, and choose one good all-in-one interior cleaner to start. Add a leather cleaner and conditioner only if your vehicle has leather. Master the top-down sequence and the spray-on-towel technique before you buy anything else. Experience with the right method beats a cabinet full of products every time.
— Charles
Professional detailing when DIY reaches its limits
Some stains, odors, and surface conditions go beyond what a starter kit can fix. Cdcautodetailing offers professional mobile detailing services across South Jersey, bringing professional-grade equipment directly to your driveway.

After a thorough interior detail, many car owners choose to add a layer of long-term protection. Cdcautodetailing provides ceramic coating services that protect both interior and exterior surfaces from future contamination. Booking is straightforward through the Cdcautodetailing website, and the team covers a wide range of service areas throughout South Jersey. If your interior needs more than a DIY session can deliver, professional help is one appointment away.
FAQ
What is the most important tool for car interior detailing?
A vacuum with crevice, brush, and upholstery attachments is the most critical tool. It removes embedded dirt and odors that no cleaning product can address on its own.
Can I use household cleaners on my car interior?
No. Products containing bleach, ammonia, or hydrogen peroxide damage upholstery, coatings, and window tint. Use automotive-specific cleaners matched to each surface type.
How many microfiber towels do I need to detail a car interior?
A minimum of six towels per session is practical. Use separate towels for glass, hard surfaces, and leather to avoid cross-contamination between surfaces.
Do I need a separate cleaner for leather seats?
Yes. Leather requires a pH-balanced cleaner followed by a conditioner. Using an all-purpose cleaner on leather strips natural oils and leads to cracking over time.
What order should I clean a car interior?
Clean top-down: headliner first, then dashboard and panels, then seats and console, and finish with floors and mats. This sequence prevents dust from falling onto already-cleaned surfaces.