
Most surface-level leather damage, including scuffs, light cracks, and fading, can be restored without replacing the seat. The process follows five steps: assess the damage, clean and prep the surface, repair cracks or tears, match and apply color, then condition and protect the finish. Expect a few hours for minor DIY fixes, longer for structural repairs that need a professional.
TL;DR:
- Identify leather type first: pigmented seats suit standard fillers and colorants, aniline needs gentler products, and bonded leather often peels in sheets.
- Use a leather cleaner with balanced pH, test it on a hidden patch, and let the seat dry for an hour before repairs.
- Build deep crack repairs with thin filler layers, sanding between coats; through tears need backing patches, while exposed foam or delaminated panels require a professional.
- Match color on a hidden area, apply several thin coats, and allow the color and topcoat to cure fully before sitting on the seat.
- After repairs cure, condition leather every one to two months, add a protective topcoat, and avoid silicone products that can block dye or filler adhesion.
Table of Contents
- How to assess leather type and damage severity
- Cleaning and prep: safe products and step-by-step routine
- Repair techniques for scuffs, cracks, and small tears
- Color restoration and dyeing: how to match and apply like a pro
- Conditioning and protecting restored leather: a maintenance plan
- Pro tips and hiring guide from CDC Auto Detailing
- Author perspective on DIY vs professional restoration
- Restoring leather seats with CDC Auto Detailing
- FAQ
- Sources
How to assess leather type and damage severity
Before touching a cleaner or filler, figure out what you’re working with. Pigmented (finished) leather has a consistent color coat and is the most common and most repairable type in vehicles. Aniline and semi-aniline leathers show more natural grain and absorb dye differently, so they need gentler products and more careful color testing. Bonded leather, often found on lower-cost seats, is a composite material that cracks and peels in sheets rather than fine lines, which usually signals a shorter repair lifespan.
Surface damage, think scuffs, small scratches, minor fading, sits in the topcoat and responds well to filler and color work. Structural damage, like torn seams, foam showing through, or cracks running the full depth of the material, usually needs stitching or patching.
- Take close-up and wide-angle photos plus measurements of any crack, tear, or worn patch.
- Note whether the damage is isolated to one seam or spread across a panel.
- Check if foam or padding is visible, which points to structural repair.
Expect small cosmetic repairs to run under several hundred dollars in materials, while independent shop repairs often range widely depending on damage and leather type, according to a cost breakdown from Stellantis.
Cleaning and prep: safe products and step-by-step routine
Skip the household cleaners. Strong detergents, bleach, and ammonia-based glass cleaners strip the natural oils and topcoat finish that keep leather flexible, which accelerates cracking instead of preventing it. A pH-balanced leather cleaner is the safer bet, and our guide on what to use on leather car seats walks through specific product choices.
- Vacuum the seat thoroughly, including seams and crevices, to remove grit that can scratch the surface during cleaning.
- Test any cleaner on a hidden patch, like the underside of the seat, before applying it broadly.
- Clean with a soft microfiber cloth and a leather-safe cleaner, working in small sections.
- Treat stubborn stains separately with a stain-specific leather product rather than scrubbing harder.
- Let the seat air dry fully before moving to repair work; trapped moisture interferes with filler adhesion.
- Lightly sand or scuff the damaged area with a fine abrasive pad if you’re applying filler, so the new material has something to grip.
Our breakdown of what to clean leather car seats with covers additional product options if you’re dealing with grease or ink stains.
Pro Tip: Let cleaned leather rest for a full hour before repair work starts: residual dampness is one of the most common reasons fillers fail to bond.
Repair techniques for scuffs, cracks, and small tears
Light scuffs and shallow cracks follow a predictable sequence: fill the gap with a flexible leather filler, let it cure, sand it smooth, then stamp in a grain texture before sealing. This keeps the repaired spot from looking flat or glossy next to the surrounding leather.
Deeper cracks need more patience. Build the filler in thin layers rather than one thick pass, sanding lightly between coats, since multiple thin layers preserve flexibility and resist re-cracking at stress points, a technique practitioner guidance from Leather Advice outlines for common repair scenarios. For splits that go all the way through, a backing patch behind the hole gives the filler something to anchor to, which matters most on bolsters and seat edges that flex constantly.
Small tears along a seam sometimes just need restitching with a heavy-duty needle and waxed thread, matched to the original stitch pattern. Larger tears combine a backing patch with filler and color work to blend the repair into the surrounding panel.
- A leather filler compound rated for automotive use
- Fine-grit sanding sponges (400 to 600 grit)
- A grain texture pad matching your seat’s pattern
- A heat tool or heat gun for curing certain fillers
- Backing material for through-and-through holes
Pro Tip: Buy a texture pad that matches your seat’s actual grain pattern, not a generic one. Mismatched grain is the single biggest giveaway of an amateur repair.
Color restoration and dyeing: how to match and apply like a pro
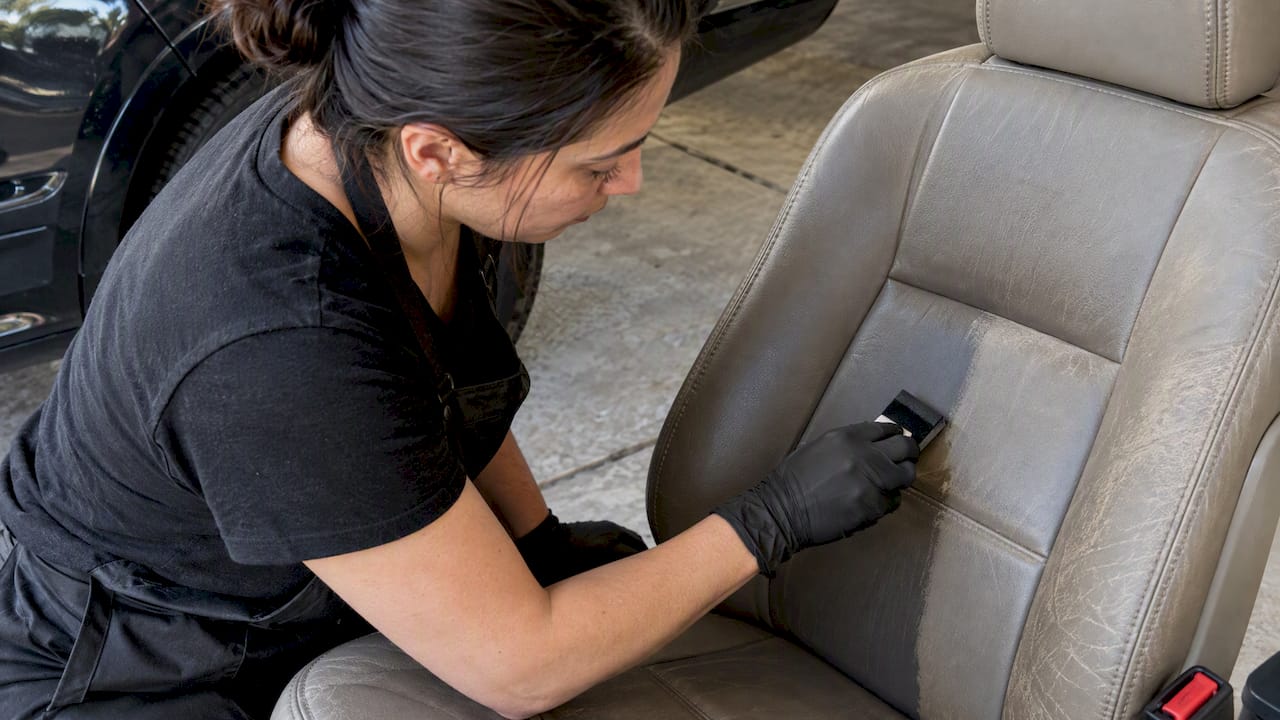
Dyes, pigments, and leather restorers aren’t interchangeable. Dyes penetrate the leather and work best on aniline leather with minimal existing finish. Pigmented colorants sit on top and are the standard choice for most pigmented automotive leather, since they cover wear and blend repairs more evenly. Restorer products combine color with a flexible binder and are often the simplest option for DIY touch-ups on finished leather.
Color matching starts with testing on a hidden area, like the back of a headrest or under the seat, and building up color in thin coats rather than one heavy application.
- Mix the colorant and apply a test patch before committing to the full seat.
- Use a sponge or airbrush for even coverage; brushes tend to leave streaks on larger panels.
- Seal the finished color with a flexible topcoat once it’s fully dry.
- Allow full curing time, often several hours, before sitting on the seat or applying conditioner.
Rushing the cure time is the most common mistake: a topcoat applied over still-tacky dye will stay sticky or peel within weeks.
Conditioning and protecting restored leather: a maintenance plan
Once color and topcoat have cured, condition the leather to restore flexibility and reduce future cracking. A topcoat built for abrasion resistance and soil resistance protects the repair longer than conditioner alone, since research on automotive leather topcoats shows that coatings balancing polyurethane and acrylic chemistries hold up better against UV exposure and surface soiling than single-chemistry finishes.
- Condition every one to two months, more often in hot or sun-exposed climates.
- Clean, then condition, then apply a protective topcoat, in that order, on a repeating cycle.
- Avoid silicone-based products, which can interfere with future dye or filler adhesion.
- Keep seats out of direct sun when parked for extended periods to slow UV breakdown.
For ongoing coating care between full restorations, Diamondbrite’s maintenance guidance covers upkeep routines that apply to protected leather surfaces as well as exteriors.
Pro tips and hiring guide from CDC Auto Detailing
Some damage is a clear signal to stop and call a professional. Structural tears, panel delamination, or seats peeling in sheets usually mean the foam or backing is compromised, which DIY filler can’t fix.
- Industrial sewing machines handle heavy-duty stitching that a home sewing kit can’t replicate.
- Sub-patching, replacing the foam or backing layer beneath torn leather, requires disassembling the seat.
- Professional spray color-matching blends large panels evenly, which is difficult to achieve with a sponge or brush.
A shop repair for moderate damage typically takes a day or two, and bringing photos, measurements, and the vehicle’s year and model speeds up an accurate estimate, consistent with the documentation practices outlined in the Stellantis cost breakdown. Full reupholstery or OEM-level restoration tends to push costs into the higher price ranges depending on the vehicle.
Author perspective on DIY vs professional restoration
DIY makes sense for scuffs, small cracks, and fading you can reach with a filler kit and a weekend. Once you’re looking at torn seams, exposed foam, or color that needs to match across multiple panels, the math favors a professional. My rule: if the repair would cost more in redone materials than a shop visit, call a shop. Document everything with photos first, regardless of which path you choose.
— Charles
Restoring leather seats with CDC Auto Detailing
When a seat needs more than a weekend fix, our Interior Detail service covers leather cleaning, conditioning, and restoration work as part of a full interior refresh, and we bring the equipment and color-matching experience that a home kit can’t match. For damage spread across multiple seats or a full cabin refresh, our Detail Packages bundle interior restoration with exterior care at a set price, so you know the cost before we start.

Before booking, snap a few photos of the damaged areas and note which seats need work, interior detailing pricing depends on scope and condition. If you’re unsure which package fits, our guide to selecting a detailing package walks through what each tier covers.
- Mention any structural damage (foam showing, torn seams) when you request a quote.
- Let us know your vehicle’s leather type if you know it, pigmented, aniline, or bonded.
- Ask about combining leather restoration with a full interior detail for better value.
Ready to see what a professional restoration looks like for your seats? Book an estimate with CDC Auto Detailing and get a clear price before any work begins.
FAQ
Can leather car seats be repaired?
Yes, most leather seat damage, including scuffs, small cracks, and minor tears, can be repaired using filler, color-matching, and sealing techniques, according to practitioner guidance on common repair scenarios. Severe structural damage, like torn padding or panel delamination, typically needs professional-grade equipment and materials.
Does Vaseline get scratches out of leather?
Petroleum jelly can temporarily mask very light surface scratches by filling them in and adding shine, but it doesn’t actually repair the leather’s finish. It can also interfere with later conditioning or dye work, so a leather-specific filler or conditioner is a more reliable choice for lasting results.
Is Dawn dish soap good for leather seats?
Dish soap is too harsh for leather upholstery because it strips natural oils and the protective topcoat, which can speed up cracking over time. A pH-balanced leather cleaner is formulated to clean without stripping those protective layers.
Do leather restorers really work?
Leather restorer products, which combine color pigment with a flexible binder, work well for covering minor fading and light wear on pigmented automotive leather. They’re less effective on deep cracks, tears, or structural damage, which need filler, patching, or professional repair instead.
Sources
- Finishing processes / Dow Leather Solutions
- 7 Common Leather Repair Scenarios – How pros fix them | Leather Advice