
Start with a wash, then move to a lubricated clay bar or clay towel, and only reach for a light compound or polish if residue remains. The process is designed to help preserve your clear coat by escalating one step at a time. If your fingernail ever catches on the mark, or you spot primer or bare metal underneath, stop and get a professional opinion.
TL;DR:
- Inspect in direct light after washing: intact color and a smooth surface suggest transferred paint, while grooves or cracked clear coat indicate deeper damage.
- Test compound on a hidden spot first, then inspect after each pass; compounding removes clear coat and can further thin previously corrected paint.
- Keep a polisher moving with light pressure, and stop if haze, dullness, peeling, cracking, or uneven texture appears rather than increasing abrasion.
- Seek professional assessment for extensive marks, collision damage, failed DIY correction, or missing clear coat; photographs from several angles help assess the repair.
- After correction, remove residue and restore wax or sealant; vehicles with ceramic coating or paint protection film should use products approved by their makers.
Table of Contents
- How to tell if it’s surface transfer or deeper damage
- Tools and materials, from gentlest to strongest
- Step-by-step: removing paint transfer without damaging your clear coat
- When to stop and call a professional instead
- Reseal the panel once the transfer is gone
- Why the clay-first approach is the right default
- How we can help when DIY correction isn’t enough
- FAQ
- Sources
How to tell if it’s surface transfer or deeper damage
Before touching the mark, wash the panel and look at it in strong, direct light. Most paint transfer sits on top of your clear coat rather than inside it, which is why a careful look often tells you more than reaching for a product right away.
- Wash and inspect in bright light before trying any removal method.
- Run a fingernail lightly across the mark: a catch or groove often signals clear-coat or deeper damage.
- Check for exposed primer, bare metal, or clear coat that looks cracked or peeling.
- If the mark followed a collision, photograph it from multiple angles before deciding on a repair path.
If the original paint color underneath still looks intact and the surface feels smooth, you are likely dealing with foreign paint sitting on your clear coat, which is a decontamination job rather than a repair job.
Tools and materials, from gentlest to strongest
Work through a short kit in order of aggressiveness rather than reaching for the strongest product first. Each item below has a specific job in the sequence.
- A pH-neutral car shampoo, soft wash mitt, and plush microfiber towel for the initial wash.
- Water-based clay lubricant paired with a cleaner clay bar or clay towel, such as the 3M Perfect-It Cleaner Clay system, which is built for paint, glass, and chrome contamination like overspray and road-paint spatter.
- Foam applicators and extra microfiber towels for checking your progress.
- A light rubbing compound and a finer finishing polish, each with its own foam pad.
- An optional dual-action polisher with suitable pads, along with appropriate safety gear.
Having every step of the ladder ready before you start keeps you from skipping straight to an abrasive when something gentler would have worked.
Step-by-step: removing paint transfer without damaging your clear coat
This sequence follows the conservative, clay-first order that Chemical Guys recommends for paint transfer that sits on top of an intact clear coat. Check your progress after every stage and stop escalating as soon as the mark is gone.
- Wash and dry the panel thoroughly. Grit left on the surface can scratch the clear coat once you introduce any pressure, so this step is not optional.
- Work the clay bar or clay towel. Spray the panel generously with lubricant, then glide the clay in light, straight passes over a small section at a time, folding it to a clean face whenever it picks up residue. 3M’s technical bulletin calls for thorough lubrication and small working sections before moving on to anything abrasive.
- Inspect after wiping off residue. Some transfer marks may lift at this stage, especially when the foreign paint is sitting on top of intact clear coat.
- Apply a light compound by hand if transfer remains. Use a foam applicator and test a small, hidden area first to confirm the compound is not too aggressive for your finish.
- If you use a dual-action polisher, keep the pad moving. Use light pressure, keep the pad moving, and inspect the panel frequently rather than working a single spot continuously.
- Finish with a light polish. This step can refine haze from compounding and improve gloss. Wipe away residue and inspect the area to assess the result.
Pro Tip: Use light passes rather than pressing harder, and keep the pad moving to help preserve the clear coat.
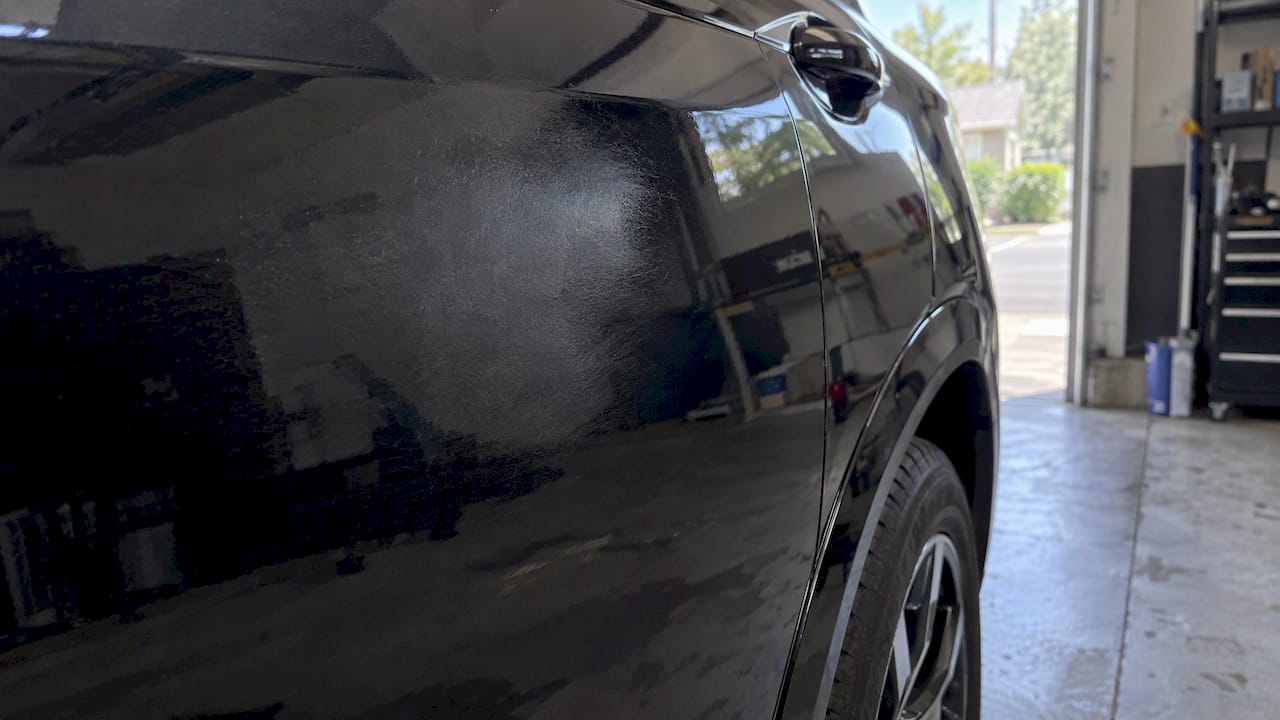
Check your results after every single step. Stop when the transfer is gone. If you see dullness, persistent haze, or signs of clear-coat damage, stop escalating rather than reaching for a stronger product.
When to stop and call a professional instead
Some signs mean you are no longer dealing with surface transfer, and continuing to polish or compound can make the repair bigger than it needs to be.
- Stop immediately if your fingernail catches a groove or you can see primer or metal.
- Stop any abrasive correction if the clear coat looks peeling, cracked, or uneven in texture.
- A large-area mark, a spot that didn’t respond to clay or light compounding, or any damage next to a collision point calls for a professional look.
- Photograph the damage from several angles and bring those images to a paint correction specialist or collision repair shop.
3M’s scratch-removal guidance explains that missing clear coat cannot be restored through polishing and may require professional panel repair. I-CAR’s collision repair guidance adds that proper repair after a collision considers more than the visible mark, including panel alignment and other structural factors a cosmetic fix won’t catch.
Reseal the panel once the transfer is gone
Compounding and polishing can remove existing wax or sealant, so consider applying compatible protection after correction. Reapplying protection is part of finishing the job, not an optional extra.
- Clean the panel once more to remove any leftover product residue.
- Apply a polymer sealant, carnauba wax, or a compatible ceramic coating following the label instructions.
- If your vehicle already has a ceramic coating or paint protection film, use only products the coating or film maker approves, and avoid harsh solvents that can degrade either layer.
- Buff off any excess with a clean microfiber towel and consider whether a professional coating or film suits your protection needs.
Why the clay-first approach is the right default
DIY paint correction can go wrong when people reach for an aggressive product before trying a gentler method. That instinct is backwards. Starting with clay can remove contamination sitting on top of the clear coat while avoiding unnecessary abrasive correction. Compound is abrasive and can remove clear coat.
That distinction matters on vehicles with prior correction, since compounding can further reduce clear-coat thickness. We treat clear-coat thickness as a finite resource, and prefer trying clay before compound when it may remove the mark. The habit of inspecting after every single pass, rather than committing to a full panel before checking results, is what separates a clean fix from a trip to a body shop.
— Charles
How we can help when DIY correction isn’t enough
If clay and light polishing didn’t fully clear the mark, or your fingernail caught and you’d rather not risk it, we offer exterior detailing and paint correction. We also install paint protection film and ceramic coatings as options for protecting your vehicle’s finish.

Book an inspection if the damage followed a collision, if DIY correction stalled, or if you’d simply rather hand it to a professional. Our exterior detail package starts the process, and we’ll tell you honestly whether your panel needs correction, protection, or both.
FAQ
Will WD-40 remove paint transfer?
WD-40 is not part of the supported paint-transfer removal sequence. Use a lubricated clay bar and assess the result before considering light polishing. A lubricated clay bar followed by a light compound, as Chemical Guys outlines, is the safer sequence for your clear coat.
What is the best rubbing compound to remove paint transfer?
There is no single universal answer, since the right compound depends on your clear coat’s condition and how much correction you actually need. The safer approach is to try the least aggressive option first: a light compound applied by hand on a foam applicator, tested on a small hidden spot before you work the full mark.
Will buffing get rid of paint transfer?
Buffing with a compound can remove paint transfer, but it also removes a thin layer of your clear coat each time, so it should come after clay rather than before it. Keep the pad moving and inspect frequently, since concentrated pressure and heat are what cause buffing damage according to research on clear-coat buffing mechanics.
Can acetone remove car paint transfer?
Acetone is not part of the conservative removal sequence. Use clay first, then consider a light compound and polish if needed. Clay, followed by light compound and polish if needed, is the supported removal sequence for paint transfer.
Sources
- [How To Remove Paint Transfer From Cars
| Chemical Guys](https://www.chemicalguys.com/blogs/exterior-how-tos/how-to-remove-paint-transfer-from-car) - Multimedia
- Zalepi
- 3M™ Perfect-It™ Cleaner Clay, 38070, 200 g, 1 bar per bottle, 6 bottles per case | 3M United States