
For fresh sap, soak the spot with warm, soapy water or a dedicated tar and sap remover, then lift it gently with a microfiber cloth. For baked-on sap, move to a clay bar or hand the job to a professional detailer. Always test a small area first, skip abrasive scraping on paint, and finish with wax or sealant to protect the clear coat.
TL;DR:
- Wash the panel first to remove grit, then press a warm, soapy microfiber cloth on fresh sap for 30 to 60 seconds; blot rather than scrub.
- Baked sap calls for a test spot first, then diluted isopropyl alcohol and an automotive remover; reserve lubricated clay for a cool panel as a last resort.
- Keep acetone, lacquer thinner, undiluted alcohol, gasoline, and metal tools off painted surfaces; they can damage clear coat, trim, or protective coatings.
- If sap leaves discoloration, covers a wide area, or resists paint safe solvents, stop escalating at home and book a professional detailer.
- After removal, rinse and dry the area, inspect for residue, then restore protection with wax or sealant; coatings or film can help beneath trees.
Table of Contents
- How to remove fresh sap from paint and glass
- Removing stubborn or baked-on sap without damaging the finish
- What not to use on sap-covered paint
- Aftercare and preventing the next sap stain
- A practitioner’s checklist for handling sap safely
- Book a mobile detail when sap won’t budge safely
- FAQ
- Sources
How to remove fresh sap from paint and glass
Fresh sap is the easiest kind to deal with, but grit left on the surface can turn a soft cloth into sandpaper if you skip the first step. Work through this sequence before reaching for anything stronger.
- Wash the whole panel with a two-bucket method or a quality mitt and car soap to clear away dirt and grit.
- Soak a warm, soapy microfiber cloth and press it onto the sap for 30 to 60 seconds so the resin softens instead of dragging across the paint.
- Blot and lift the softened sap rather than scrubbing, then rinse the area and dry it with a clean towel.
- If residue remains, apply an automotive bug and tar or sap remover according to the label, then rinse thoroughly.
This dwell period matters more than most people assume. Letting a product sit for at least 30 to 60 seconds breaks down the resin bond before you touch it, which cuts the risk of dragging grit and leaving fine scratches. On glass, a razor blade held flat against the surface can lift stubborn sap that soap alone won’t budge, but that trick stays off painted panels, where the same blade would cut straight through the clear coat.
Pro Tip: Keep a spray bottle of warm, soapy water in your trunk so you can treat fresh sap the moment you spot it, before it has a chance to bake in the sun.
Removing stubborn or baked-on sap without damaging the finish
Sap that’s been sitting for days or weeks behaves differently. Heat from the sun drives the resin deeper into the clear coat’s surface, and the longer it stays, the more it starts to act less like a sticky residue and more like a bonded contaminant. Consumer Reports notes that removing sap as soon as possible matters because heat speeds up how it bonds to paint, and extended exposure can etch straight through the clear coat.
For sap that won’t come off with soap and water alone, work up through these options in order, testing an inconspicuous spot before each one:
- Try diluted isopropyl alcohol on a cloth first, since it’s gentle enough for most finishes.
- Step up to a dedicated automotive sap or tar remover if the alcohol doesn’t fully clear it.
- Use an automotive adhesive remover rated safe for cured paint, such as 3M’s formula, which relies on petroleum solvents designed to dissolve adhesive and tar without harming most cured finishes when used as directed.
- Reach for a clay bar with a synthetic lubricant as a last resort for sap that’s physically bonded to the surface.
Chemical Guys recommends this laddered approach, moving from non-abrasive products to automotive-rated solvents and only reaching for clay when softer methods fail. When you do use a clay bar, keep the panel cool and well lubricated, fold the clay to a fresh surface every few passes, and work in light, short strokes rather than long drags. Avoid claying a hot panel or working in direct sunlight, since the lubricant dries out fast and raises the chance of marring.
Pro Tip: Stop immediately if the clay starts to drag or the panel looks dull afterward. That’s a sign it’s time to rinse, re-lubricate, and reassess rather than push through.
If the sap has left visible discoloration, covers a wide area, or shrugs off every safe solvent you try, that’s the point to book a professional detailer or paint-correction service instead of escalating to something harsher at home. A similar progression applies to glue residue on car paint, where the same test-first, soften-before-touching logic keeps the clear coat intact.
What not to use on sap-covered paint
Plenty of home remedies promise a fast fix, and most of them trade a quick result for real damage. Chemical Guys warns against social-media shortcuts that can strip wax, attack rubber trim, or eat into clear coat.
- Acetone and lacquer thinner strip wax and sealant and can dull or discolor paint on contact.
- Undiluted rubbing alcohol is harsh enough to damage trim and, over time, soften clear coat.
- WD-40 and gasoline leave oily residue that attracts more dirt and can degrade plastic and rubber parts.
- Aggressive scraping with a razor or metal tool cuts through the clear coat on painted surfaces, something that’s only safe on glass.
Household swaps aren’t free of risk either. AAA Club Alliance points out that tricks like peanut butter or WD-40 may soften sap, but they often leave residue or harm coatings, making a purpose-built automotive adhesive remover a safer substitute for nail polish remover or acetone. The same caution applies to tackling tar deposits on a car’s finish, where progressive, paint-safe solvents beat any one-step hack.
Aftercare and preventing the next sap stain
Once the sap is gone, the job isn’t finished until you’ve cleared away solvent residue and put protection back on the surface. Rinse the treated area thoroughly, dry it with a clean towel, and inspect it under good light for any leftover film.
- Reapply a quick wax or spray sealant to the cleaned spot to restore the protective layer you just stripped away.
- Consider paint protection film or a ceramic coating if you park under trees often, since a sacrificial layer reduces how strongly future sap can bond.
- Stick to a regular wax schedule rather than waiting for visible damage to show up.
- Park away from overhanging branches when you can, or use a breathable car cover during peak sap season.
AAA notes that regular waxing and protective coatings give contaminants less to grip, which makes the next cleanup easier. For a deeper look at how these layers work together, paint protection strategies cover the tradeoffs between wax, sealant, and longer-term coatings.
A practitioner’s checklist for handling sap safely
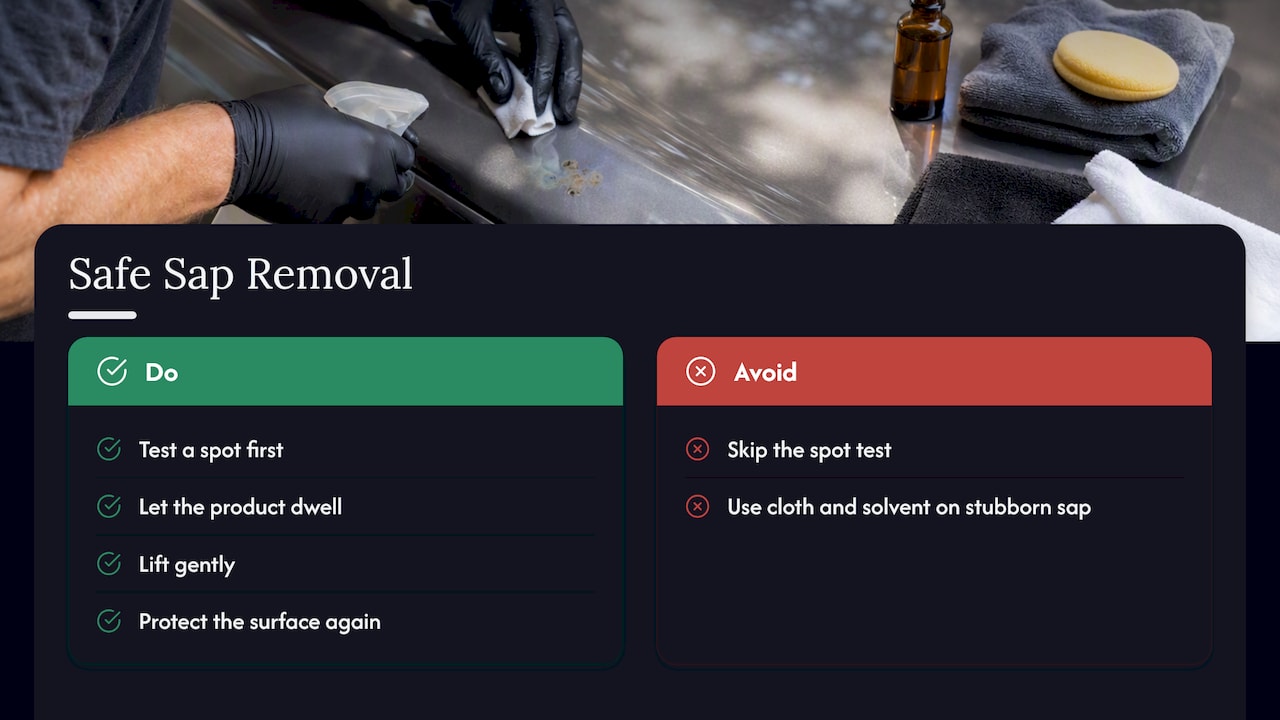
The order that keeps paint safe never changes: test a spot, let the product dwell, lift gently, then protect the surface again. Skipping the test step is where most DIY sap removal goes wrong, since a solvent that’s fine on one car’s clear coat can dull another.
When sap has baked on for weeks, left behind discoloration, or spread across a wide panel, that’s usually past the point where a cloth and solvent will finish the job cleanly. At that stage, an exterior detail, paint correction, or a protective layer like PPF or ceramic coating addresses both the current stain and the next one.
— Charles
Book a mobile detail when sap won’t budge safely
Baked-on sap that resists safe solvents is exactly the kind of job worth handing off. We bring paint-safe removal techniques straight to your driveway across South Jersey, and we can pair the cleanup with protective options like paint protection film or ceramic coating so the next batch of sap never gets the chance to bond.

- Detail packages for a full interior and exterior refresh.
- Exterior detail focused on restoring a sap-affected finish.
- Ceramic coating to reduce future buildup from trees and sap.
Request a quote through our detail packages page and we’ll walk you through the right option for your vehicle.
FAQ
How do you get dried sap off a car without damaging paint?
Start with warm, soapy water and let it sit on the sap for 30 to 60 seconds before wiping, then move to a dedicated automotive sap or tar remover if residue remains. For sap that’s fully bonded, a clay bar with synthetic lubricant lifts it without abrasive scrubbing, as Chemical Guys recommends.
Does WD-40 remove sap from car paint?
WD-40 can loosen some sap, but it leaves an oily residue that attracts dirt and can degrade rubber trim and plastic parts nearby. A purpose-built automotive sap or adhesive remover is the safer choice for paint and surrounding trim.
Will Dawn dish soap remove tree sap from car?
Dish soap mixed with warm water can soften fresh sap when you let it dwell on the spot before wiping, making it a reasonable first step. It won’t typically clear sap that’s already bonded to the clear coat, which calls for a dedicated remover or clay bar instead.
Will Goo Gone remove tree sap from car paint?
Adhesive removers in that category can work on sap, but always check that the specific product is labeled safe for automotive clear coat and test a hidden spot first. A formula built for cured automotive paint, like 3M’s adhesive remover, reduces the risk of dulling or discoloring the finish.
Sources
- How to remove tree sap from your car | Chemical Guys
- How to get tree sap and bugs off your car | Consumer Reports
- 3M™ Adhesive Remover product page
- How to clay bar a vehicle | Autotrader