TL;DR:
- Paint correction permanently removes surface defects by leveling the clear coat, unlike waxing or polishing.
- Proper tools, techniques, and paint thickness measurements are crucial to avoid damaging the vehicle’s paint.
- Professional help is recommended for thin, complex, or delicate finishes to prevent irreversible damage.
Most car owners assume a fresh wax or a thorough wash will take care of those dull, scratched, or hazy spots on their vehicle’s finish. That assumption costs people real money. Waxing adds a thin protective layer on top of the paint, but it does nothing to fix what’s underneath. Paint correction is a completely different process, one that physically restores the surface by removing actual defects from the clear coat. This guide breaks down exactly what paint correction is, how it works, what tools and techniques are involved, and when it makes sense to call in a professional rather than attempting it yourself.
Table of Contents
- What automotive paint correction really means
- The essential tools and techniques for safe, effective correction
- Navigating challenges: Thin paint, unusual finishes, and edge cases
- Why professional help matters for at-home paint correction
- Our take: The uncomfortable truth about paint correction
- Bring out your car’s best finish with CDC Detailing
- Frequently asked questions
Key Takeaways
| Point | Details |
|---|---|
| Paint correction defined | It’s the process of permanently removing paint defects by safely leveling the clear coat. |
| Proper tools needed | Always use a paint thickness gauge and the least aggressive method for effective correction. |
| Know your limits | Edge cases and thin paint require expert evaluation to avoid irreversible damage. |
| Professional help advantage | Pros have better tools, knowledge, and can handle challenging finishes or deep defects. |
What automotive paint correction really means
Paint correction is not a single product or a quick fix. It is a multi-step process that removes surface imperfections by carefully leveling the clear coat, which is the transparent outer layer that protects your car’s color. Instead of masking defects, correction eliminates them permanently by abrading the clear coat down to a uniform, smooth surface.
This is fundamentally different from regular waxing or polishing. Waxing fills in minor scratches temporarily and adds gloss, but the defects return as soon as the wax wears off. True paint correction removes the defect itself, which is why results can last for years when properly maintained.
Here are the most common problems that paint correction addresses:
- Swirl marks caused by improper washing technique or automatic car washes
- Water spots left by mineral deposits from hard water or sprinklers
- Oxidation that makes paint look chalky or faded, especially on older vehicles
- Chemical etching from bird droppings, tree sap, or acid rain
- Light to moderate scratches that have not cut through the clear coat
One of the most important concepts in paint correction is paint thickness. Your car’s clear coat is typically between 100 and 200 microns thick, and paint correction removes only 2-5 microns per stage, with a safe lifetime maximum of around 25% of the total clear coat. That means there is a finite number of times correction can be performed before the clear coat becomes dangerously thin.
Pro Tip: Before any correction work begins, measure your paint thickness with a digital gauge. This single step tells you how much room you have to work with and prevents irreversible damage.
Professionals who pursue paint correction training learn to read these numbers and adjust their approach accordingly. Performing correction in a dust-free paint environment also dramatically reduces the risk of introducing new defects during the process.
“Paint correction done right is a science, not a shortcut. Every pass of the polisher removes material that can never be replaced.”
| Detailing method | What it does | Defect removal | Longevity |
|---|---|---|---|
| Waxing | Adds protective layer | No | Weeks to months |
| Polishing | Adds gloss, minor smoothing | Minimal | Months |
| Paint correction | Levels clear coat | Yes, permanent | Years |
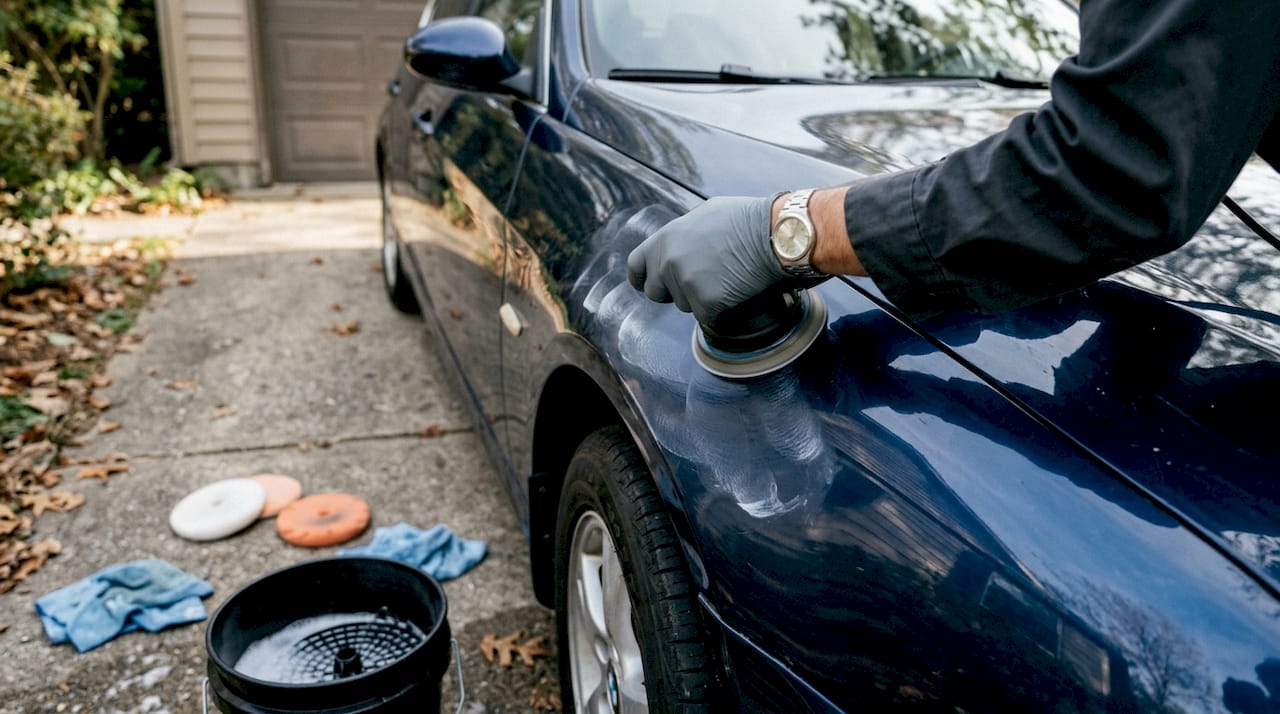
The essential tools and techniques for safe, effective correction
Knowing what tools and methods actually deliver results without damaging your car’s paint is just as important as understanding what paint correction is. The wrong tool or technique can cause more harm than the original defect.
The two main types of polishers are dual-action (DA) and rotary. Here is how they compare:
| Feature | DA polisher | Rotary polisher |
|---|---|---|
| Ease of use | Beginner-friendly | Requires experience |
| Cutting power | Moderate | High |
| Heat generation | Low | High |
| Risk of damage | Lower | Higher |
| Best for | Light to moderate defects | Heavy correction |
Pad choice matters just as much as polisher type. Essential tools include DA and rotary polishers, foam, microfiber, and wool pads, along with a paint thickness gauge. Wool pads cut aggressively, foam pads balance cutting with finishing, and microfiber pads are ideal for final polishing stages.
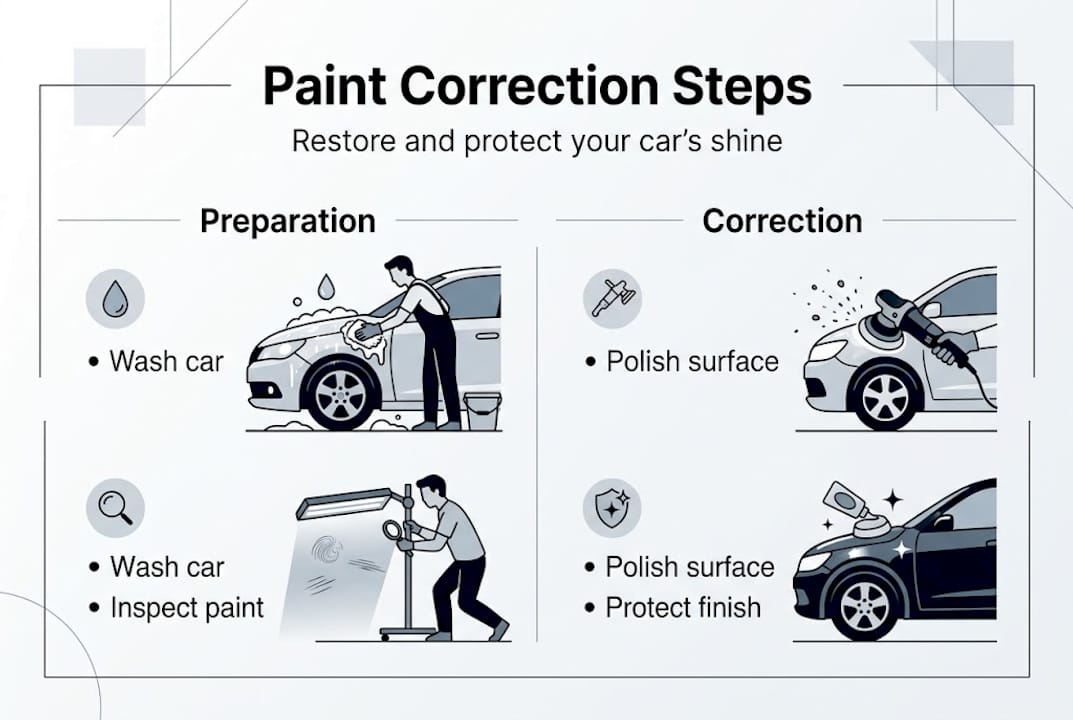
Here is a step-by-step overview of how a professional correction job unfolds:
- Surface inspection under bright LED or halogen lights to identify all defects and their severity
- Paint thickness measurement using a digital gauge on every panel before touching the paint
- Compounding with a cutting compound and appropriate pad to remove deeper defects
- Polishing with a finer product to refine the surface and remove any compounding marks
- Finishing with a light polish or glaze to maximize gloss and clarity
Technique is often more important than product strength. Applying too much pressure or working too fast generates heat, which can burn through the clear coat or create new haze. Understanding how to read paint finish quality factors helps professionals identify when a surface is ready to move to the next stage.
Pro Tip: Always start with the least aggressive compound and pad combination. Only escalate to something stronger if the defects are not responding. This approach protects your clear coat and gives you more control over the final result.
Proper washing technique after correction also matters. Knowing the right way to approach washing after paint correction keeps your results looking sharp without undoing the work.
Navigating challenges: Thin paint, unusual finishes, and edge cases
Not every paint correction job is a clean, straightforward process. Some vehicles present real challenges that require a different strategy, and ignoring those challenges can lead to permanent damage.
Here are the most common edge cases you need to know about:
- Thin paint on edges and curves where the clear coat is naturally thinner due to the spray application process
- Repainted panels that may have inconsistent thickness or different paint chemistry
- Soft Japanese paints that are easier to correct but also easier to damage with aggressive pads
- Hard German paints that resist correction and require more passes or stronger compounds
- Matte and satin finishes that cannot be corrected with standard polishing methods without altering the finish
- Ceramic-coated surfaces that need the coating stripped before any correction can begin
Edge cases like thin paint, soft versus hard paints, and matte finishes require a gentler approach, more frequent thickness checks, and a willingness to stop before reaching perfection.
Pro Tip: Always inspect edges and curves separately before starting any correction work. These areas lose clear coat faster than flat panels and are where burn-through most commonly occurs.
“Chasing 100% defect removal on thin or repainted panels is one of the fastest ways to void a warranty and destroy a finish. Know when good enough is actually the right answer.”
For vehicles with specialty finishes or panels that have already been corrected multiple times, the safest path is often a light one-stage polish rather than a full multi-stage correction. Specialized correction services can assess your vehicle’s specific situation and recommend the right level of treatment. Working in a clean booth environment also reduces contamination risks that can complicate results on sensitive finishes.
Why professional help matters for at-home paint correction
DIY paint correction is possible, but the margin for error is narrow. The process requires the right equipment, a trained eye, and the discipline to stop before causing damage. Many car owners underestimate how quickly things can go wrong.
Common DIY mistakes include:
- Using overly aggressive pads or compounds for the defect level present
- Skipping paint thickness measurements entirely
- Applying too much pressure or working in direct sunlight
- Over-polishing one area while trying to remove a stubborn defect
- Not properly decontaminating the surface before starting
Mistakes like chasing perfection can void warranties or cause damage that cannot be reversed without a full respray. That is an expensive lesson.
Here are clear signals that it is time to bring in a professional:
- Your paint thickness readings are already below 80 microns on any panel
- You have deep scratches that penetrate through the clear coat into the color layer
- Your vehicle has a matte, satin, or ceramic-coated finish
- You are working on a leased or warrantied vehicle where damage would be costly
- You lack a DA or rotary polisher and a calibrated paint thickness gauge
Reviewing common detailing mistakes before you start can save you from the most frequent errors. Understanding detailing safety protocols is equally important, especially when working with compounds and polishers that generate heat. The goal of detailing for paint protection is always to improve the vehicle, not to create new problems in the process.
Professionals bring calibrated tools, years of hands-on experience, and accountability that DIY simply cannot match. For most South Jersey car owners, the cost of professional correction is far less than the cost of fixing a mistake.
Our take: The uncomfortable truth about paint correction
Here is what most guides skip over. Paint correction is not a magic reset button for your vehicle’s finish. It has hard limits, and pushing past those limits causes permanent damage that no amount of polishing will fix.
We have seen cars come in after DIY correction attempts where the clear coat was already gone on the hood edges. At that point, the only option is a respray. That is not a detailing problem anymore. It is a body shop problem.
The smarter strategy is this: correct what you can safely correct, then protect aggressively. After correction, extending your paint life with a ceramic coating or paint protection film is far more valuable than chasing that last 5% of defect removal.
Maintaining realistic expectations also means understanding that some defects, like deep scratches or structural damage to the color layer, are simply outside the scope of what correction can address safely. Spending more time on prevention and maintenance after correction will always outperform aggressive repeat treatments.
Pro Tip: After any paint correction, protect your investment immediately with paint protection film or a ceramic coating. This locks in your results and reduces how often correction will be needed in the future.
Bring out your car’s best finish with CDC Detailing
If this guide has shown you anything, it is that paint correction done right requires knowledge, the right tools, and a careful hand. At CDC Auto Detailing, we bring professional-grade paint correction directly to your driveway across South Jersey, so you get expert results without the hassle.

Our team handles everything from light one-stage polishing to full multi-stage correction, followed by protective treatments that keep your finish looking its best. Whether you want to explore auto detailing service options, lock in your results with paint protection film, or shield your paint with a ceramic coating, we can walk you through the right choice for your vehicle. Reach out today to schedule a consultation and find out exactly what your car’s finish needs.
Frequently asked questions
Does paint correction damage my car’s clear coat?
When performed correctly, paint correction stays within safe limits. Safe removal is 2-5 microns per stage, with a lifetime maximum of around 25% of total clear coat thickness, which leaves plenty of protection when done properly.
How long do results from paint correction last?
Results typically last for several years when the vehicle is maintained with proper washing techniques and protected with wax, sealant, or a ceramic coating after correction.
Is paint correction the same as waxing or polishing?
No. Paint correction physically removes defects by leveling the clear coat, while waxing and polishing only add gloss or temporarily fill in imperfections without addressing the underlying damage.
When should I choose professional paint correction over DIY?
Choose professional service when you have thin paint, deep defects, specialty finishes, or lack the proper tools. Mistakes on thin or special surfaces can lead to burn-through or warranty issues that cost far more to fix than a professional service would have.