
TL;DR:
- Polish and compound serve different purposes in car detailing: compound removes deeper defects with coarse abrasives, while polish refines and enhances the finish with finer abrasives.
- Using the correct product at the right stage is essential to protect your vehicle’s clear coat and achieve a flawless look, especially on modern or layered paint.
Many car owners use “polish” and “compound” as if they mean the same thing, but reaching for the wrong product can make your paint situation significantly worse. Apply a polish to a deep scratch and you’ve wasted time with nothing to show for it. Grab a compound for light swirls on a newer car and you risk thinning your clear coat unnecessarily. Understanding the actual difference between these two products, when to use each one, and how to protect your finish afterward is the foundation of smart paint care for any South Jersey vehicle owner.
Table of Contents
- Defining polish and compound in car detailing
- When to use compound and when to use polish
- How pads, tools, and technique change the results
- After compounding and polishing: Protection is key
- What most car owners get wrong about polish and compound
- Enhance and protect your car with professional detailing
- Frequently asked questions
Key Takeaways
| Point | Details |
|---|---|
| Compound removes deeper flaws | Compounding uses coarser abrasives to eliminate deep scratches and heavy oxidation. |
| Polish refines and boosts gloss | Polishing gently removes light defects and enhances shine after compounding. |
| Correct order matters | Using compound before polish avoids micro-marring and maximizes clarity. |
| Pad and technique impact results | Choosing the right pad and method can change the effectiveness and safety of paint correction. |
| Always protect after correction | Apply a wax, sealant, or coating after correction to ensure long-term shine and protection. |
Defining polish and compound in car detailing
The single biggest source of confusion in detailing is that product labels often blur the line between these two categories. Walk into any auto parts store and you’ll see bottles labeled “polishing compound” or “finishing polish,” and the language sounds almost identical. But the products behave very differently on your paint.
Compound is the aggressive player in paint correction. It uses coarse, hard abrasives designed to cut through the top layer of your clear coat to remove deeper defects. Think heavy swirl marks, oxidation (the chalky, faded appearance on older or sun-damaged vehicles), moderate scratches, and water spot etching that won’t wipe off. As compounding removes deeper defects, it’s classified as the heavy-correction stage of the detailing process.
Polish, on the other hand, is the refinement step. It uses finer, softer abrasives to clean up the surface after compounding, or to handle minor imperfections on their own. Light swirl marks from automatic car washes, fine surface scratches, and paint clarity issues are all in polish territory. Polish also restores gloss and depth to the finish, making your paint pop before you seal it.
The core technical distinction comes down to abrasive cut. A compound uses harder abrasives for deeper cutting action, while polish uses softer abrasives for a gentler, more refined result. Think of it like sandpaper: 120-grit for shaping, 400-grit for smoothing. Both sand, but for completely different purposes.
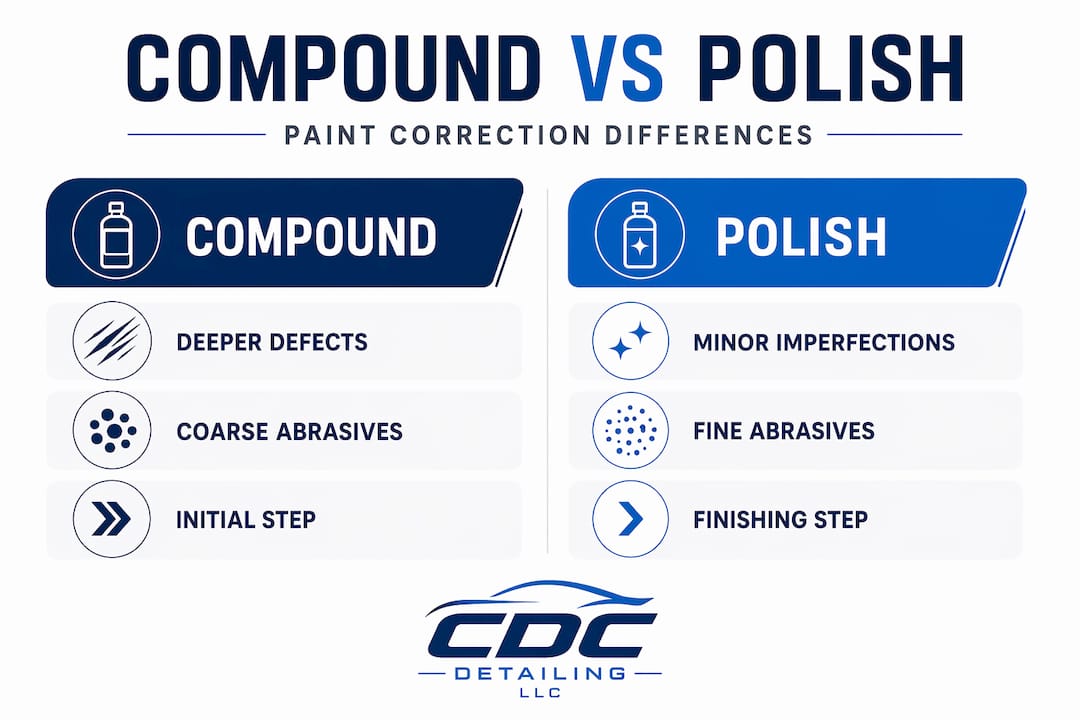
Here’s a quick side-by-side comparison:
| Feature | Compound | Polish |
|---|---|---|
| Abrasive cut level | Heavy/coarse | Light/fine |
| Defects it targets | Deep scratches, oxidation, heavy swirls | Light swirls, minor haze, gloss refinement |
| Stage of correction | First (heavy correction) | Second (refinement) |
| Risk if misused | Thins clear coat | May not remove deeper defects |
| Finish result | Can leave haze or micro-marring | Smooth, glossy, clear finish |
Key takeaways from this comparison:
- Compound is always used before polish when both steps are needed
- Polish can be used alone for light paint issues
- Compound should never be the final step in a correction job
- Using only polish on deep defects will leave you disappointed
“Polish refines what compound corrects. Skipping one for the other doesn’t just slow things down, it can make things worse.”
Understanding how automotive paint correction actually works at a technical level helps you make smarter decisions before you ever open a bottle.
When to use compound and when to use polish
With a clear understanding of their definitions, it’s essential to know when each product is appropriate for your vehicle’s needs.
Matching the correction tool to the defect severity is the most important skill in paint care. Using too aggressive a product on mild defects wastes clear coat you can never get back. Using too mild a product on serious damage is just a waste of your time and energy.
Here’s how to match defect to product:
- Light swirl marks and minor surface hazing — Polish only. These are typically caused by automatic car wash brushes or improper hand washing technique. A quality polish with a soft foam pad will handle these without any need for compound.
- Moderate swirls and light scratches (visible in direct sunlight) — Polish first; if the result isn’t satisfying, move to compound followed by polish.
- Deep scratches, heavy oxidation, water spot etching, or paint transfer — Compound first, then polish to refine the surface.
- New car with dealer-installed swirls — Usually polish alone is sufficient, since the clear coat is still thick and the damage is typically shallow.
- Older vehicle with years of sun exposure and fading — Compound is almost always necessary first, followed by a thorough polishing stage.
The correction workflow for most paint jobs follows this sequence: compound for heavy correction first, then polish to remove micro-marring and haze left behind by the compound, restoring clarity and gloss to the finish.
Skipping steps creates real problems. If you compound and stop there, your paint will look hazy and dull under certain lighting. The compound’s coarse abrasives leave tiny micro-scratches of their own. That’s not a flaw in the product; it’s by design. Polish exists to clean those up. Conversely, using only polish may not remove deeper defects no matter how many passes you make.
Pro Tip: Before you grab any product, check the defect under a bright flashlight or detailing light at a low angle to the paint surface. This reveals the true depth and severity of the damage, so you can choose the right starting point.
Smart, detailing best practices always start with the mildest approach and escalate only when necessary. This protects your clear coat and your investment. If you’re exploring multi-stage polishing for the first time, understanding this sequence is the foundation.
How pads, tools, and technique change the results
Choosing the right correction product is crucial, but the tools and approach you use can completely change your results.
Here’s something most guides skip over: the same compound applied with two different pads on two different machines can produce completely different levels of cut. The product itself is only one variable. Pad material, pad hardness, machine speed, and application pressure all interact to determine how aggressive the process actually is.
Common pad types and their behavior:
- Wool pads — Most aggressive. Used with compounds for heavy cutting. Removes material fast but leaves the most micro-scratches behind.
- Foam cutting pads (firm/dense) — Aggressive but more controllable than wool. Common for compound application on modern machines.
- Foam polishing pads (soft/flexible) — Less aggressive. Designed for polish application and light defect removal.
- Microfiber pads — Versatile and increasingly popular. Can range from cutting to finishing depending on the product used.
- Ultra-soft finishing pads — Used for the final polish step to maximize clarity and gloss with minimal material removal.
Machine choice matters too. A dual-action (DA) polisher is significantly safer for home users. It oscillates and rotates simultaneously, which limits the risk of burning through clear coat even if you hold it in one spot too long. A rotary polisher spins on a fixed axis and is far more powerful, capable of faster correction but also faster damage in untrained hands.
The cut level paired with the finishing goal matters enormously. Professional detailers always match pad hardness and machine speed to both the defect depth and the final result they’re targeting.
Here’s a real-world example. Imagine two people both apply the same compound to a door panel with deep swirl marks. Person A uses a heavy cutting foam pad on a DA polisher at medium speed. Person B uses a soft finishing pad on a slow-speed DA polisher. Person A cuts through the defects in two passes. Person B makes eight passes and barely touches the defects. Same product, drastically different outcomes.
It’s also worth noting the terminology overlap that creates confusion for owners. A “polishing compound” can sound like a polish but behave like a compound. A “rubbing compound” is a compound. The way products are named doesn’t always reflect their actual aggression level, which is why reading the technical specs and abrasive ratings matters more than the name on the label.
Pro Tip: When trying a new product, do a test panel on a small, inconspicuous area first. Apply the product with the least aggressive pad, do two passes, then evaluate. Escalate only if needed. This saves clear coat and prevents mistakes you can’t undo.
Working with exterior detailing best practices helps you build a systematic approach rather than guessing. For South Jersey vehicles exposed to salt air, summer heat, and coastal UV exposure, this kind of disciplined approach protects the finish long-term. When in doubt, professional paint correction services take the guesswork out entirely.
After compounding and polishing: Protection is key
Correcting your paint is only part of the story — the next essential step ensures your hard work lasts.
A lot of vehicle owners spend hours compounding and polishing their paint to a perfect finish, then drive the car out the next day without applying any protection. Within weeks, environmental contaminants, UV rays, and road grime start attacking the freshly corrected clear coat. All that effort starts degrading faster than it should.
After heavy paint correction, protection through wax, sealant, or ceramic coating is necessary because compounding and polishing refine the surface but provide zero long-term defense against environmental damage.
Here’s the recommended sequence after completing your correction work:
- Wipe down with a panel wipe or IPA (isopropyl alcohol) solution — This removes any polish or compound residue and oils from the surface so your protection bonds properly.
- Inspect under a detailing light — Check that all defects are addressed and the finish looks consistent before locking anything in.
- Apply a paint sealant — Sealants are synthetic products that bond to the clear coat and provide several months of protection. Great for everyday use.
- Top with a carnauba wax (optional) — Adds depth, warmth, and a beautiful wet-look shine over the sealant. Shorter lasting but visually stunning.
- Consider a ceramic coating for long-term protection — Ceramic coatings chemically bond to the paint and can last years with proper maintenance, offering hydrophobic properties and strong UV protection.
“Freshly corrected paint is like a sanded piece of wood. It looks great but needs a topcoat to stay that way. Without protection, all your correction work is temporary.”
Pro Tip: Ceramic coatings applied right after paint correction lock in that perfect finish and make maintenance dramatically easier. Rain, dust, and light contamination bead right off, which means less frequent washing and less risk of introducing new swirl marks.
Knowing how to handle post-correction washing is equally important, since the wrong wash method after a correction job can undo your results surprisingly fast. Exploring your paint protection options before you commit to a protection product helps you match the solution to your vehicle’s exposure level and your maintenance schedule.
What most car owners get wrong about polish and compound
Having covered the facts, here’s a candid perspective shaped by real-world detailing experience right here in South Jersey.
The most common mistake we see isn’t using the wrong product. It’s assuming that more aggressive always means better results. Owners see a scratch and immediately want to reach for the strongest compound they can find, believing it will work faster or more thoroughly. It might. But it also removes clear coat that you can never restore, and on thinner or repainted panels, it can go through to the base coat with just a few passes.
The professional rule is “least aggressive necessary.” Start mild and escalate only when the evidence in front of you demands it. This is especially relevant for South Jersey vehicles. Coastal UV exposure and summer heat accelerate clear coat thinning over time. Cars in our area often have less clear coat to work with than their age might suggest, which makes conservative correction choices even more important.
Another thing that trips people up is expecting one product to do everything. We regularly see vehicles where an owner polished the same panel six or seven times trying to remove a scratch that needed compound from pass one. The scratch barely moved. Six passes of polish removed a measurable amount of clear coat without fixing the actual problem. That’s time and clear coat spent on the wrong tool.
Professional detailers don’t just look at a defect and grab the closest bottle. They assess paint thickness with a paint depth gauge, evaluate the defect under proper lighting, check for prior repaint work or factory thin spots, and then choose a starting point. The expert correction insights behind a proper diagnosis are what separate professional results from DIY frustration.
The paint correction process done correctly is methodical, not aggressive. It respects the material you’re working with. That mindset alone, applied consistently, will keep your car looking better for far longer than any single product ever could.
Enhance and protect your car with professional detailing
Ready to apply what you’ve learned and get professional results without the risk of DIY mistakes?
Understanding how auto detailing works at a professional level makes it clear why expert assessment matters before any product touches your paint. At CDC Auto Detailing, we diagnose defect severity precisely before recommending or performing any correction work, so you never pay for more than your paint actually needs.

Beyond correction, we offer lasting protection with ceramic coating services that lock in your results for years, and paint protection film for the ultimate physical barrier against road debris and environmental damage. Serving South Jersey from our base in Pitman, our mobile detailing team brings professional-grade equipment directly to your driveway. If your paint needs attention, whether it’s a quick polish or a full multi-stage correction with ceramic protection, we’re ready to deliver the kind of results that last.
Frequently asked questions
Can I skip compounding if my car only has light swirls?
Yes, polishing alone is usually enough for light swirls and minor paint imperfections. For light swirls, starting with compound would be unnecessarily aggressive.
Will using compound too often damage my car’s paint?
Overusing compound can thin or damage paint, so only use it when needed for deeper defects and always follow with polish for refinement. The rule of compound first for heavy defects, then polish, protects the clear coat from unnecessary removal.
Do I need to wax or seal after polishing my car?
Yes, waxing or sealing is strongly recommended after polishing or compounding to protect your vehicle’s freshly corrected paint. Without it, protection after correction is missing, and environmental damage begins immediately.
Are compounds and polishes safe for all paint types?
Most are safe for modern clear coat finishes, but always check product labels and start with the least aggressive method to avoid damage. Single-stage paints and repainted panels are more vulnerable and require extra caution.
Do I need professional tools, or can I apply polish or compound by hand?
Both can be applied by hand, but professional machines with proper pads provide better, more consistent results. Pad and tool choice dramatically affects how a product cuts and finishes, making machine application the preferred method for serious correction work.