TL;DR:
- Premium waxing requires thorough surface prep and high-quality products for long-lasting shine.
- Proper environment and technique are crucial to avoid defects and maximize protection.
- Regular maintenance and professional mobile service help sustain optimal gloss and paint health.
Your car’s paint is looking dull, and you know it deserves better. But between work, family, and everything else pulling at your schedule, finding hours to sit at a shop feels impossible. That’s exactly where a premium mobile waxing procedure changes the game. Instead of driving to a detailing bay and waiting, you get shop-quality results delivered right to your driveway in South Jersey. This guide walks you through every phase of the premium waxing process, from prep and materials to technique and long-term maintenance, so you know exactly what to expect and how to get the most out of every application.
Table of Contents
- What makes a waxing procedure premium?
- Gathering the right materials and setting up
- Step-by-step: The premium waxing process
- Common mistakes and expert troubleshooting
- What to expect: Results, longevity, and maintenance tips
- A mobile detailer’s take: What actually makes waxing results last
- Ready for premium shine? Book a South Jersey mobile detail service
- Frequently asked questions
Key Takeaways
| Point | Details |
|---|---|
| Preparation is everything | Washing, claying, and polishing your car maximizes the shine and longevity of premium waxing. |
| Correct technique matters | Thin, even layers applied in the shade and buffed properly prevent defects and enhance results. |
| Quality materials last longer | Premium waxes and proper applicators provide deeper gloss and superior protection for months. |
| Troubleshoot early | Address common errors like streaking or swirl marks right away to keep your finish flawless. |
| Mobile pros offer convenience | Professional mobile detailing services deliver premium waxing at your door, saving you time and hassle. |
What makes a waxing procedure premium?
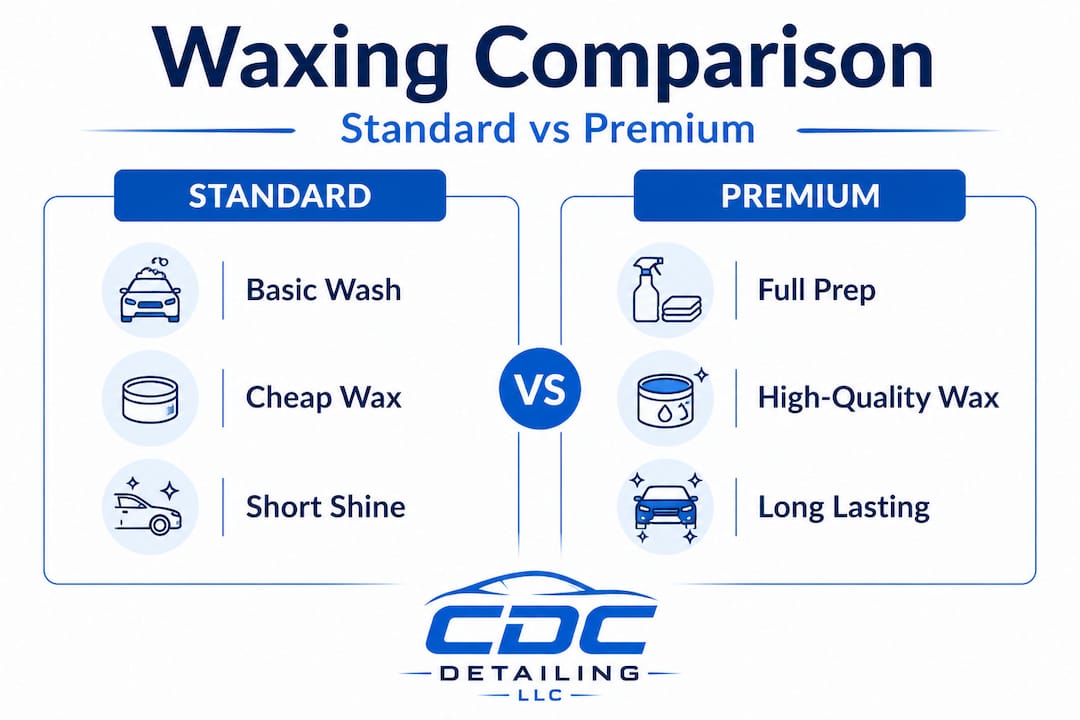
Not every wax job is created equal. A standard waxing might mean running a foam applicator over a barely-rinsed hood and calling it done. A premium waxing procedure is something entirely different, and the results show it immediately.
The core difference comes down to preparation and product quality. According to a step-by-step guide, a premium car waxing procedure involves thorough preparation including a full wash, clay bar treatment, and polishing if needed, followed by applying thin, even layers of wax using a foam applicator or microfiber in circular motions on small sections in the shade, allowing the wax to haze for 4 to 12 minutes, then buffing with clean microfiber towels. Every one of those steps matters.
Premium waxes are also formulated differently. Cheaper waxes may offer a quick shine that fades within weeks. High-quality carnauba blends or synthetic polymer waxes bond more effectively to the clear coat, offering deeper gloss, stronger UV protection, and water-repellent properties that last months instead of weeks. Understanding why quality matters for luxury detailing helps explain why the investment pays off over time.
Here’s a quick comparison to put it in perspective:
| Feature | Standard wax job | Premium wax procedure |
|---|---|---|
| Prep steps | Rinse or basic wash | Full wash, clay bar, polish |
| Product quality | Basic paste or spray wax | High-grade carnauba or polymer |
| Application method | Random passes | Circular motions, small sections |
| Haze time | Often skipped | 4 to 12 minutes per panel |
| Buffing tool | Any cloth | Clean microfiber towels |
| Results | Light shine, fades fast | Deep gloss, months of protection |
A premium procedure is recommended after seasonal changes, before winter salt exposure, after paint correction work, or any time your vehicle’s finish looks flat or unprotected. It’s also the right call for newer vehicles where protecting the original clear coat matters most.
Key qualities that define premium waxing at a glance:
- Long-lasting gloss that deepens paint color
- Hydrophobic (water-beading) surface that resists dirt buildup
- UV protection that slows paint oxidation
- Smooth finish that’s noticeable to the touch
- A process that’s repeatable without damaging clear coat
Knowing these vehicle care essentials helps you set the right expectations before you ever open a tin of wax.
Gathering the right materials and setting up
With the difference between standard and premium waxing covered, the next step is knowing exactly what you need and how to set the stage for success.
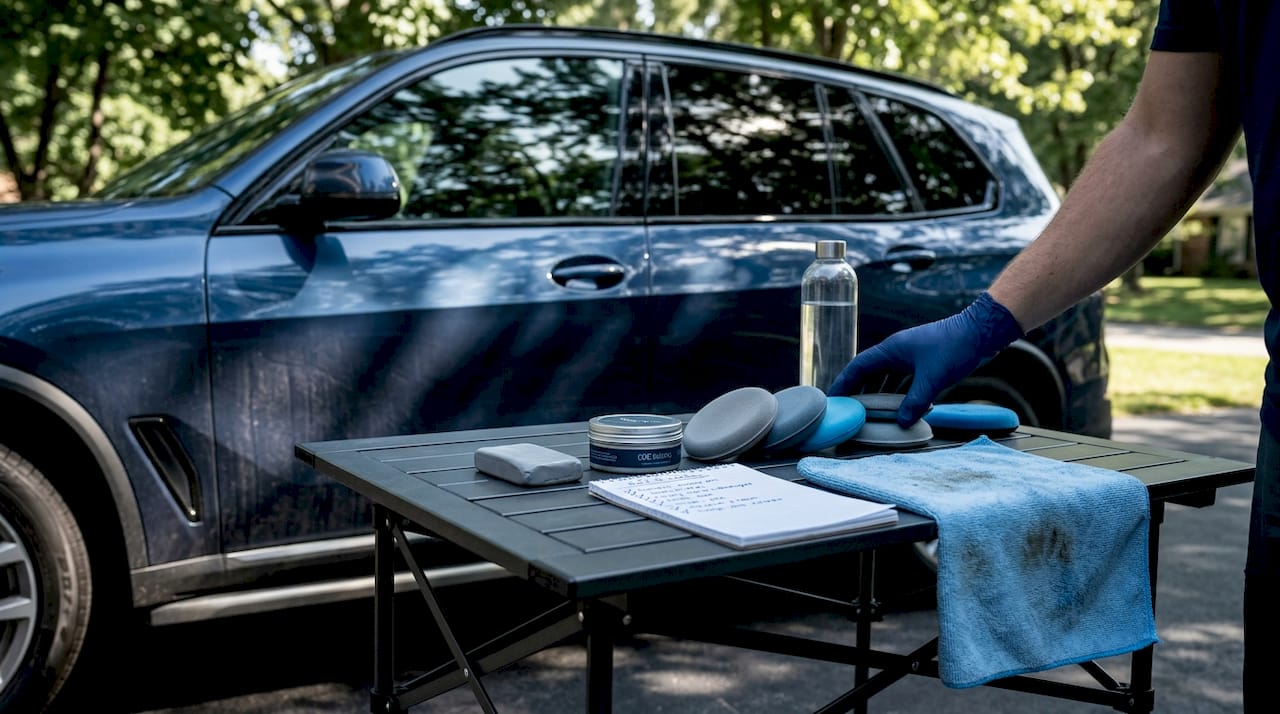
Getting your materials right before you start saves you from stopping mid-job, which can lead to uneven application and frustration. Here’s what a professional mobile detailer brings to every appointment:
- Two-bucket wash system with grit guards
- pH-neutral car wash soap
- Clay bar kit with detailing spray lubricant
- Dual-action polisher or hand polish pad (for correction if needed)
- High-quality carnauba or synthetic polymer wax
- Multiple foam applicator pads (one per panel is ideal)
- Minimum six clean, lint-free microfiber buffing towels
- Detailing light or flashlight for checking surface clarity
The full breakdown of materials and their purpose:
| Material | Purpose | What to look for |
|---|---|---|
| Clay bar | Removes bonded surface contaminants | Fine or medium grade for most paint |
| Foam applicator pad | Applies wax evenly without streaks | Closed-cell foam, soft texture |
| Microfiber towels | Buffs wax without fine scratches | 300 to 400 GSM plush towels |
| Premium wax | Protects and adds gloss | Carnauba content or polymer formula |
| Detail spray | Lubricates clay, quick surface wipes | Silicone-free for paint safety |
The benefits of waxing your car go far beyond looks, but you only unlock them when the right products are used correctly.
Environment is just as critical as materials. Working in direct sunlight is one of the most common reasons wax jobs go wrong. Heat causes wax to dry too quickly and unevenly, leading to white streaks that are difficult to buff out. A shaded driveway, garage, or covered parking spot is ideal. Early morning or late afternoon sessions work well in South Jersey summers when the concrete has cooled down slightly.
As noted in the iSeeCars waxing guide, direct sun exposure and inconsistent pressure are two of the biggest causes of wax defects, and mobile services are particularly suited for South Jersey owners who want to skip the shop while still getting professional-grade results.
Pro Tip: Lay out all your materials in order of use before starting. When your hands are coated with wax and your foam pad is loaded, the last thing you want is to dig through a bag for a fresh towel.
Step-by-step: The premium waxing process
Once all your gear is ready and your environment is ideal, you’re ready to start the step-by-step premium waxing process. Take your time here. Rushing any phase compromises the final result.
-
Wash the vehicle thoroughly. Use the two-bucket method with a grit guard to avoid dragging dirt across the paint. Rinse completely and dry with a clean waffle-weave drying towel or forced-air blower.
-
Inspect the paint under a light source. A detailing light held at a low angle reveals contaminants, swirl marks, and water spots invisible in regular lighting. This tells you whether polishing is needed before waxing.
-
Clay bar the entire surface. Spray detailing lubricant on one panel at a time and work the clay bar back and forth with light pressure. The clay pulls out bonded contaminants like industrial fallout, tree sap, and road grime that washing alone won’t remove. Fold the clay frequently to expose a clean surface.
-
Polish if needed. If swirl marks or light scratches are visible after claying, apply a light cutting polish with a foam pad using a dual-action polisher or by hand. Wipe clean and inspect again before moving on.
-
Apply wax in thin, even layers. Load a foam applicator pad with a small amount of wax, roughly the size of a quarter. Work one section at a time (think hood, then roof, then trunk) using overlapping circular motions. Thin layers bond better and buff out more cleanly than thick globs. This step-by-step process is what separates premium application from a rushed wipe-down.
-
Allow the wax to haze. Let the applied wax sit for 4 to 12 minutes depending on the product. You’ll see it shift from wet-looking to a slightly cloudy, matte finish. This tells you the solvents have evaporated and the protective layer is ready to be buffed.
-
Buff with a clean microfiber towel. Use a fresh, plush microfiber towel and work in straight, overlapping passes. Flip the towel frequently to avoid re-depositing wax. A second light buff with another clean towel removes any remaining haze.
-
Inspect under a detailing light. Check each panel at a low angle for leftover wax, missed spots, or uneven gloss. Touch up where needed.
Pro Tip: Keep your applicator pads and towels in labeled bags during the job. Using a towel that already has wax on it for your final buff will dull the gloss right before your eyes.
Avoiding detailing mistakes during this phase is just as important as following the right steps, especially if you’re working on a dark-colored vehicle where every imperfection shows.
Common mistakes and expert troubleshooting
Even the most careful DIYer can encounter challenges. Knowing the most common mistakes can help you troubleshoot before the shine is lost.
The mistakes that ruin most wax jobs happen fast and often feel invisible until you step back to look at the finished panel:
- Using too much product. More wax doesn’t mean more protection. It means harder buffing, white residue in trim gaps, and wasted product. Thin layers are always better.
- Buffing too soon. If you buff before the wax has properly hazed, you’ll smear it around instead of lifting it cleanly. Wait for the full haze before touching it with a towel.
- Working in direct sunlight. As the iSeeCars guide confirms, direct sun and inconsistent pressure cause defects, and mobile services work particularly well for South Jersey owners because a skilled detailer controls the environment and process from start to finish.
- Inconsistent pressure during buffing. Pressing harder in some areas than others creates uneven gloss and can introduce light swirl marks, especially on soft clear coats.
- Using the wrong towel. A towel with any debris, wax buildup, or synthetic fiber blend can drag across your paint and leave fine scratches. Always use a clean, plush microfiber specifically rated for buffing.
“The difference between a good wax job and a great one usually comes down to what happened before the wax was ever applied. Surface prep is where the real work happens.”
When problems appear, knowing how to address them quickly saves the finish. Wax streaks can often be resolved by lightly re-applying a small amount of product over the streak and buffing again with a clean towel. White residue in door jambs or trim gaps is removed with a detail brush and a clean microfiber. If swirl marks appear after buffing, a mild polish followed by a re-wax corrects it without damage.
Understanding common waxing mistakes before you start puts you ahead of most car owners who only discover the problems after the fact.
What to expect: Results, longevity, and maintenance tips
After mastering the process and troubleshooting, it’s key to know the kind of results you can expect and how to make the effect last as long as possible.
The visual change after a proper premium wax is immediate and dramatic. Paint that looked flat and oxidized takes on a wet, mirror-like depth. Dark colors gain richness. Light colors brighten. Water beads up and rolls off the surface instead of sheeting or sitting in puddles. The entire vehicle feels smoother to the touch.
Here’s what a properly executed premium waxing procedure delivers over time:
- Deep gloss that enhances the natural color of the paint
- Hydrophobic protection that repels rain, dirt, and light debris
- UV resistance that slows paint oxidation and fading
- A smooth finish that resists minor surface contamination
- Easier weekly maintenance washes because dirt doesn’t bond as strongly
Premium waxes typically last 3 to 6 months depending on the product, your local climate, and how often the vehicle is washed. South Jersey’s seasonal humidity and road salt exposure in winter can shorten that window, which is why scheduling mobile detailing for easy care on a seasonal basis makes sense for most vehicles here.
To stretch your results as long as possible:
- Wash the car with a pH-neutral soap every two weeks
- Use a quick detailer spray between washes to add a light layer of protection
- Avoid automatic car washes with abrasive brushes
- Park in shade or a garage whenever possible
- Schedule a fresh wax before winter and again in spring
Consistent maintenance is what keeps a lasting shine with regular waxing going strong. A professionally applied wax followed by simple upkeep habits can keep your paint looking showroom-quality for far longer than most car owners expect.
A mobile detailer’s take: What actually makes waxing results last
Here’s something most waxing guides won’t tell you: the brand of wax on the shelf matters far less than what happens before the cap comes off. We’ve seen cars waxed with budget products that outshine vehicles treated with high-end formulas, purely because the surface prep was done right on one and rushed on the other.
Surface contamination is the silent enemy of long-lasting wax. If bonded contaminants, industrial fallout, or microscopic oxidation sit under the wax, they prevent the product from bonding cleanly to the clear coat. The wax sits on top of the problem instead of locking into a clean surface. It looks great for a week, then fades fast. That’s why the clay bar step isn’t optional in a premium procedure.
The other factor most DIYers underestimate is pressure consistency. Human hands naturally vary in how hard they press across different panels. On curved surfaces like fenders and hoods, that variation creates uneven bonding and gloss. A skilled mobile detailer trains to apply even, deliberate pressure across every surface regardless of shape, which is a learned skill that takes real time and practice to develop.
Mobile detailing also gives us something shops can’t always offer: we come to you and control the environment from the moment we arrive. We choose the shaded spot, we bring the right conditions to your driveway, and we follow up with ongoing maintenance visits so your paint never goes more than a few months without attention. Choosing local professionals who know South Jersey’s specific climate, road conditions, and seasonal challenges means your wax protection is calibrated for the environment your vehicle actually lives in, not a generic standard from a national chain.
Ready for premium shine? Book a South Jersey mobile detail service
You now have a complete picture of what premium waxing involves, why preparation matters, and how to maintain results that actually last. The next step is turning that knowledge into action for your vehicle without adding another trip to a shop to your schedule.

At CDC Auto Detailing, we bring the full premium waxing experience directly to your driveway anywhere in South Jersey. Our mobile team handles everything from clay bar prep to final buff, using professional-grade products and proven techniques. Whether you want to learn more about what goes into auto detailing services, understand how detailing works before your first appointment, or simply want to skip the research and book mobile detailing today, we make it easy. Reach out, pick a time, and we’ll bring the shine to you.
Frequently asked questions
How long does a premium wax job last?
A premium car wax typically lasts 3 to 6 months with proper maintenance, though South Jersey’s winters and seasonal humidity can shorten that window without routine upkeep.
Do I really need to clay my car before waxing?
Yes. Claying removes bonded surface contaminants that prevent wax from adhering properly, which directly impacts both the gloss and how long the protection lasts.
Can I wax my car in the sun?
Never wax in direct sunlight. As confirmed by detailing experts, direct sun causes the wax to dry unevenly and creates streaks that are difficult to remove after the fact.
Is mobile waxing as good as shop waxing?
Premium mobile waxing can match or exceed shop results when a skilled professional controls the environment and uses high-quality products, which is exactly how our South Jersey mobile services operate.
What should I avoid after a fresh wax?
Avoid washing the vehicle, exposure to rain, or contact with harsh chemicals for at least 24 hours after waxing to allow the protective layer to cure fully and bond to the clear coat.
Recommended
- Wax vs. Ceramic Coating: Which Protects Your Car Best?
- Why use protective coatings: car protection that lasts
- Hydrophobic coating for cars: guide to lasting protection
- 7 Essential Detailing Maintenance Tips for Perfect Results
- How to Season Carbon Steel Wok for a Lasting Nonstick Finish – Brass & Steel