
TL;DR:
- Microscopic swirl marks damage your vehicle’s clear coat, reducing gloss and exposing paint to environmental risks. Professional removal involves a careful, multi-step process using proper tools and testing to avoid over-polishing and preserve paint integrity. Maintaining proper washing techniques and protective coatings extends results and prevents future swirl formation.
Those circular, web-like patterns spreading across your hood in direct sunlight are not just an eyesore. Swirl marks are actually microscopic damage to your clear coat, and ignoring them speeds up paint degradation, reduces your vehicle’s resale value, and makes any protective coating far less effective. If you’ve been brushing them off as normal wear, this guide will change how you see your paint and show you exactly what professional swirl mark removal involves, why it works, and how to protect your results long after the job is done.
Table of Contents
- What are swirl marks and why do they matter?
- How swirl mark removal works: The professional process explained
- What determines swirl mark removal success?
- Keeping your car swirl-free: Aftercare and protection
- Why swirl mark removal is more art than science
- Get professional swirl mark removal and lasting paint protection
- Frequently asked questions
Key Takeaways
| Point | Details |
|---|---|
| Swirl marks defined | Swirl marks are tiny scratches in your car’s clear coat that reduce gloss and protection. |
| Why removal matters | Removing swirl marks restores shine and defends your paint against further damage. |
| Professional process | Pros assess your paint and use careful steps to safely remove swirls for lasting results. |
| Not all cars are the same | Results depend on your vehicle’s clear coat thickness and the depth of the marks. |
| Smart aftercare | Using the right wash techniques and paint protection keeps your car looking great longer. |
What are swirl marks and why do they matter?
Most vehicle owners first notice swirl marks under strong direct light, like bright sunlight or a showroom lamp. The paint that looked fine in the garage suddenly reveals a swirling, spiderweb pattern that seems to cover every panel. That pattern is not random. It follows the circular motion of whatever was used to wash or dry the car.
Swirl marks are microscopic scratches etched into the vehicle’s clear coat, made visible by the way light scatters off those surface abrasions. The clear coat is the outermost layer of your paint system. It is what gives your car its depth, gloss, and shine. Once the clear coat is scratched, even at a microscopic level, it loses its ability to reflect light cleanly, and your paint looks dull, tired, and older than it really is.
Here is what typically causes swirl marks to form:
- Automatic car washes with rotating brushes that drag grit across the surface
- Old or low-quality sponges that trap debris and grind it across the paint
- Dirty drying towels or improper drying techniques that scratch the clear coat while removing water
- Drive-through pressure wash wands held too close at steep angles
- Improper hand washing, including the use of a single rinse bucket instead of a two-bucket method
“Swirl marks make paint look dull and tired and actively compromise the clear coat’s ability to protect underlying paint layers from UV rays, moisture, and oxidation over time.”
Beyond appearances, the practical risk is real. A compromised clear coat exposes your base coat and paint to environmental damage at an accelerated rate. Ultraviolet radiation, road chemicals, and water penetration all become more problematic once those micro-abrasions exist. Following detailing best practices from the start prevents most of this from happening, but once swirl marks are present, removal is the only reliable fix.
Now that you know swirl marks are more than just a minor annoyance, let’s explore what swirl mark removal really means.
How swirl mark removal works: The professional process explained
Swirl mark removal is not just rubbing a bottle of compound on the paint and hoping for the best. Real correction is a methodical, multi-step process that requires skill, proper equipment, and a clear understanding of your vehicle’s paint system.
Here is how a professional approaches swirl mark removal from start to finish:
- Initial inspection under lighting to identify the severity, distribution, and pattern of swirl marks across each panel.
- Paint depth gauge measurement to determine how thick the clear coat is before any work begins. This tells the detailer how much room they have to work with.
- Test spot application on a small, less visible section of the car using the least aggressive combination of pad and compound.
- Assessment of the test spot to evaluate how much correction was achieved versus how much clear coat was removed.
- Full-panel correction using the appropriate machine, pad, and compound combination based on the test spot result.
- Panel wipe-down with an IPA (isopropyl alcohol) solution to remove polish residue and reveal the true corrected finish.
- Post-correction protection with a wax, sealant, or ceramic coating to lock in the results.
Professional detailers use paint depth gauges and start with the least aggressive approach, escalating compound aggressiveness or number of passes only if the test spot shows insufficient correction. This principle protects against over-correction, which permanently thins the clear coat and causes long-term damage.
Pro Tip: Never skip the test spot, even on a car you’ve worked on before. Different panels on the same car can have dramatically different clear coat thicknesses, especially on repainted sections.
Skipping the proper cleaning process before correction is one of the most common mistakes. Any grit or contamination left on the paint before machine polishing will cause additional scratches, making the problem worse.
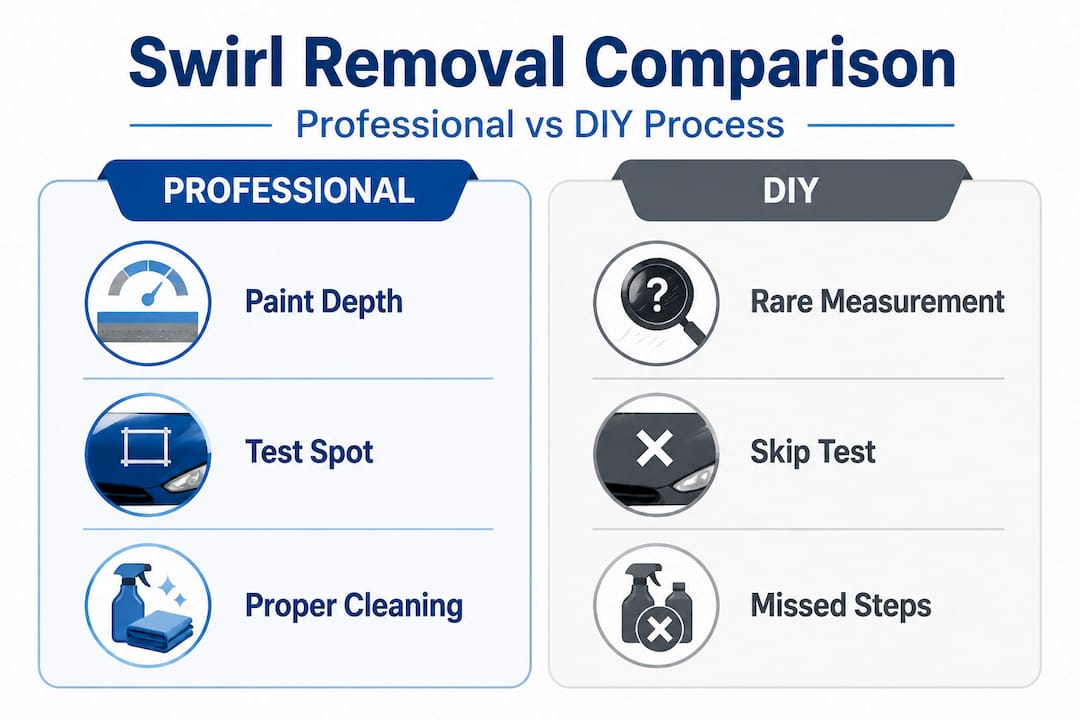
Here’s a side-by-side comparison to show why professional correction consistently outperforms DIY attempts:
| Factor | Professional removal | DIY attempt |
|---|---|---|
| Paint depth measurement | Always performed | Rarely done |
| Equipment quality | Professional dual-action or rotary polishers | Consumer-grade polishers or hand application |
| Product selection | Matched to paint type and severity | Often based on guesswork or marketing |
| Test spot protocol | Standard practice | Frequently skipped |
| Risk of over-correction | Very low | High |
| Final protection applied | Ceramic coating, sealant, or wax | Inconsistent |
| Results longevity | Months to years | Days to weeks in many cases |
Understanding the process gives you a better sense of what detailers do, but it’s not one-size-fits-all. The next section dives into why results can vary dramatically.
What determines swirl mark removal success?
Not every car responds to the same correction approach. The final outcome depends heavily on a few key variables, and a skilled detailer evaluates all of them before touching the paint.
Clear coat thickness is the most important factor. Every polishing pass removes a tiny fraction of the clear coat. Modern vehicles are often manufactured with thinner clear coats than older cars, which means there is far less margin for aggressive correction. Swirl mark removal results depend on clear coat thickness and swirl depth; modern or thinner clear coats reduce the margin for aggressive correction significantly.
Paint age and condition also matter. Older paint may be more brittle or may have already been polished multiple times, reducing its remaining correction margin. Swirl depth determines whether surface-level polishing is enough or whether a more aggressive cut compound is needed first.
Here’s a quick reference for how paint type relates to correction flexibility:
| Paint type | Typical clear coat thickness | Correction margin | Notes |
|---|---|---|---|
| Modern factory paint (2015 and newer) | 80 to 100 microns | Limited | Requires careful approach |
| Older factory paint (pre-2010) | 100 to 150 microns | Moderate | More forgiving with compounds |
| Repainted panels | Varies widely | Unpredictable | Always test first |
| Soft European paint (e.g., German brands) | Softer, scratches easily | Easier to correct, easier to over-correct | Requires lighter pads |
| Hard Asian paint (e.g., Japanese brands) | 90 to 110 microns | Moderate | Resists correction but holds gloss well |
Understanding the paint correction process from a professional standpoint reveals just how much goes into making safe, lasting improvements. A detailer who skips the gauge and the test spot is essentially guessing, and on a modern vehicle with thin clear coat, a bad guess can leave you with paint that looks polished but is now dangerously thin and unprotectable.
Pro Tip: If your car has been repainted, always mention it to your detailer before any correction work. Repainted panels can be as thin as 40 to 50 microns, leaving almost no margin at all.
Since paint protection is key for long-lasting results, the last piece of the puzzle is knowing how to maintain your car after swirl marks are gone.
Keeping your car swirl-free: Aftercare and protection
Getting swirl marks removed professionally is an investment. The worst thing you can do is repeat the same habits that caused them in the first place. Proper aftercare not only preserves your results but significantly extends the life of your clear coat going forward.
The single biggest thing you can do is change how you wash your car. Swirl marks are almost entirely a washing-related problem. Using the right tools and technique keeps microscopic paint scratches from re-forming after your correction work is done.
Here are the safe washing and drying tools and techniques every car owner should use:
- Two-bucket wash method: One bucket for soapy water, one for rinsing your mitt. This keeps contamination from going back onto the paint.
- Microfiber wash mitts: Softer and less abrasive than traditional sponges. Rinse frequently during the wash.
- High-quality microfiber drying towels: Use a plush towel with a gentle patting or dragging motion. Avoid circular rubbing.
- Foam cannon pre-soak: A foam cannon loosens dirt before you ever touch the paint, reducing the chance of dragging particles across the surface.
- Touchless or hand wash only: Avoid automatic brush car washes entirely after professional correction.
For long-term protection, applying a physical barrier over the paint after correction is highly recommended. Ceramic coatings bond chemically to the clear coat and create a hard, hydrophobic surface that resists light scratches, environmental contamination, and UV damage. Paint protection film offers even more physical protection for high-impact areas like the front bumper, hood, and mirrors.
Reviewing a post-correction washing guide is one of the best steps you can take after professional swirl mark removal. The first few washes after correction are especially important for preserving the finish.
Pro Tip: Schedule a professional inspection every six to twelve months, even if your paint looks great. Catching early-stage swirl marks before they worsen means lighter correction work, less clear coat removal, and lower cost overall.
With the core facts and practical steps covered, it’s time to address a few common misconceptions from a professional’s perspective.
Why swirl mark removal is more art than science
Here is something that gets lost in most swirl mark removal guides: you cannot simply follow a formula and expect perfect results every time. Every car tells a different story through its paint, and experienced detailers read that story before they ever pick up a machine.
The science side is real and important. Paint depth gauges, compound chemistry, pad cut levels, and machine oscillation speeds all matter. But the art is in the interpretation. How do you react when the test spot shows only 60% improvement? Do you escalate the compound, add passes, or accept that this particular clear coat is too thin to go further? That judgment call only comes from experience with many different paint systems, many different conditions, and a healthy respect for what you cannot undo.
One uncomfortable truth in the detailing world is that over-correction is far more common than people realize. It happens when a detailer, whether professional or DIY, chases perfection without monitoring how much clear coat they are removing. The paint can look absolutely flawless in the shop and then develop haze, water spotting, and premature failure within months because the protective layer was polished to a dangerous thinness. This is the risk that real-world paint correction work teaches you to respect over time.
What actually works is patience, systematic testing, and a genuine understanding of each vehicle’s limits. The best correction jobs we’ve seen are not the most aggressive ones. They are the ones where the detailer knew when to stop, protected what was left, and set the owner up with tools and knowledge to keep that finish intact for years.
Get professional swirl mark removal and lasting paint protection
Your car’s paint deserves more than a quick polish and a hope that the swirls disappear. At CDC Auto Detailing, we bring professional-grade swirl mark removal directly to you across South Jersey, with the tools, technique, and expertise to restore your clear coat safely and protect it for the long haul.

Our team handles everything from targeted swirl correction to full paint correction services and ceramic coating application, all backed by professional aftercare guidance. We’ll tell you exactly what your paint needs and what it can handle, so you’re never left guessing. Whether you want to understand how auto detailing improves your vehicle or you’re ready to explore the full range of auto detailing services we offer, our team is ready to help you get the best results possible and keep them lasting. Book your appointment today and give your paint the professional care it deserves.
Frequently asked questions
How long does swirl mark removal last?
Results can last for months or even years with proper aftercare, including safe washing techniques and a protective coating applied after correction. New swirl marks can form quickly if improper washing methods are resumed.
Is swirl mark removal safe for all vehicles?
Most vehicles benefit from professional swirl mark removal, but cars with extremely thin or previously damaged clear coats require a thorough expert assessment before any correction work begins. Clear coat thickness is the key factor that determines how safely and aggressively a detailer can work.
Can I remove swirl marks myself at home?
Light swirl marks may show some improvement with consumer-grade products, but professional paint depth gauges and systematic test spot methods consistently deliver safer and more lasting results than DIY correction.
Does swirl mark removal fix deep scratches?
Swirl mark removal is designed for surface-level clear coat scratches and is not the right solution for deep scratches that reach the base coat or primer layer. Those deeper defects require a different repair approach.
What’s the difference between swirl mark removal and full paint correction?
Swirl mark removal is a focused process targeting the fine, circular scratches in the clear coat, while full paint correction addresses a broader range of paint defects including oxidation, water spots, and deeper scratches for a complete surface restoration.