
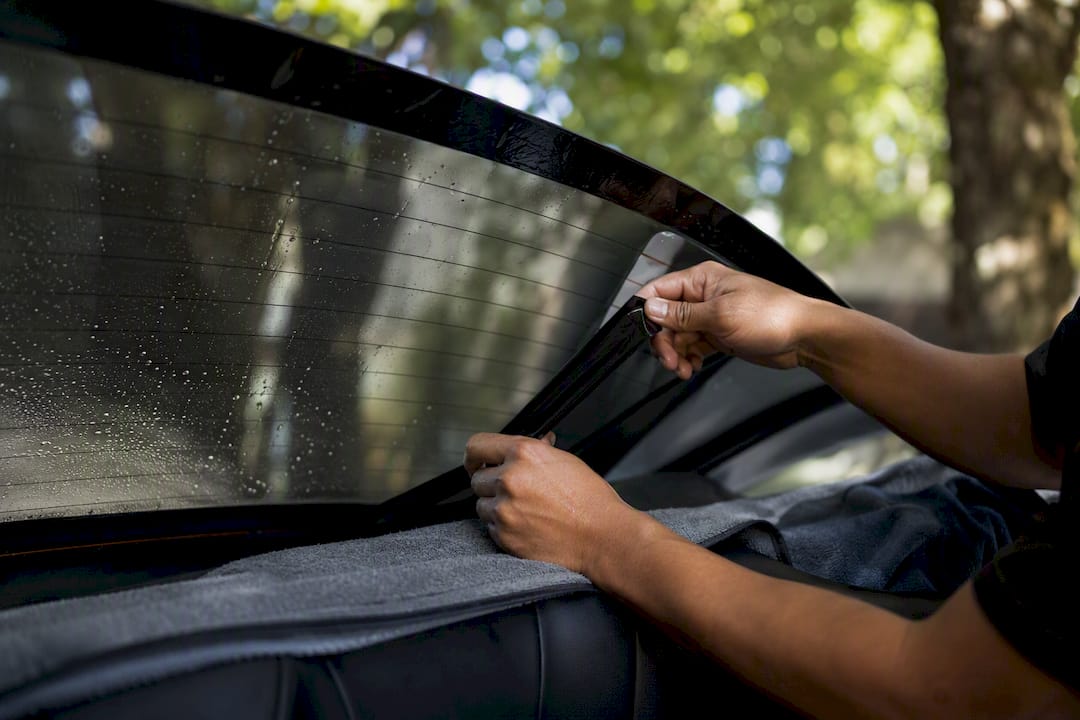
A clothes steamer is the best DIY tool for pulling old window film, since moist heat softens adhesive evenly without scorching the glass. A heat gun or hair dryer works if you’re careful, and the ammonia-and-trash-bag method still handles stubborn, baked-on jobs when you don’t own a steamer. Stop and call a professional if you’re dealing with factory-tinted glass, a rear defroster you’re not confident about, or adhesive that’s been baking under the sun for a decade.
TL;DR:
- Using a clothes steamer is recommended for tint removal because it softens adhesive evenly while minimizing the risk of damaging rear defroster lines.
- Carefully avoid metal blades near defroster traces and never attempt to remove factory-tinted glass, as it is embedded in the glass itself.
- The adhesive residue can take as much time to clean as the peel itself, requiring specific solvents and careful scraping to avoid glass damage.
- The ammonia and trash-bag method remains effective only for baked-in, years-old tints, requiring full sunlight and proper safety precautions.
- Professional removal is advisable for complex cases such as damaged defrosters, tough adhesives, or if you lack patience, to prevent costly repairs and ensure safe, clean results.
Table of Contents
- What You Need Before You Try Tint Removal Methods For A Car
- How Do You Remove Tint With A Steamer?
- Can You Use A Heat Gun Instead Of A Steamer?
- Is The Ammonia And Trash-Bag Method Still Worth Trying?
- How Do You Protect The Rear Defroster During Tint Removal?
- How Do You Get Rid Of Leftover Adhesive Residue?
- When Does DIY Tint Removal Stop Making Sense?
- Get Your Windows Professionally Cleared And Re-Tinted
- Why Most DIY Tint Removal Guides Get The Order Wrong
- Sources
What You Need Before You Try Tint Removal Methods For A Car
Grabbing a razor blade and hoping for the best is how people end up with scratched glass and a dead rear defroster. Get your tools lined up first.
Here’s what actually belongs in your kit:
- Clothes steamer — the preferred tool because moist heat softens adhesive more evenly than dry heat and stays below boiling temperature at the glass surface, which lowers the risk of overheating rear-window solder points
- Plastic razor blades for prying up film corners without scratching glass
- Fresh single-edge metal blades, reserved strictly for side and front glass, never the rear window
- 91% isopropyl alcohol for breaking down fresh adhesive residue
- Goo Gone Automotive or 3M adhesive remover for older, gummier glue
- Plastic scraper and a squeegee for peeling and finishing passes
- Microfiber towels, a spray bottle, and a utility knife for trimming edges
- Heat gun or hair dryer as a backup if you don’t have a steamer
Wear nitrile gloves and eye protection at minimum. If you’re going the ammonia route, add a respirator to that list. Cover your door panels, dashboard vents, and any exposed electronics with painter’s plastic before you start spraying anything.
Rear glass with defroster lines needs different rules than side windows. Never run a metal blade across those thin silver traces, and keep solvents away from the bus bars where the wires connect. If your car has factory-tinted glass (tint baked into the glass itself during manufacturing, not a film applied later), you can’t remove it. Trying will just waste your afternoon.
Work in the shade if you can, with the ambient temperature above 60°F. Direct sun makes the film brittle and speeds up adhesive curing mid-job, which is the opposite of what you want.
Pro Tip: Test your steamer or heat gun on a small, hidden strip of tint first. Some cheap aftermarket films react differently to heat than the premium stuff, and you’ll want to know before you’re three windows deep.
How Do You Remove Tint With A Steamer?
This is the method most detailers reach for first, and for good reason. It’s slower than a heat gun in the first minute, but far more forgiving over the course of a whole car.
1. Prep the window. Clean the glass, protect the interior trim with towels or plastic, and crack the window down about an inch so you can access the top edge of the film.
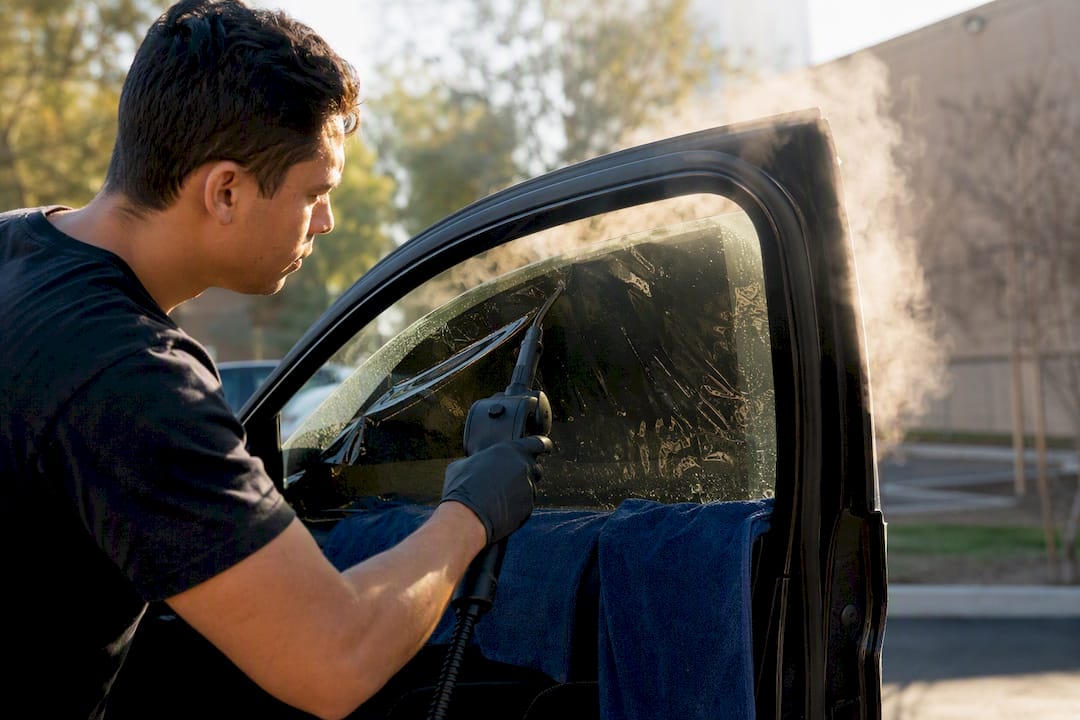
2. Preheat the film. Hold the steamer nozzle 2 to 6 inches from the glass and work in overlapping horizontal passes. Give the whole window 3 to 5 minutes of steam before you try to peel anything.
3. Start the peel. Lift a top corner with a plastic scraper, then pull the film at a shallow 15 to 30 degree angle. Keep the steamer running 6 to 8 inches ahead of wherever you’re peeling. A slow, low-angle peel keeps the adhesive bonded to the film rather than the glass, which means less scraping later.
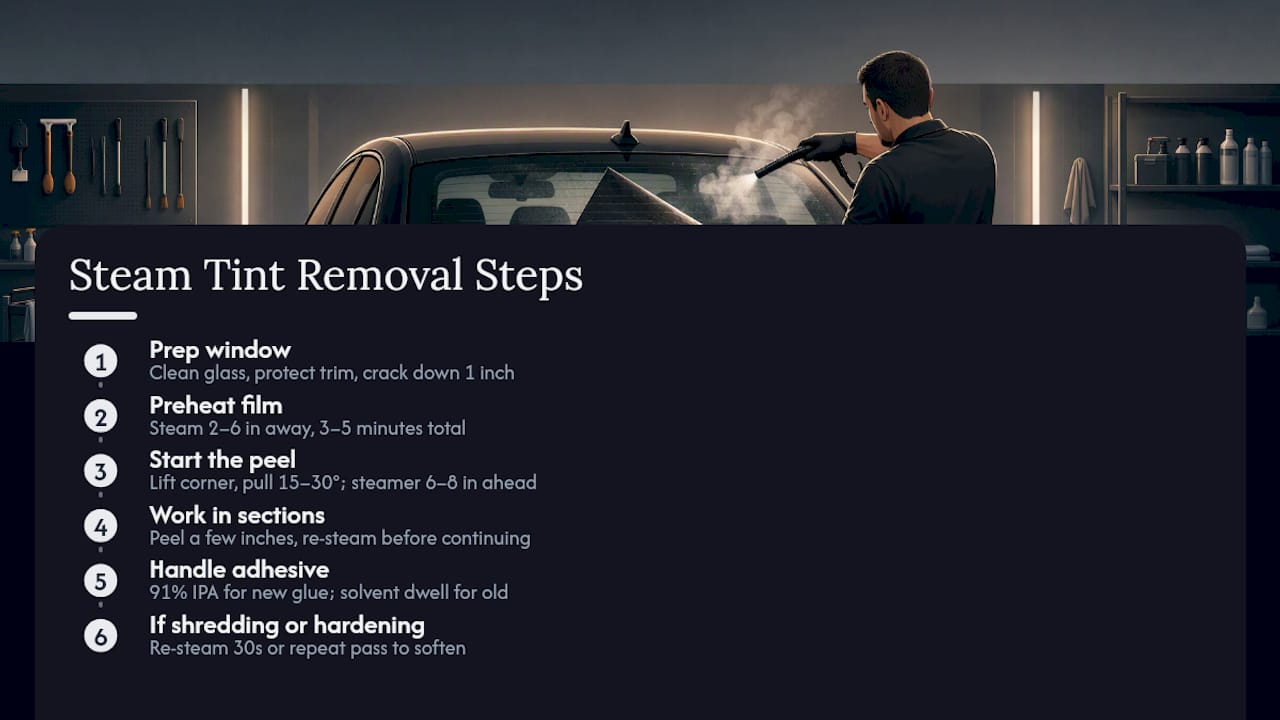
4. Work in sections. Don’t try to rip the whole sheet in one pull. Peel a few inches, re-steam, peel again. Rushing is what tears the film.
5. Handle the glue as you go. For recent tint jobs, a quick wipe with 91% isopropyl alcohol usually clears the leftover adhesive. Older glue needs a solvent dwell, meaning you spray it and let it sit before scraping with a plastic tool.
Time-wise, expect under an hour per side window once you’ve got a rhythm. The rear window takes longer due to extra caution needed around defroster lines. Removing tint from all six windows solo usually takes several hours.
If the film starts shredding into confetti instead of peeling in sheets, stop and re-steam that spot for another 30 seconds. Shredding almost always means the adhesive hasn’t softened enough yet, not that you need to pull harder. If adhesive re-hardens while you’re mid-peel (common on cold days), a quick second pass with the steamer resets it.
Pro Tip: Keep a second towel dedicated just to wiping steamer condensation off the glass. Water pooling at the bottom of the window makes it harder to see how much adhesive is left.
Can You Use A Heat Gun Instead Of A Steamer?
Yes, and plenty of people do, especially if a steamer isn’t in the garage. The tradeoff is that a heat gun demands constant motion to avoid scorching a single spot, since dry heat concentrates faster than steam.
Set the gun to medium heat at the manufacturer’s recommended setting and hold it several inches from the glass. A hair dryer works too, but it tops out at a much lower temperature, so expect to spend more time per window and get less consistent results on older tint.
Keep these rules in mind:
- Never hold the heat source still on one spot for more than a second or two
- Sweep in slow, overlapping passes rather than circles
- Peel immediately behind the heated area while the adhesive is still warm
- Reheat every few inches rather than trying to soften the whole window at once
Heat guns make more sense on warmer days when the film is already a little pliable. On cold mornings or with very old, hardened adhesive, a steamer’s moist heat still outperforms dry heat for softening the glue layer evenly.
The real risk with a heat gun is creating a hot spot that exceeds safe temperatures for the glass, which can stress rear-window defroster traces or even the glass itself. If you’re working on rear glass, this is the method where extra caution matters most, or you should switch to a steamer altogether as the smarter call.
Is The Ammonia And Trash-Bag Method Still Worth Trying?
This one’s a legacy technique, and it’s messier than the other two, but it earns its keep on tint that’s been baking in the sun for 10 or 15 years and has essentially fused to the glass. If you don’t own a steamer or heat gun, and Amazon delivery is two days away, this is your workaround. WikiHow’s breakdown of the method emphasizes ventilation and protective gear, and that’s not optional advice here.
The sequence looks like this:
- Cut black trash bags to roughly the size of each window
- Wet the exterior of the glass with soapy water, then stick a wet bag to the outside
- Spray the interior of the glass generously with ammonia
- Press a second bag against the interior to seal in the fumes
- Let the car sit in direct sun for 1 to 2 hours so heat and ammonia break down the adhesive together
This is the one method where you actually want full sun, unlike everything else on this list. Wear a respirator rated for ammonia fumes, nitrile gloves, and eye protection the entire time you’re working near the interior spray. Cover seats, door panels, and any exposed wiring or electronics before you spray anything, because ammonia will discolor fabric and can damage certain interior plastics if it drips.
After the bake, peel the film the same way you would with steam or heat: low angle, working in sections, wiping adhesive as you go.
Pro Tip: Crack all four windows slightly before you start spraying ammonia inside a sealed car sitting in the sun. Fume buildup in a closed cabin gets dangerous fast, even with the windows bagged.
How Do You Protect The Rear Defroster During Tint Removal?
Rear windows aren’t just glass. They’ve got printed defroster traces, thin lines of silver conductive ink baked onto the surface, running from a set of bus bars on either side. Metal blades or a stationary heat source can lift these traces right off the glass, and once that happens, your rear defroster is permanently dead in that section.
That’s why the workflow for rear glass is stricter than for side windows:
- Use only a steamer and plastic blades, never metal, anywhere near the traces
- Peel horizontally, parallel to the defroster lines, not diagonally across them
- Re-steam more often than you think you need to, since rushing is what causes tears near the bus bars
- Scrape adhesive with horizontal strokes only, following the direction of the lines
Once the film is off, run the defroster for 30 to 60 seconds and watch for any lines that don’t fog off or heat up evenly. A multimeter can confirm continuity across a trace if you want to be certain, though a visual and functional check catches most problems.
Repairing a damaged defroster line typically means a conductive-ink pen kit for minor breaks, which costs relatively little but takes patience, or a full rear-glass replacement, which runs into hundreds of dollars for parts and labor if the line is beyond a quick fix. That gap in cost is exactly why the plastic-blade rule on rear glass isn’t a suggestion. For anyone unsure whether their glass survived, Collision Auto Glass & Calibration’s guidance on glass care is worth a look before you assume everything’s fine.
How Do You Get Rid Of Leftover Adhesive Residue?
Peeling the film is genuinely the easier half of this job. Experts consistently point out that adhesive cleanup often takes as long as the removal itself, especially on older cars where the glue has had years to cure.
1. Start with isopropyl alcohol. For fresh tint or light residue, 91% IPA on a microfiber towel handles most of it in one or two passes. It’s also the safest solvent to use near rear defroster bus bars.
2. Step up to a dedicated adhesive remover for stubborn spots. Goo Gone Automotive or 3M Adhesive Remover cuts through polymerized, years-old glue that IPA alone won’t touch. Keep either product away from the bus bar connections on rear glass.
3. Scrape at a shallow angle. Hold a plastic scraper nearly flat against the glass, not perpendicular, to lift residue without gouging. Metal blades are fine on side windows if you keep the angle low and the glass wet, but they have no place on rear glass.
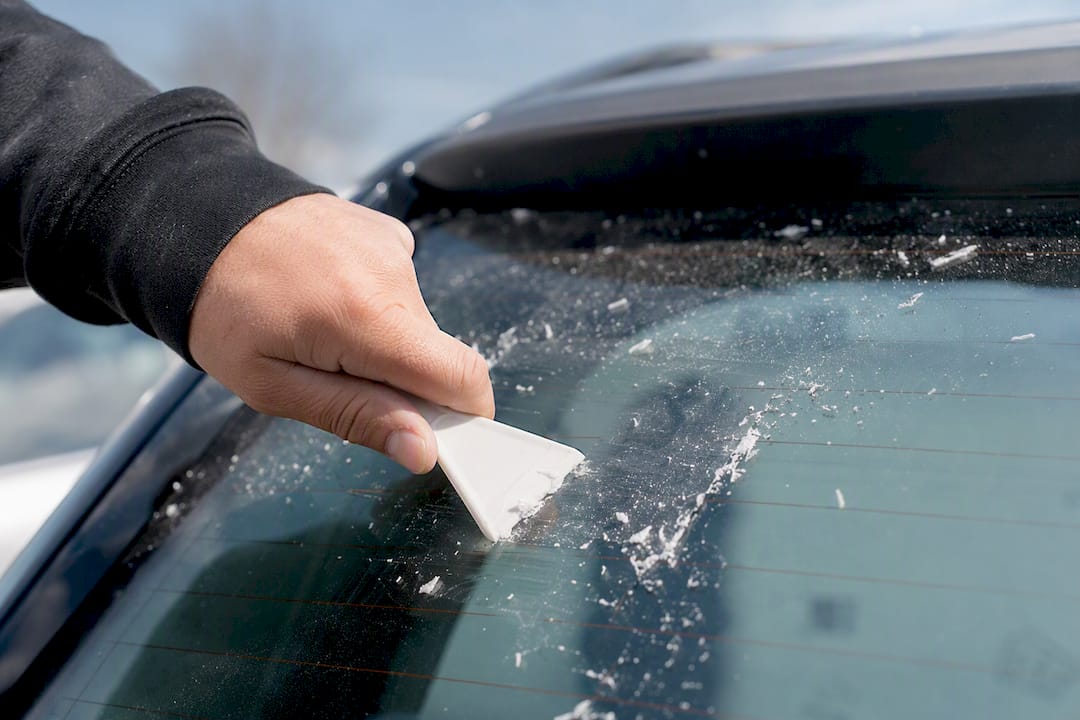
4. Use the dwell-and-wrap trick for the worst spots. Soak a rag in solvent, lay it over the stubborn residue, and cover it with plastic wrap for 15 to 30 minutes so the solvent doesn’t evaporate before it can break down the glue. Multiple short dwell cycles beat one aggressive scraping session, especially on rear glass near the bus bars.
5. Finish with an ammonia-free glass cleaner. Wipe with one towel, buff dry with a second, and check your work under a flashlight at a low angle. Residue that’s invisible in daylight often shows up clearly under angled light.
If you’re planning to re-tint afterward, this final inspection matters even more, since any leftover film or haze will telegraph through new film. Our guide on choosing window tinting walks through what to look for once your glass is clean and ready.
Pro Tip: Do your final residue check at night with a work light held at a sharp angle to the glass. Daylight hides thin adhesive streaks that become obvious the first time headlights hit them.
When Does DIY Tint Removal Stop Making Sense?
There’s a point where the math flips, and it’s worth knowing where that line sits before you start.
Factory-tinted glass is a hard stop, since there’s no film to peel because the tint is embedded in the glass itself. Damaged or suspect defroster lines are another. If you’re not confident the traces survived your peel, or you weren’t confident about them going in, that’s not a spot to guess. Chips or cracks near the edges of the glass also change the calculation, since heat and scraping can turn a small flaw into a spreading crack.
Then there’s the practical stuff: if you don’t have an afternoon to spend, or the adhesive has clearly polymerized into something closer to epoxy than glue, a shop will save you the frustration. Professional removal typically runs $25 to $75 per window or $150 to $350 for a full car, depending on your market and how bad the existing tint is.
What you’re paying for beyond the labor is peace of mind. A proper shop tests defroster continuity after removal and hands you glass that’s ready for new film immediately, no second-guessing whether you left a haze behind or cooked a bus bar. If your rear window is the piece giving you doubts, that’s exactly the job Cdcautodetailing handles as a mobile service across South Jersey.
Get Your Windows Professionally Cleared And Re-Tinted
If steaming, scraping, and second-guessing your defroster lines sounds like more Saturday than you signed up for, Cdcautodetailing handles the whole thing at your driveway instead of a shop bay. That’s the real advantage here: no dropping the car off, no waiting room, no wondering if a plastic blade missed a bus bar. A trained tech shows up, strips the old film cleanly, tests the defroster, and preps the glass so it’s ready for new tint the same visit if you want it.

That matters most for rear windows, where a mistimed heat gun or a stray metal blade can turn a $40 DIY afternoon into a defroster repair bill. Cdcautodetailing’s mobile setup skips that risk entirely, and if you’re already planning to upgrade your film while the glass is bare, the crew can walk you through legal VLT limits and finish options on the spot. Check out the full window tinting service details and get a quote for your vehicle before you commit to a weekend of scraping.
Why Most DIY Tint Removal Guides Get The Order Wrong
Most guides treat tint removal as a peeling problem. It’s not. It’s an adhesive problem with a peeling step attached to the front of it, and that distinction changes how you should actually approach the job.
The steamer-first advice isn’t just about being gentle on glass, though that’s real. It’s about sequencing. Heat softens the bond between film and adhesive, but it does almost nothing to the bond between adhesive and glass once the film is gone. That second bond is what eats your afternoon, and it’s also the part every rushed YouTube tutorial skips past in a jump cut. Budget your time assuming adhesive cleanup takes as long as the peel itself, because on any car older than five years, it usually does.
The other thing I’d push back on: treating rear windows like bigger side windows. They’re not. The defroster traces turn a forgiving job into one where a single wrong tool choice creates a repair bill bigger than the whole project was supposed to save you. If you take nothing else from this, take the plastic-blade rule for rear glass seriously, even when it’s slower and more annoying than just grabbing the metal one sitting right next to it.
DIY tint removal is a legitimately good weekend project for side windows. Rear glass is where I’d want a genuinely honest answer about your own patience level before you start spraying ammonia or waving a heat gun around bus bars you can’t see clearly.
— Charles
Sources
- How To Remove Window Tint: Expert Techniques for Effortless Results
- How to Remove Window Tint – TheFixCar
- How to Remove Window Tint – wikiHow