
Wait the full cure period your installer gave you, usually 3 to 7 days, before cleaning or rolling down your windows. Once the film has cured, clean it only with an ammonia-free cleaner and a soft microfiber cloth. Never use a scraper, an abrasive pad, or a store-bought glass cleaner unless the label confirms it’s ammonia-free.
TL;DR:
- Window tint typically takes 3 to 7 days to cure, but cooler weather and certain film types can extend this period up to several weeks.
- After curing, only ammonia-free cleaners and microfiber cloths should be used for cleaning to avoid scratching or damaging the film.
- Avoid using abrasive tools, ammonia-based cleaners, or pressing on bubbles during the curing period to prevent permanent damage.
- Regularly inspect the tint every season for signs of lifting, bubbling, or discoloration, especially on external or high-contact areas.
- Contact a professional if bubbles persist beyond 14 to 30 days or if there are signs of peeling, lifting, or color shifts, rather than attempting repairs yourself.
Table of Contents
- How Long Does Window Tint Take to Cure After Installation?
- How Do You Clean Tinted Windows Without Damaging Them?
- What Products Are Safe for Window Tint?
- What Should You Never Use on Tinted Windows?
- Bubbles, Lifting, or Discoloration: When to Call Your Installer
- How Often Should You Inspect Your Window Tint?
- What Installers Notice That Most Owners Miss
- Keep Your Tint Looking Sharp With a Professional Check-Up
- Where to Verify Manufacturer Care Guidance
- Sources
How Long Does Window Tint Take to Cure After Installation?
Standard dyed and carbon films typically need 3 to 7 days to cure, according to installer guidance from Chroma Auto Lab. Ceramic films can take longer, and cold or overcast weather slows the drying process further since the mounting solution needs warmth to evaporate properly, sometimes stretching the cure window to several weeks in cooler climates. Manufacturer guidance varies by brand, with some recommending anywhere from 3 to 30 days before you touch the film at all.
Here’s what that timeline actually looks like in practice:
- Days 0 to 3: Keep windows fully up. Don’t touch, clean, or press on the film. Park in shade if you can.
- Days 3 to 7: Light cleaning with an ammonia-free solution is usually fine, but avoid rolling windows down.
- Up to 30 days: Some manufacturers ask you to hold off on rolling windows down repeatedly, since the film needs time to fully bond to the glass.
Small water bubbles or a light haze during this window are normal and typically resolve on their own. Persistent bubbles or lines that don’t shrink after a couple of weeks are a different story, and we’ll get to that later.
How Do You Clean Tinted Windows Without Damaging Them?
Once your film has cured, cleaning tinted windows is simple, but the order of operations matters more than people think.
What you need:
- An ammonia-free glass cleaner or a mild soap solution (a few drops of dish soap per quart of water works well, according to Solar Gard’s care guidance)
- Two clean microfiber cloths
- A soft rubber squeegee
- A spray bottle
The routine:
- Spray the cleaning solution directly onto the glass, not the cloth. This avoids oversaturating one spot and gives you even coverage.
- Wipe in straight, horizontal or vertical strokes, never circular motions. Circular wiping tends to trap grit and drag it across the film, which is how micro-scratches happen.
- Use the rubber squeegee to pull excess moisture toward the bottom edge of the glass.
- Finish with a dry microfiber cloth to catch streaks before they set.
Pro Tip: Fold your microfiber cloth into quarters and flip to a clean section every few wipes. Reusing the same dirty patch of cloth is one of the most common ways people scratch tint they just paid good money for.
If you live somewhere dusty or near the coast, bump up your cleaning frequency to once a week. Salt air and road dust build a fine film on glass fast, and letting it sit longer just gives grit more time to work into the surface during your next wipe-down. Most other climates do fine with cleaning every two to three weeks.
What Products Are Safe for Window Tint?
Not every cleaner or tool sold for car glass belongs anywhere near tinted windows. Here’s how to sort the safe from the risky:
- Ammonia-free glass cleaners are your default choice for regular upkeep. Look for the label explicitly, since plenty of “glass cleaners” still contain ammonia.
- Diluted dish soap and water works just as well for routine cleaning and costs almost nothing, per Solar Gard’s own recommendation.
- Microfiber cloths with a tight weave pick up dust without dragging it. Paper towels and newspaper feel similar in a pinch, but their fibers are stiff enough to leave fine scratches on film, even on scratch-resistant coatings.
- Isopropyl alcohol can remove sticky residue like leftover sticker adhesive, but spot-test it on a small corner first and never use it as a general cleaner.
- A soft rubber squeegee speeds up drying and reduces water spots without contacting the film with anything abrasive.
For a deeper look at how different film types hold up over time, our full window tinting guide breaks down the material differences that affect care.
What Should You Never Use on Tinted Windows?
Ammonia is the big one. It’s a corrosive chemical that breaks down the adhesives holding film to glass, and repeated exposure causes discoloration, bubbling, or premature peeling. Most big-box glass cleaners still contain it, so check labels every time, not just once.
Beyond ammonia, avoid:
- Abrasive sponges, scrub pads, or anything with texture
- Razor blades, ice scrapers, or metal tools of any kind
- Paper towels or newspaper, which leave microscopic scratches over repeated use
- Suction-cup mounts, parking permits, or stickers pressed directly onto the film
- Rolling windows down before the cure period ends, or pressing on bubbles to force them out
That last one trips up more people than you’d expect. A bubble that would have resolved on its own in a week can turn into a permanent crease if you push on it.
Bubbles, Lifting, or Discoloration: When to Call Your Installer
Most issues during the first couple of weeks are cosmetic and temporary. XPEL’s own care documentation notes that haze from mounting solution should naturally dissipate as the film finishes drying. Small bubbles fall into the same category.
Contact your installer if you notice:
- Bubbles that are still there or have grown after 14 to 30 days
- Edges lifting or peeling away from the glass
- A purple or blue tint shift, which signals the film’s dye is breaking down
- Bubbles clustered in one spot rather than scattered evenly
Before you call, photograph the problem in natural light, note when you first noticed it, and avoid touching or pressing on the area. A clear photo and a rough timeline get you a faster answer than a phone call alone.
How Often Should You Inspect Your Window Tint?
Set a seasonal reminder, four times a year, to walk around your vehicle and check the edges, corners, and any spot exposed to direct sun. You’re looking for lifting at the seams, a purple cast that wasn’t there before, and hairline scratches from careless cleaning.
Climate and habits do most of the heavy lifting here. Cars parked outside in full sun age faster than garage-kept vehicles, and premium films like ceramic and carbon hold up better under UV stress than basic dyed film, especially when paired with shaded parking and light, regular cleaning instead of infrequent deep scrubs.
Dyed film typically lasts several years before fading becomes noticeable, while ceramic and carbon films often outlast it by a wide margin under the same conditions. If you spot early lifting or fading during a seasonal check, a professional inspection costs far less than a full re-tint, and catching a small edge lift early can save the whole panel.

What Installers Notice That Most Owners Miss
After enough tint jobs, you start noticing the same handful of mistakes over and over: someone uses a household glass cleaner out of habit, or a rear seatbelt buckle scrapes the same six inches of window every single day until there’s a visible groove. Neither one is dramatic, but both are entirely preventable.
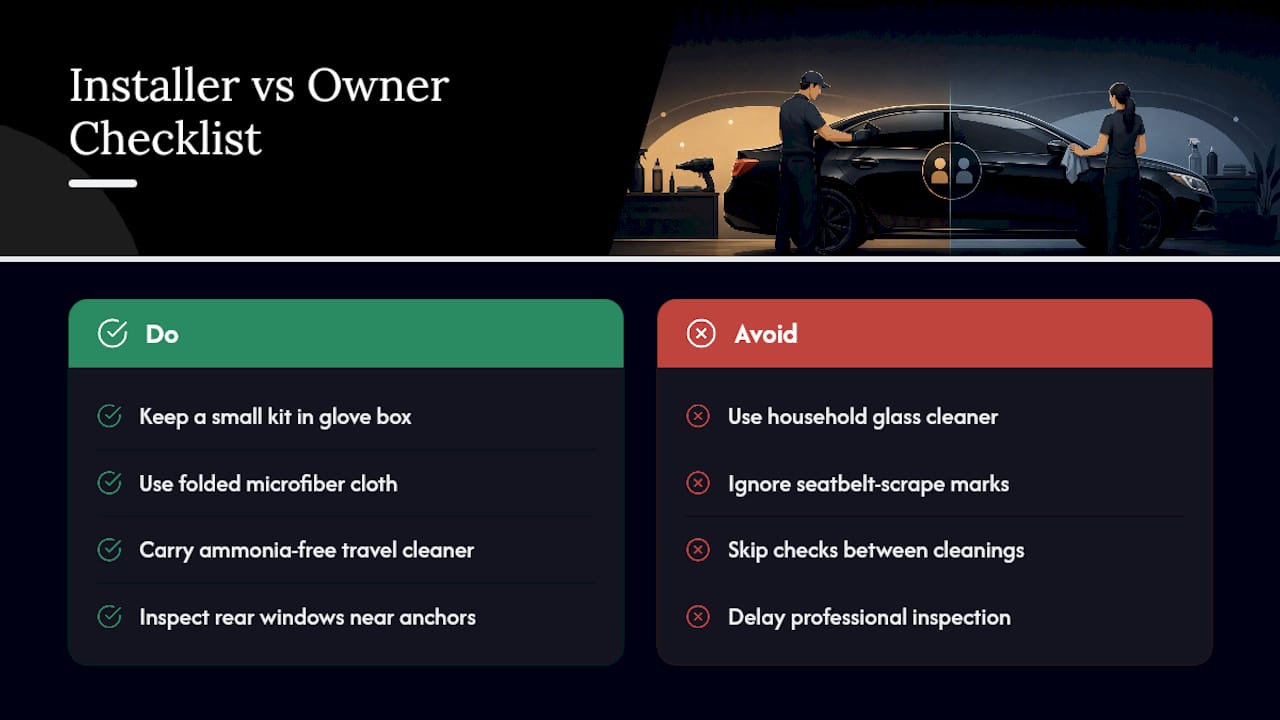
Keep a small kit in your glove box: a folded microfiber cloth and a travel-size bottle of ammonia-free cleaner. It takes up no space and handles 90 percent of the spots you’ll actually deal with between real cleanings. Rear windows near seatbelt anchors deserve extra attention since repeated buckle contact is one of the most common causes of localized scratching that has nothing to do with cleaning technique at all.
DIY care handles routine upkeep just fine. Bring in a professional when you spot edge lifting, persistent bubbling, or when you simply want a second set of eyes before a small issue becomes a costly one.
— Charles
Keep Your Tint Looking Sharp With a Professional Check-Up
Cleaning your own windows keeps things looking good day to day, but some problems, like early edge lift or a bubble that’s been sitting for three weeks, are easier to catch and fix with a trained eye than a phone flashlight and a guess. A mobile tint inspection and safe cleaning service available at your home or office in South Jersey can help you skip the drive to a shop and the guesswork of diagnosing a problem yourself.

A typical visit includes a full inspection for lifting, discoloration, or scratches, a proper ammonia-free cleaning if your film is due for one, and an honest assessment of whether an edge repair or reinstallation makes sense. If you’re due for new film or want to compare your options first, our window tinting resource page covers what to expect from installation through the first month of cure. Ready to get your tint checked before small issues turn into expensive ones? Book a mobile visit and we’ll come to you.
Where to Verify Manufacturer Care Guidance
For brand-specific rules, check Solar Gard’s care instructions, XPEL’s care and maintenance guide, and this streak-free glass cleaning method for extra technique tips.
Sources
- Care and Maintenance | Solar Gard
- Window Tint Care Guide — Chroma Auto Lab
- Chemicalsafetyfacts
- COMMERCIAL CARE & MAINTENANCE — XPEL (PDF)