Juggling work commitments and family life often leaves little time for upgrades that protect your investment and boost your vehicle’s style. For South Jersey car owners, prioritizing convenience and professionalism is a must when it comes to window tinting. With the right tools and a focus on precise preparation, you can achieve a sleek look while adding valuable UV protection, all without sacrificing your busy schedule.
Table of Contents
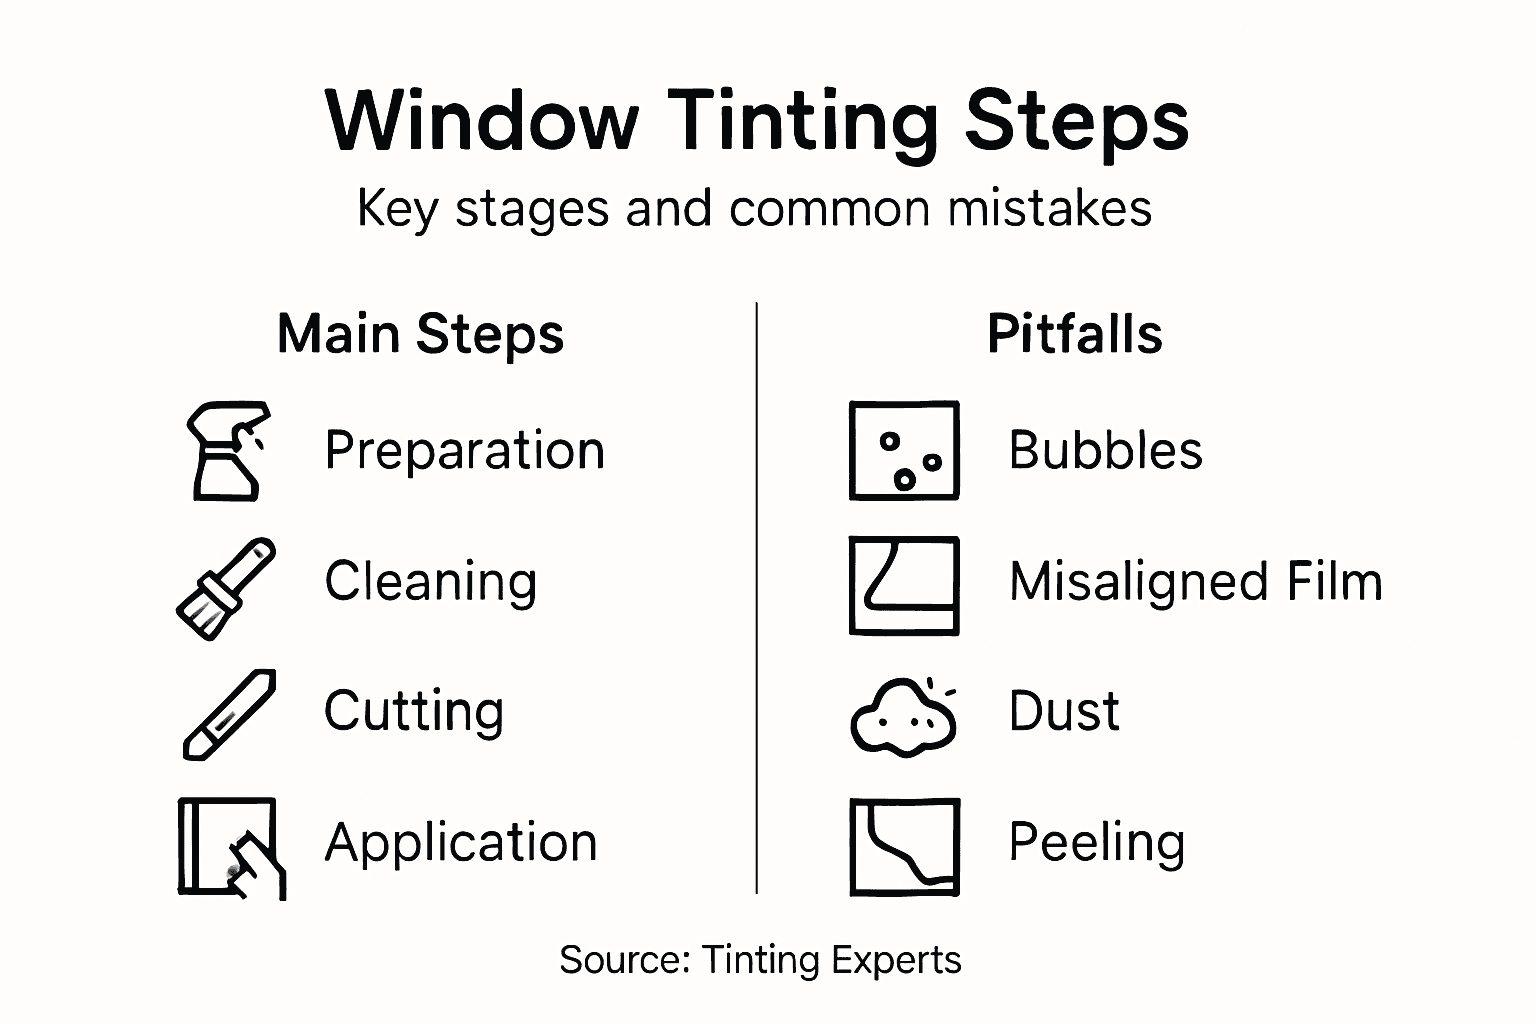
- Step 1: Gather Essential Window Tinting Tools
- Step 2: Clean and Prep Window Surfaces Thoroughly
- Step 3: Cut and Fit Tint Film Accurately
- Step 4: Apply and Smooth Tint Film Carefully
- Step 5: Inspect for Bubbles and Finalize Edges
Quick Summary
| Essential Insight | Detailed Explanation |
|---|---|
| 1. Gather the right tools | A complete toolkit including squeegees, scissors, and spray bottles ensures professional results when tinting windows. |
| 2. Clean windows thoroughly | Meticulously clean surfaces are essential for avoiding imperfections and ensuring proper adhesion of the tint film. |
| 3. Measure and cut with precision | Accurately measuring windows and cutting the film to size prevents costly mistakes and waste during installation. |
| 4. Apply tint carefully and evenly | Smoothly applying the tint with steady pressure is vital for preventing air bubbles and achieving a flawless finish. |
| 5. Inspect for flaws post-installation | A thorough inspection in ideal lighting ensures any small bubbles or imperfections are addressed quickly for a perfect appearance. |
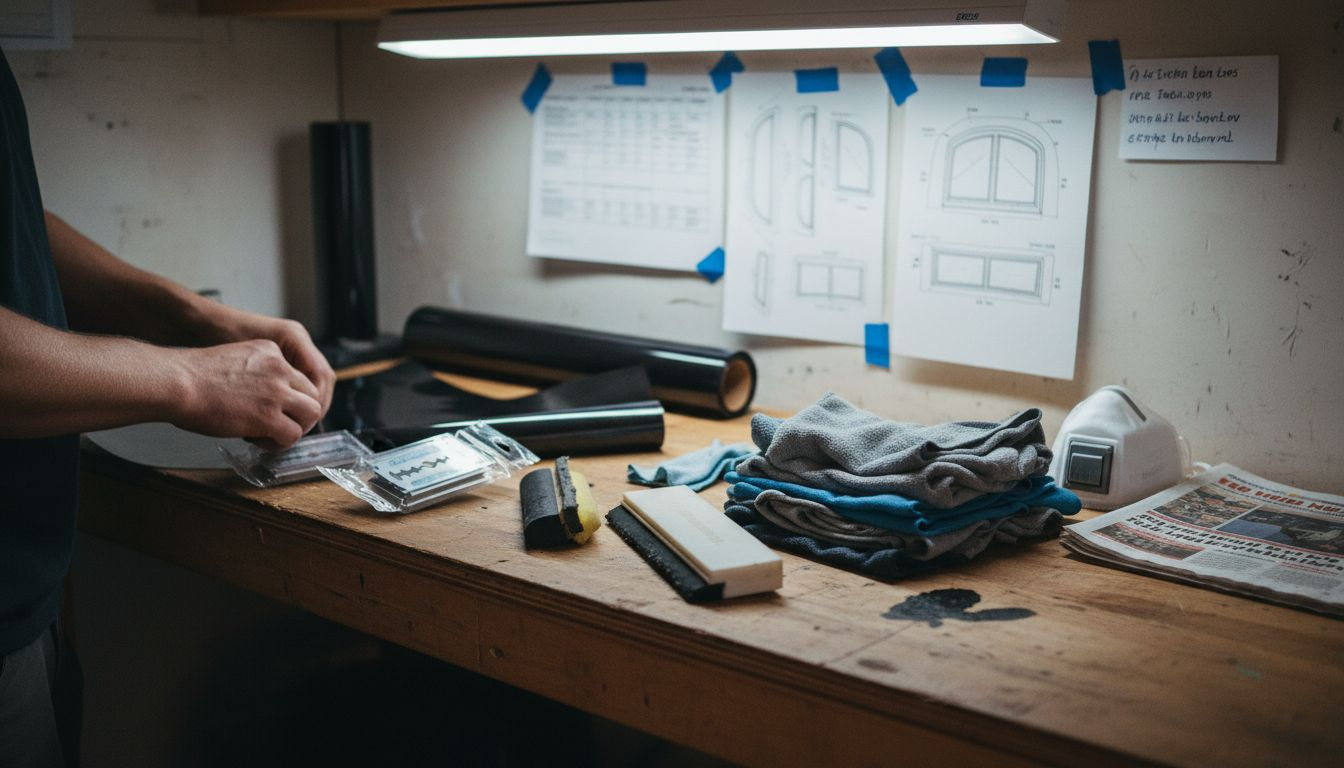
Step 1: Gather Essential Window Tinting Tools
Preparing to tint your vehicle’s windows requires selecting the right tools and equipment for a professional-looking finish. Window film installation demands precision and the proper toolkit.
Your essential window tinting toolkit should include several key items:
- Spray bottle filled with a water and soap solution
- Professional-grade squeegee with soft rubber edge
- Sharp scissors or utility knife for precise cutting
- Clean microfiber towels for surface preparation
- Lint-free cleaning cloths
- Measuring tape for accurate measurements
- Heat gun (optional but recommended for complex window curves)
- Razor blade scraper for removing old tint or cleaning surfaces
Before starting, ensure your workspace is clean, dust-free, and has adequate lighting. A well-organized workspace prevents contamination and helps achieve a smooth application.
Professional tinters know that preparation is 90% of a successful window tint installation.
Workspace preparation is just as crucial as having the right tools. Choose a clean, enclosed area away from dust, wind, and direct sunlight. A garage or indoor workspace with consistent temperature works best.
Pro tip: Always have extra blades and a backup squeegee on hand, as these tools wear quickly during precise window tinting work.
Step 2: Clean and Prep Window Surfaces Thoroughly
Successful window tinting starts with meticulous surface preparation. Automotive window cleaning requires careful attention to detail to ensure a flawless tint application.
Begin by gathering your cleaning supplies:
- Automotive glass cleaner
- Lint-free microfiber cloths
- Razor blade scraper
- Isopropyl alcohol
- Clean spray bottle
- Soft lint-free towels
Follow these critical cleaning steps:
- Remove any existing window tint completely
- Use razor blade to carefully scrape off old adhesive
- Spray window with glass cleaner
- Wipe in horizontal and vertical motions
- Clean edges and corners thoroughly
- Use isopropyl alcohol for final surface preparation
A perfectly clean window is the foundation of a professional window tint installation.
Ensure your working environment is dust-free and well-lit. Any remaining dirt or debris can cause bubbles or imperfections in the tint application. Pay special attention to window edges and corners where grime tends to accumulate.
Pro tip: Work in a temperature-controlled environment and avoid cleaning windows in direct sunlight to prevent premature drying of cleaning solutions.
Step 3: Cut and Fit Tint Film Accurately
Precision is paramount when cutting and fitting window tint film for your vehicle. Window film installation requires careful measurement and strategic cutting to achieve a professional result.
Equip yourself with these essential tools:
- Sharp utility knife
- Cutting mat or hard surface
- Measuring tape
- Spray bottle with soapy water
- Squeegee
- Precision scissors
Follow these critical cutting steps:
- Measure window dimensions carefully
- Add 1-2 inches of extra material for precise fitting
- Cut film on a clean, flat surface
- Use steady hand movements
- Make initial rough cut first
- Fine-tune edges after initial placement
Professional window tinters know that measuring twice and cutting once prevents costly mistakes.
When cutting, always work in a well-lit area with a clean, dust-free workspace. Test-fit the film before final application to ensure accurate coverage and minimal waste.
Pro tip: Practice cutting on scrap film first to develop confidence and precision in your technique.
Step 4: Apply and Smooth Tint Film Carefully
The success of your window tinting project hinges on precise application and meticulous smoothing techniques. Window film application requires patience and a systematic approach to achieve a professional finish.
Key application tools and materials:
- Spray bottle with slip solution
- Plastic squeegee
- Soft microfiber cloth
- Utility knife
- Heat gun (optional)
- Lint-free towels
Follow these critical application steps:
- Thoroughly wet window surface with slip solution
- Remove protective backing from tint film
- Position film carefully on glass
- Gently press film using squeegee
- Start from center and work outwards
- Remove air bubbles systematically
- Trim excess film around edges
Smooth, consistent pressure is the secret to bubble-free window tint installation.
Work slowly and methodically, applying even pressure with your squeegee. Start from the center of the window and push air bubbles towards the edges using overlapping strokes. Take your time to ensure a flawless, professional-looking result.
Pro tip: Keep a spray bottle with slip solution nearby during application to help reposition film if initial placement is slightly off.
Step 5: Inspect for Bubbles and Finalize Edges
The final stage of window tinting demands a meticulous visual inspection process to ensure a flawless, professional appearance. Your goal is to identify and address any remaining imperfections in the tint film.
Critical inspection areas include:
- Window edges
- Corner alignments
- Bubble zones
- Film adhesion points
- Overall surface smoothness
Follow these detailed inspection steps:
- Wait 24-48 hours after installation
- Inspect in bright, natural light
- Use oblique lighting to reveal subtle imperfections
- Check for tiny air bubbles
- Verify clean, precise edge trimming
- Look for uniform film adhesion
Perfection is in the details – a great window tint is invisible to the casual observer.
If you discover small air bubbles, gently use your squeegee to push them towards the nearest window edge. For stubborn bubbles, a heat gun can help soften the film and facilitate smoother application.
Pro tip: Keep a clean microfiber cloth nearby during inspection to quickly address any dust or lint that might have settled during the final stages of installation.
Below is a summary of workspace requirements at each stage:
| Stage | Ideal Workspace Conditions | Why It Matters |
|---|---|---|
| Preparation | Clean, enclosed, well-lit | Prevents dust contamination |
| Cleaning | Temperature-controlled, shaded | Reduces drying streaks |
| Cutting & Fitting | Flat, dust-free, bright | Ensures accuracy and precision |
| Application | Even lighting, calm air | Minimizes film movement |
| Inspection | Bright daylight, clean area | Reveals hidden imperfections |
Here’s a quick reference comparing key steps in the window tinting process:
| Step | Primary Goal | Common Pitfall | Success Tip |
|---|---|---|---|
| Preparation | Gather proper tools | Incomplete toolset | Organize tools before starting |
| Cleaning | Remove all residues | Streaks left behind | Use lint-free cloths |
| Cutting & Fitting | Accurate film shape | Cutting film too small | Measure twice, cut once |
| Application | Bubble-free finish | Trapped air bubbles | Work slowly, squeegee outward |
| Inspection | Perfect appearance | Missed small flaws | Use bright, angled light |
Achieve Flawless Window Tinting with Professional Support
Window tinting demands precision, the right tools, and careful techniques to avoid common pitfalls like bubbles, miscuts, or uneven edges. If the step-by-step process feels overwhelming or you want to ensure a lasting, flawless finish without the hassle of workspace preparation and delicate application, expert help can make all the difference. From surface cleaning to accurate cutting and smooth application, CDC Auto Detailing in Pitman, New Jersey provides mobile window tinting services designed to meet your exacting standards.

Get ready to experience premium results with professional equipment and skilled application that you can trust. Visit our main service page to learn how our experienced team combines detailed preparation and flawless execution. Don’t wait for imperfections to show — secure your appointment now and protect your vehicle with expert care that delivers perfect edges, bubble-free film, and a polished finish every time.
Frequently Asked Questions
What tools do I need for window tinting?
You’ll need several essential tools for successful window tinting, including a spray bottle with a soap solution, a professional-grade squeegee, sharp scissors or a utility knife, microfiber towels, and a measuring tape. Gather all these tools before starting to ensure a smooth installation process.
How do I prepare the window surfaces before applying tint?
To prep window surfaces, start by thoroughly cleaning them with automotive glass cleaner and lint-free cloths. Remove any existing tint and old adhesive using a razor blade, then wipe down the window with isopropyl alcohol for a final clean, ensuring no dust or debris remains.
What is the best method for cutting and fitting the tint film?
When cutting the tint film, measure the window dimensions accurately and add 1-2 inches for a precise fit. Cut the film on a clean, flat surface and practice on scrap film to build your confidence and ensure your cuts are steady and accurate.
How do I apply the tint film to the window?
To apply the tint film, first wet the window surface with a slip solution. Remove the protective backing from the film, position it carefully on the glass, and use the squeegee to push out air bubbles from the center toward the edges, ensuring an even application without imperfections.
How can I inspect the tinted windows for flaws after installation?
Inspect the tinted windows in bright, natural light 24-48 hours after installation to see any imperfections, such as bubbles or uneven edges. Look closely at the corners and edges, and if you find small bubbles, gently push them out with a squeegee or use a heat gun to smooth them out.
What should I do if there are bubbles in the tint film?
If you notice bubbles in the tint film, use a squeegee to work them toward the nearest edge gently. For stubborn bubbles, apply heat from a heat gun to soften the film and make removal easier, ensuring a smooth and flawless finish.