TL;DR:
- Proper car interior cleaning involves separating dry vacuuming from wet cleaning to prevent dirt from becoming mud and damaging surfaces. Using material-specific cleaners and conditioning leather seats after cleaning extends their lifespan and prevents cracking. Regular maintenance with quick weekly refreshes supports a deep cleaning schedule that keeps the interior pristine and odor-free.
Effective tips on cleaning car interior are defined as a structured sequence of dry and wet procedures using material-appropriate tools and automotive-grade products to remove embedded grime, restore surfaces, and extend cabin life. Professional auto detailing calls this process interior detailing, and the distinction from casual tidying matters: deep cleaning addresses residues beneath visible surfaces using chemistry matched to each material. For best results, you need microfiber cloths, a quality vacuum with crevice attachments, pH-balanced cleaners, and a clear workflow. Industry guidance recommends deep cleaning every 3 to 6 months for average use, with more frequent sessions for vehicles carrying children or pets.
1. Tips on cleaning car interior: start with preparation
Preparation is the single step most car owners skip, and it costs them time on every other step. Before any product touches a surface, remove all trash, personal items, and loose objects from the cabin. Empty the glove box, center console, and door pockets. This gives you unobstructed access to every surface and prevents items from getting wet or damaged.
Remove all floor mats and shake them out outside the vehicle. Rubber mats can be scrubbed with a stiff brush and mild soap, then rinsed and left to dry completely before reinstalling. Fabric mats need vacuuming and, if soiled, a fabric cleaner applied before they go back in.
Lay out your supplies before you start: vacuum with attachments, microfiber cloths, interior cleaner, leather conditioner if applicable, a soft-bristle brush, and a dedicated glass cleaner. A 10-minute prep routine that includes decluttering and organizing your tools makes the actual cleaning faster and more thorough.
Pro Tip: Keep a small caddy in your trunk stocked with a microfiber cloth, a travel-size interior spray, and a lint roller. This makes quick refreshes between deep cleans take under five minutes.
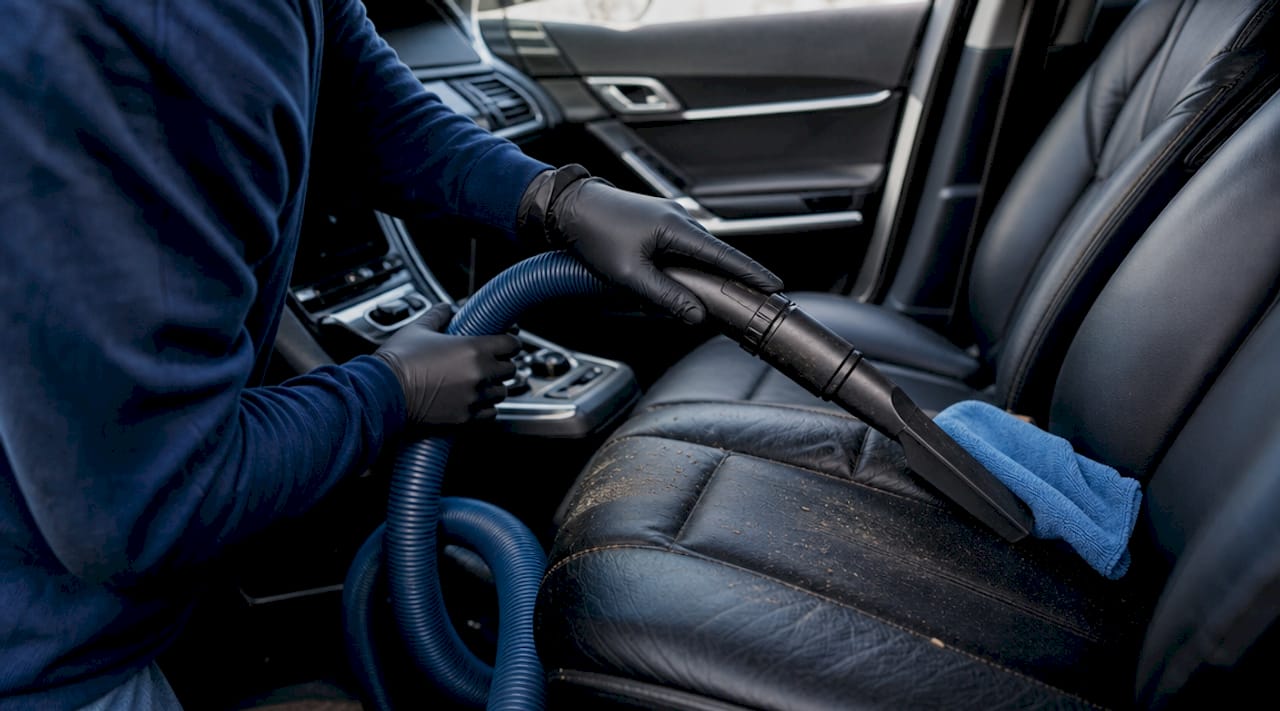
2. Vacuum thoroughly before introducing any moisture
The divide-and-conquer method is the professional standard: complete all dry cleaning before any wet cleaning begins. Mixing moisture with loose dirt creates mud that grinds into fabric fibers and is far harder to remove than dry debris.
Start vacuuming from the top of the cabin and work downward. Hit the headliner gently, then move to the seats, followed by the floor. Use these attachments strategically:
- Crevice tool: Gets into seat seams, between the center console and seats, and around the gear shifter
- Upholstery brush: Lifts embedded debris from fabric seats and carpets without pulling fibers
- Flat nozzle: Works along door sill edges and under seats
- Soft dusting brush: Clears vents and delicate trim without scratching
Crevice tools and upholstery brushes are not optional extras. They are the difference between surface-level cleaning and actually removing the grit that wears down your interior over time.
Pro Tip: Run the vacuum over seats twice: once with the nap of the fabric, once against it. The second pass pulls up debris the first pass missed.
3. Clean dashboards and hard surfaces correctly
Dashboards, door panels, and center consoles collect dust, skin oils, and UV damage. Use a soft microfiber cloth lightly dampened with an automotive interior cleaner. Spray the product onto the cloth, not directly onto the surface, to prevent overspray on screens or vents.
For textured plastic trim, a soft-bristle detailing brush loosens dust from grooves before you wipe. Work in sections and flip the cloth frequently to avoid redistributing grime. Screens and piano black trim require controlled wiping techniques with a clean, dry microfiber to avoid micro-scratches.
Steering wheel and pedal protectants create slippery surfaces that pose real safety risks. Skip glossy sprays on the steering wheel entirely, and avoid any protectant on brake or accelerator pedals. On dashboards, use a matte-finish product to prevent glare on the windshield.
4. Match your cleaner to the surface material
Using the wrong product on the wrong surface is the most common and most damaging mistake in car interior cleaning. Here is a quick reference for the four main interior materials:
| Surface | Recommended cleaner | What to avoid |
|---|---|---|
| Leather seats | pH-balanced leather cleaner plus conditioner | Bleach, hydrogen peroxide, all-purpose sprays |
| Fabric upholstery | Automotive fabric cleaner or foam upholstery spray | Soaking with water, bleach-based products |
| Vinyl panels | Mild automotive interior spray | Solvent-based cleaners, silicone sprays |
| Dashboard/plastic | Automotive interior detailer (matte finish) | Household glass cleaner, ammonia-based products |
Household cleaners with bleach or hydrogen peroxide cause irreversible damage to upholstery and coatings. Water mixed with a mild automotive-specific cleaner is always the safer choice. Brands like Chemical Guys, Meguiar’s, and 303 Products all offer interior-specific lines formulated to clean without degrading materials.
For leather seats, conditioning after cleaning is not cosmetic. Leather conditioning after cleaning prevents long-term cracking and extends seat life significantly. A pH-balanced leather conditioner applied with a microfiber applicator pad, buffed in circular motions, restores flexibility to the hide and reduces the risk of cracking by a substantial margin.
5. Handle the headliner with minimal moisture
The headliner is the most fragile surface in your car’s cabin, and most people damage it by over-wetting. The fabric is bonded to a foam backing with adhesive, and excess moisture weakens that bond, causing the material to sag permanently.
Avoid soaking the headliner. Use a lightly dampened microfiber cloth with a small amount of upholstery cleaner, and blot rather than scrub. Work in small sections and allow each area to dry before moving on. For stubborn spots, a soft-bristle brush with minimal product applied in gentle circular motions is the right approach.
This same principle of minimal moisture applies to any fabric-backed surface. When in doubt, use less product and more patience.
6. Tackle stains, odors, and pet hair
Stain treatment works best when it is immediate. Blot liquid spills with a clean microfiber cloth rather than rubbing, which pushes the stain deeper into fibers. For dried stains on fabric, apply an automotive upholstery cleaner, let it dwell for two to three minutes, then agitate gently with a soft brush and blot clean.
For odors, the approach depends on the source:
- General mustiness: Sprinkle baking soda on carpets and fabric seats, leave for 15 to 30 minutes, then vacuum thoroughly
- Biological odors (food, pet accidents): Use an enzymatic cleaner like Nature’s Miracle or a dedicated automotive odor eliminator that breaks down odor-causing molecules rather than masking them
- Smoke odor: Requires an ozone treatment or activated charcoal, since surface cleaning alone will not reach the odor embedded in the headliner and HVAC system
Pet hair removal requires a layered approach. A rubber pet hair brush loosens hair from fabric fibers before vacuuming. A lint roller picks up what the vacuum misses on seat surfaces. Slightly dampening a rubber glove and running it across upholstery creates static that pulls stubborn hair to the surface.
7. Clean windows and mirrors from the inside
Interior glass collects a film from off-gassing plastics, skin oils, and humidity. This film causes glare at night and reduces visibility. Use an automotive glass cleaner, not a household product containing ammonia, which degrades window tint and rubber seals over time.
Spray the cleaner onto a clean microfiber cloth and wipe in overlapping horizontal strokes, then follow with vertical strokes using a dry cloth. The two-direction technique eliminates streaks that a single-direction wipe leaves behind. For the rear windshield, wipe along the defroster lines rather than across them to avoid damage.
8. Dry thoroughly and ventilate after wet cleaning
Moisture left inside a vehicle after cleaning creates the conditions for mold growth and musty odors within 24 to 48 hours. Proper ventilation during and after cleaning prevents this moisture buildup. Leave windows slightly open after cleaning, park in a shaded area with airflow, and use a portable fan directed into the cabin if conditions are humid.
For fabric seats and carpets that received wet treatment, press a dry microfiber towel firmly into the surface to absorb as much moisture as possible before air drying. A wet-dry vacuum run over treated areas speeds up drying significantly.
Pro Tip: Never reinstall floor mats until they are completely dry. Damp mats trap moisture against the carpet underneath and are a primary cause of mold in car interiors.
9. Set a cleaning schedule that actually works
| Scenario | Deep clean frequency | Quick refresh frequency |
|---|---|---|
| Average adult driver | Every 3 to 6 months | Weekly wipe-down and vacuum |
| Frequent child or pet transport | Every 2 to 3 months | Twice weekly |
| Food or coffee in the car regularly | Every 2 to 3 months | After each incident |
| Rarely used vehicle | Every 6 months | Monthly dust and wipe |
Weekly vacuuming and quick wipe-downs maintain hygiene between deep cleans and make each deep clean faster and more effective. A periodic quick refresh that includes trash removal, surface wipe-downs, and basic vacuuming takes about 10 minutes and prevents the buildup that turns a manageable clean into a full-day project. Follow the interior cleaning step by step process Cdcautodetailing outlines to keep your schedule consistent.
Key takeaways
Effective car interior cleaning requires completing all dry work before wet work, matching products to materials, and maintaining a consistent schedule to prevent buildup from compounding.
| Point | Details |
|---|---|
| Dry before wet | Always vacuum and dust completely before applying any liquid cleaner to avoid mud and staining. |
| Match product to material | Use pH-balanced automotive cleaners for leather, fabric, vinyl, and plastic to prevent irreversible damage. |
| Condition leather after cleaning | Leather conditioner applied after cleaning prevents cracking and extends seat life significantly. |
| Ventilate after wet cleaning | Leave windows open and use a fan to prevent mold and musty odors from trapped moisture. |
| Schedule regular refreshes | A 10-minute weekly wipe-down keeps buildup manageable and reduces deep clean time. |
What I’ve learned from years of watching people clean their cars wrong
Most car owners treat interior cleaning as one continuous task. They grab a bottle of whatever is under the sink, spray it on everything, and wipe. The result is a surface that looks cleaner for about two days before the residue attracts more dust and the leather starts to look dull.
The professional distinction that actually matters is the separation of dry and wet phases. Every time I see someone spray a cleaner onto a dusty dashboard, I know they are creating a paste that fills texture grooves and is harder to remove than the original dirt. Vacuum first. Always.
The other mistake I see constantly is over-wetting fabric. People think more product means more clean. It means more drying time, more risk of mold, and more potential for adhesive failure on headliners. A damp cloth with the right product outperforms a soaked cloth with the wrong one every single time.
If you want to get closer to professional detailing results at home, invest in two things: a cordless vacuum with proper attachments, and a set of material-specific cleaners. The tools matter more than the effort. You can scrub for an hour with the wrong product and do less than five minutes of work with the right one.
— Charles
When home cleaning is not enough

Even the most disciplined home cleaning routine has limits. Embedded odors from smoke or pet accidents, deeply stained upholstery, and oxidized trim require professional-grade equipment and chemistry that is not available in retail stores. Cdcautodetailing provides mobile interior detailing services across South Jersey, including deep upholstery shampooing, enzymatic odor treatment, and full surface conditioning, all performed at your location. For vehicles that need more than a refresh, explore the full range of auto detailing services Cdcautodetailing offers, from interior restoration to ceramic coating protection. Book directly through the site and a professional comes to you.
FAQ
How often should you deep clean your car interior?
Deep clean your car interior every 3 to 6 months for average use. Vehicles that regularly carry children, pets, or food benefit from cleaning every 2 to 3 months.
What is the best way to clean car seats?
The best method depends on the material. Leather seats need a pH-balanced leather cleaner followed by a conditioner. Fabric seats respond best to an automotive upholstery foam cleaner agitated with a soft brush and blotted dry.
Can you use household cleaners on car interiors?
Household cleaners with bleach or hydrogen peroxide cause irreversible damage to upholstery and coatings. Use automotive-specific products from brands like Chemical Guys or Meguiar’s for safe, effective results.
How do you remove pet hair from car seats?
Use a rubber pet hair brush to loosen hair from fabric fibers, vacuum thoroughly, then follow with a lint roller for surface hair. A slightly damp rubber glove dragged across upholstery also pulls stubborn hair to the surface effectively.
Why does my car smell after cleaning?
Musty odors after cleaning usually indicate moisture trapped in carpets or fabric seats. Ventilate the cabin by leaving windows open, use a fan to accelerate drying, and make sure floor mats are fully dry before reinstalling them.