TL;DR:
- Regular engine bay cleaning removes grease and debris, prevents corrosion, and helps detect leaks early. Proper preparation, gentle tools, and patience ensure safety and effectiveness, extending engine life. Professional detailing offers superior results for heavily soiled or delicate engine compartments, saving time and reducing damage risks.
Engine bay cleaning is the process of safely removing grease, grime, and debris from your vehicle’s engine compartment to improve appearance, support maintenance, and extend engine life. Most vehicle owners skip this task entirely, which means a dirty engine bay quietly hides oil leaks, corrodes connectors, and traps heat. This engine bay cleaning guide covers every step from preparation to protective sealing, using tools like Chemical Guys degreasers, Simple Green, and soft detailing brushes. Follow these steps correctly and you will protect sensitive electronics, spot problems early, and keep your engine running cleaner longer.
What is an engine bay cleaning guide and why does it matter?
Engine bay detailing is not just cosmetic work. Regular cleaning helps you find leaks before they become expensive repairs and extends the working life of your engine. A clean engine also runs cooler because grime acts as insulation, trapping heat against metal surfaces and rubber hoses.
The standard industry term for this process is engine compartment maintenance, though most DIYers simply call it engine bay detailing. Both terms describe the same goal: a clean, protected engine compartment that functions better and looks professional.
Skipping this maintenance creates compounding problems. Grease buildup attracts dirt, which holds moisture against metal, which accelerates rust. Dirty electrical connectors corrode faster. Rubber hoses crack sooner when coated in oil and grime. A clean engine bay is a diagnostic tool as much as it is a visual upgrade.
What tools do you need before you start?
Preparation is the most important phase of any engine cleaning job. The right tools prevent damage to sensitive components and make the entire process faster and more effective.
| Tool | Purpose | Pro Tip |
|---|---|---|
| Soft detailing brushes | Agitate degreaser in tight spaces | Use separate brushes for greasy and dry areas |
| Microfiber cloths | Wipe surfaces and protect components | Layer over plastic bags for double protection |
| Car-safe degreaser (Chemical Guys, Simple Green) | Break down grease and oil deposits | Choose a pH-neutral formula for painted surfaces |
| Plastic bags or aluminum foil | Cover electrical components and sensors | Secure with rubber bands or tape |
| Garden hose with low-pressure nozzle | Rinse degreaser without forcing water into electronics | Never use a pressure washer on an engine bay |
| Vacuum or compressed air | Remove dry debris before wet cleaning | Always do this step first |
Safety prerequisites come before any water or product touches your engine. Industry protocols require a minimum 30-minute cool-down period and disconnection of the battery’s negative terminal before you begin. These two steps alone prevent the majority of cleaning-related damage.
Double-layer coverage of sensitive parts, meaning a microfiber towel placed over a plastic bag, reduces moisture intrusion far more effectively than a plastic bag alone. Cover your alternator, fuse box, air intake, and any exposed electrical connectors before any liquid is applied.
Pro Tip: Remove leaves, threads, and loose debris with a vacuum or compressed air before applying any liquid. Wet debris clogs drains and smears across surfaces, making the job harder.
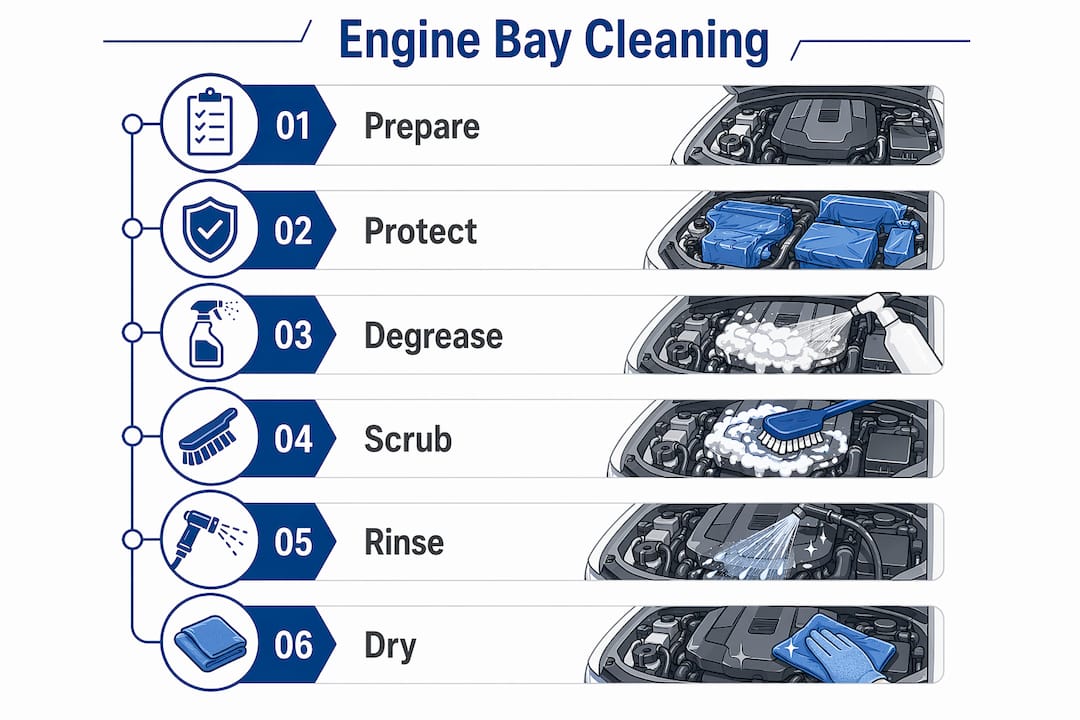
How do you clean an engine bay step by step?
The full engine cleaning step-by-step process takes 15–30 minutes of active work, not counting cool-down and drying time. Work in sections rather than flooding the entire bay at once. Professional detailers use slow, controlled stages to prevent water pooling and product runoff into sensitive areas.
- Cool the engine completely. Wait at least 30 minutes after driving. A warm engine is acceptable; a hot engine is not.
- Disconnect the battery’s negative terminal. This eliminates the risk of electrical shorts if water contacts a connector.
- Cover sensitive components. Use plastic bags secured with rubber bands over the alternator, fuse box, air filter housing, and any open electrical connectors. Add a microfiber towel on top for double protection.
- Remove dry debris. Use compressed air or a vacuum to clear leaves, dust, and loose grime from crevices and drain channels.
- Apply degreaser in sections. Spray Chemical Guys Degreaser, Simple Green, or a similar car-safe product onto one section at a time. Allow 3 minutes dwell time before scrubbing. This dwell period is what actually breaks down grease at the molecular level.
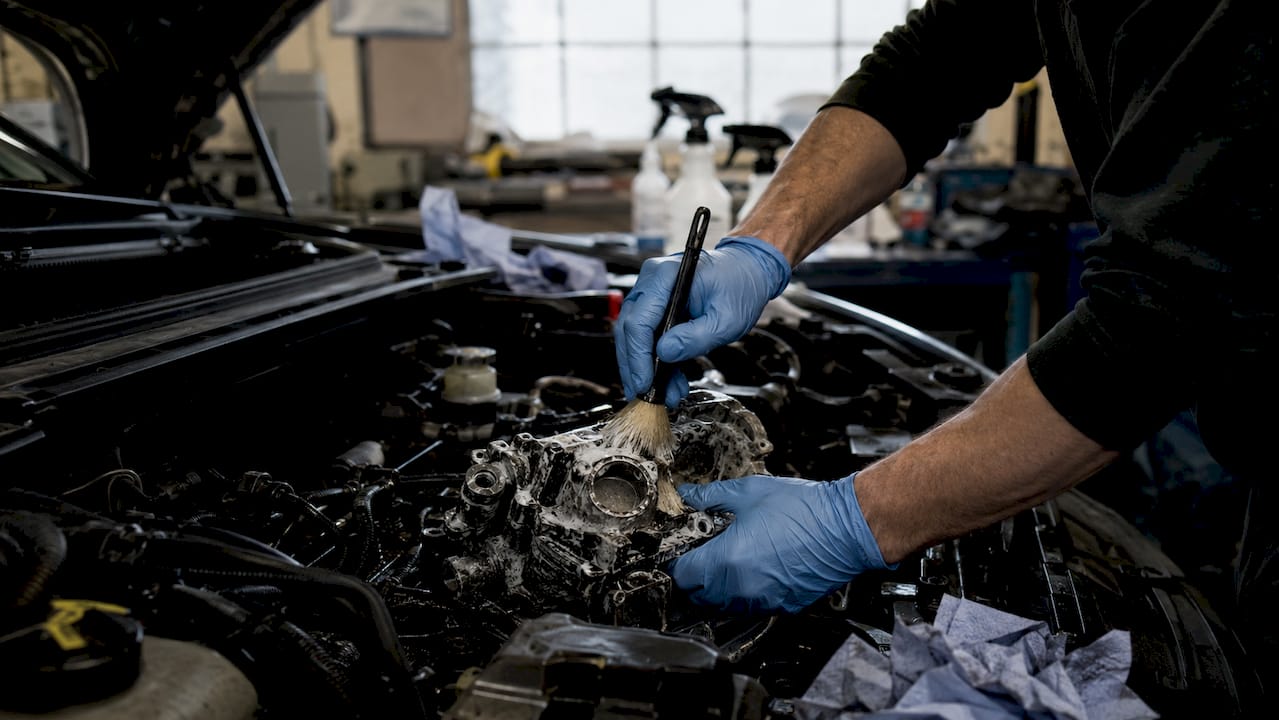
- Agitate with soft brushes. Use a nylon detailing brush to work the degreaser into crevices. Avoid scrubbing directly on rubber hoses, plastic sensors, or wiring harnesses.
- Rinse with low pressure. A garden hose on a gentle setting is the correct tool here. Low-pressure water or steam is far safer than any pressure washer for engine bays. Angle the spray downward and away from covered components.
- Dry thoroughly. Use compressed air to blast water from crevices, then follow with microfiber towels on flat surfaces. Run the engine for 5–10 minutes to evaporate remaining moisture from hard-to-reach areas.
- Apply a protective sealant. A gloss sealant applied after cleaning reduces dust accumulation and protects plastic and rubber from moisture and UV damage. Products like Chemical Guys VRP or a dedicated engine dressing work well for this step.
Pro Tip: Work one quarter of the engine bay at a time. Apply degreaser, scrub, and rinse each section before moving to the next. This prevents the product from drying on surfaces before you can rinse it off.
Hand cleaning vs. pressure washing: which is safer?
| Method | Risk Level | Best For |
|---|---|---|
| Hand cleaning with garden hose | Low | All vehicles, especially modern cars with complex electronics |
| Steam cleaning | Low to medium | Stubborn grease without soaking components |
| Pressure washing | High | Not recommended for engine bays |
Pressure washing forces water past weather seals on electronics. That water causes corrosion, short circuits, and in severe cases, control unit failure. The risk is not worth the time saved.
What mistakes damage your engine during cleaning?
Most engine bay cleaning damage comes from human error, not from water itself. The risk is primarily procedural, which means following the right steps eliminates most of it.
Top mistakes to avoid:
- Using high-pressure water. High-pressure water breaches weather-tight seals on electronics and can cause permanent control unit failure. Use a garden hose only.
- Cleaning a hot engine. A hot engine causes degreasers to flash-dry, leaving streaks and residue. Cold water on a very hot engine also risks thermal shock fractures in metal and plastic parts.
- Skipping component coverage. Leaving the alternator, fuse box, or air intake uncovered invites water damage that may not show up until days later when corrosion sets in.
- Using harsh household chemicals. Products like bleach or strong alkaline cleaners strip protective coatings from plastic and rubber. Stick to car-safe degreasers rated for engine use.
- Rushing the drying phase. Water left sitting in electrical connectors corrodes pins over weeks. Always dry with compressed air and run the engine after cleaning.
“If water enters an electrical connector, remove the covering immediately, dry with compressed air, and allow the engine to run for at least 10 minutes before reconnecting the battery. Do not ignore moisture in connectors.”
Pro Tip: If you notice a stubborn grease spot that won’t lift after one application, apply degreaser a second time and let it dwell for 5 minutes instead of 3. Avoid scrubbing harder, which can scratch painted engine covers.
For a broader look at common detailing mistakes that affect the whole vehicle, Cdcautodetailing has a dedicated resource worth reading before your next session.
How often should you clean your engine bay?
Cleaning frequency depends on how and where you drive. The general recommendation is once or twice per year, with more frequent cleaning for vehicles driven in harsh conditions like road salt, heavy dust, or off-road environments. That interval keeps grime from hardening into a layer that requires aggressive products to remove.
Maintenance habits that extend cleanliness between full washes:
- Inspect the engine bay monthly for new oil spots, coolant residue, or debris buildup.
- Wipe down accessible plastic covers with a damp microfiber cloth every few months.
- Address small leaks immediately. A fresh oil drip is easy to clean. A baked-on oil stain from months of heat cycles is not.
- Use a leaf blower or compressed air to clear debris from drain channels after driving through heavy leaf fall or dusty roads.
Regular cleaning aids early leak detection and prevents minor drips from becoming major mechanical failures. A clean surface makes it immediately obvious when a new stain appears.
Signs you need professional engine bay detailing instead of a DIY session:
- Heavy oil or coolant buildup that has baked onto surfaces over multiple heat cycles
- Visible corrosion on battery terminals or wiring harnesses
- Grime packed into areas you cannot safely reach without removing components
- A vehicle that has never been cleaned under the hood and has more than 50,000 miles
Professional detailers bring industrial-grade steam cleaners, specialty brushes sized for specific engine layouts, and the experience to work around sensitive components without causing damage. For South Jersey vehicle owners, Cdcautodetailing’s engine bay cleaning service covers all of these scenarios with mobile convenience.
Key takeaways
A clean engine bay is functional maintenance first and cosmetic improvement second. Every step in this process protects your vehicle’s electronics, helps you spot problems early, and extends the life of rubber and metal components.
| Point | Details |
|---|---|
| Safety before water | Cool the engine 30 minutes and disconnect the battery before any cleaning begins. |
| Double-layer protection | Cover sensitive components with a plastic bag plus a microfiber towel to block moisture intrusion. |
| Dwell time matters | Let car-safe degreaser sit for 3 minutes before scrubbing for effective grime breakdown. |
| Low pressure only | Use a garden hose, never a pressure washer, to prevent electronics damage during rinsing. |
| Seal after cleaning | Apply a protective sealant to reduce dust buildup and protect plastic and rubber surfaces. |
What i’ve learned after cleaning hundreds of engine bays
The single biggest mistake I see from first-time DIYers is skipping preparation and going straight to spraying. They grab a bottle of degreaser, hit the engine with a hose, and wonder why their check engine light comes on two days later. Preparation is not optional. It is the job.
The second thing I have learned is that patience with drying pays off more than any product you buy. I have seen beautifully cleaned engine bays develop corroded connectors within a month because the owner skipped the compressed air step and did not run the engine afterward. Water finds its way into places you cannot see, and it sits there.
For DIYers building confidence with this process, I always recommend starting with an older or simpler vehicle before tackling a modern car loaded with sensors and modules. The principles are identical, but the margin for error is wider on older engines. Build your technique, then apply it to your daily driver.
One thing most guides do not mention: the protective sealant step is where aesthetics and function meet. A dressed engine bay with treated plastic and rubber looks genuinely impressive when you open the hood. More importantly, that sealant layer makes your next cleaning session faster because grime cannot bond as deeply to treated surfaces. It is the one step that rewards you twice.
— Charles
Why professional engine bay detailing is worth considering
If your engine bay has years of baked-on grime or you simply want the job done right the first time, professional detailing delivers results that DIY methods struggle to match.

Cdcautodetailing provides mobile engine bay detailing across South Jersey, bringing professional-grade steam cleaners, specialty brushes, and car-safe products directly to your driveway. The team covers full degreasing, component protection, thorough drying, and protective sealant application in a single visit. For a complete look at what professional care includes, explore Cdcautodetailing’s auto detailing services or read the full breakdown of how auto detailing works. Book a session and skip the guesswork entirely.
FAQ
What is engine bay cleaning exactly?
Engine bay cleaning is the safe removal of grease, grime, oil deposits, and debris from a vehicle’s engine compartment using degreasers, brushes, and low-pressure water. The process improves appearance and supports mechanical maintenance by making leaks and worn components easier to spot.
How long does it take to clean an engine bay?
The active cleaning process takes 15–30 minutes, not including the required 30-minute cool-down before you start or the drying time afterward. Budget two hours total for a thorough first-time clean.
Is it safe to use a pressure washer on an engine bay?
No. High-pressure water forces moisture past weather seals on electronics and can cause permanent damage to control units and wiring. A garden hose on a gentle setting or a steam cleaner is the correct tool.
What is the best degreaser for engine bay cleaning?
Car-safe degreasers like Chemical Guys Engine Clean, Simple Green All-Purpose Cleaner, and Meguiar’s Super Degreaser are widely used and effective. Choose a pH-neutral formula to protect painted engine covers and rubber components.
How often should you clean your engine bay?
Once or twice per year is the standard recommendation for most vehicles. Vehicles driven in salty, dusty, or off-road conditions benefit from more frequent cleaning to prevent accelerated corrosion and grime buildup.