TL;DR:
- Professional ceramic coating bonds chemically to your vehicle’s paint, offering a durable, hydrophobic shield that lasts up to five years. Proper surface preparation, including paint correction and panel wipe, is essential for optimal bonding and gloss, with environmental control during application being highly recommended. Regular maintenance using pH-neutral washes and periodic sealant boosts sustains long-term protection and appearance.
The professional ceramic coating process is the application of a liquid polymer that bonds chemically to your car’s paint, creating a hard, hydrophobic layer that protects against UV damage, chemical stains, and light abrasion. Unlike wax, which sits on top of paint and wears off within weeks, a properly applied ceramic coating lasts up to 5 years with professional-grade systems. That durability gap is the reason vehicle owners across South Jersey and beyond are choosing professional ceramic coating over traditional paint protection. Products like Gtechniq CSL, Gtechniq EXOv5, and TAC System UHS Ultra represent the current standard for long-lasting ceramic coating results. Getting those results, though, depends entirely on how well each step is executed.
What are the essential preparation steps before applying ceramic coating?
Preparation is where the professional ceramic coating process is won or lost. No coating, regardless of how advanced its chemistry, can compensate for a surface that still holds polish oils, iron fallout, or micro-scratches. Professionals treat prep as the majority of the job, and they are right to do so.
Wheel and tire cleaning
Start with the wheels and tires before touching the paint. Brake dust and road grime are corrosive, and washing them last risks contaminating paint you have already cleaned. Use a dedicated iron fallout remover on the wheels, then follow with an all-purpose cleaner on the barrels and faces. Rinse thoroughly before moving to the body.
Paint washing and decontamination
Wash the entire vehicle with a pH-neutral or wax-stripping shampoo to remove surface dirt and any existing wax or sealant residue. A two-bucket wash method with grit guards prevents reintroducing contamination. After the rinse, run a clay bar or clay mitt across every painted panel. Clay decontamination pulls embedded iron particles and industrial fallout from the clear coat that washing alone cannot remove. You will feel the surface transform from rough to glass-smooth as you work.
Paint correction
Paint correction is non-negotiable before any ceramic coating application. Coatings lock in whatever condition the paint is in at the moment of application. Swirl marks, water spot etching, and buffer trails will be preserved permanently under the coating if not addressed. Professionals use dual-action or rotary polishers with cutting compounds and finishing polishes to restore clarity. The goal is a defect-free surface that the coating will amplify, not a flawed one it will magnify.
Final panel prep
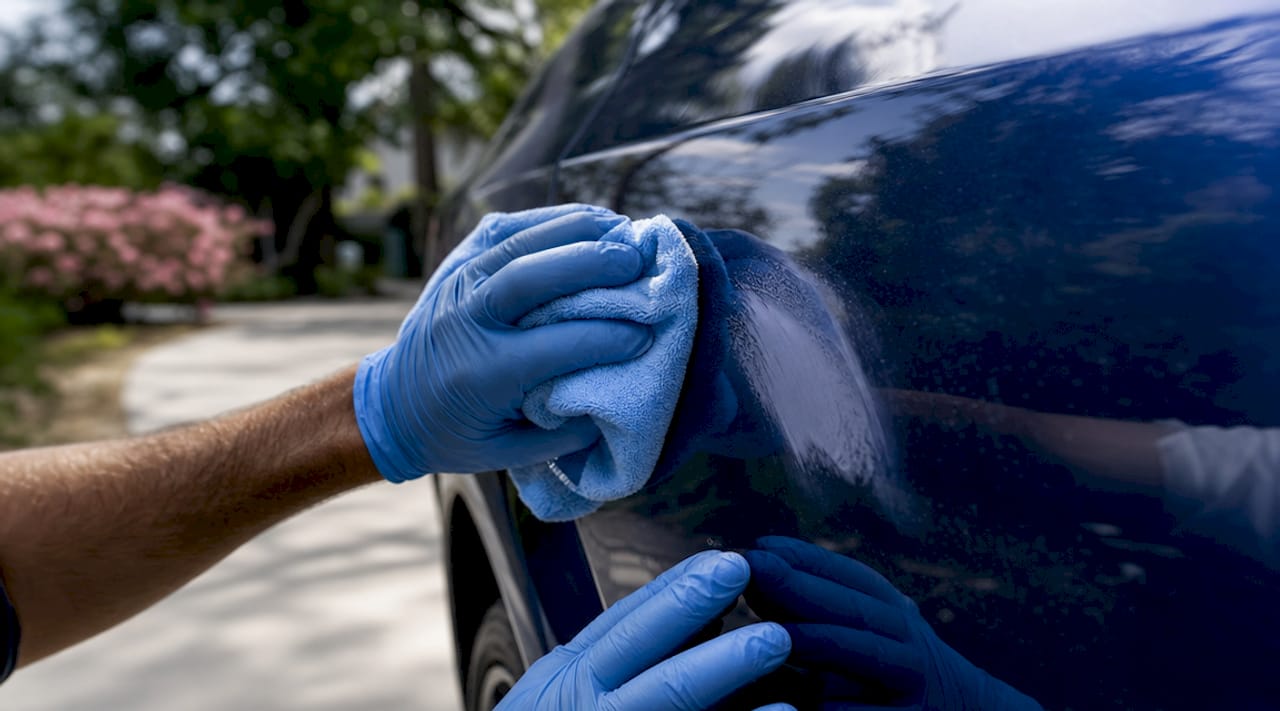
The last step before coating is a panel wipe. Dedicated panel prep sprays remove polishing oils and microfiber lint that would otherwise prevent proper chemical bonding. Products like ESOTERIC Panel Prep Wipe are applied with a clean, folded microfiber towel using straight-line passes. Work one panel at a time and coat immediately after wiping to avoid recontamination.
Pro Tip: Work in a shaded area or indoors during prep. Direct sunlight heats panels, causing panel prep solutions to evaporate too quickly and leaving residue behind.
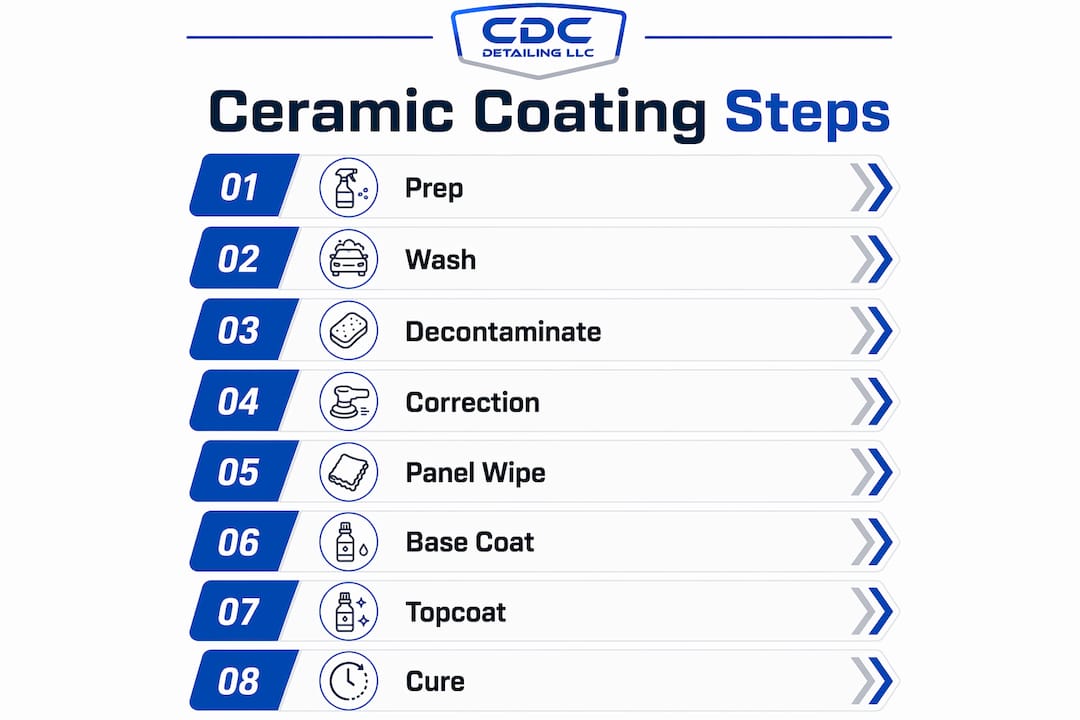
How is the professional ceramic coating applied step-by-step?
With the surface perfectly prepared, the ceramic coating application itself follows a precise, methodical sequence. Rushing any part of this stage produces high spots, uneven gloss, or bonding failures that require correction.
-
Set up your environment. The ideal application temperature is 60 to 80°F with low humidity. High humidity slows flash times unpredictably, and temperatures below 60°F can prevent proper bonding. Work indoors or in a shaded garage with good ventilation.
-
Load your applicator. Apply 4 to 6 drops of coating onto a suede or foam applicator block wrapped in a microfiber cloth. Do not flood the applicator. A thin, even load produces better results than a heavy one.
-
Apply panel by panel using the river method. Work in overlapping straight lines, then cross-hatch with perpendicular passes to achieve full coverage. Apply coating panel by panel in a consistent sequence: roof, hood, trunk, doors, bumpers, and lower panels last. This prevents you from leaning over freshly coated areas.
-
Monitor flash time. Flash timing varies by product and environment, typically 30 seconds to 2 minutes. Watch for the coating to shift from a wet, glossy look to a slightly hazy or rainbow-like appearance. That visual change signals the coating has begun bonding and is ready to buff.
-
Buff off the excess. Use a clean, plush microfiber towel to remove the haze with light, straight-line passes. Flip to a fresh side of the towel frequently. Buffing too early removes the coating before it bonds; buffing too late leaves high spots that require machine correction to fix.
-
Apply the topcoat layer. Systems like Gtechniq CSL and EXOv5 use a two-layer approach. CSL goes on first as the base coat, buffed after flash, then EXO is applied after at least one hour. Each layer has its own flash and cure behavior that must be respected for full adhesion and performance.
Pro Tip: Keep two sets of microfiber towels: one for buffing the coating and one for final leveling. Mixing them introduces coating residue back onto the panel.
Base coat vs. topcoat: what each layer does
| Layer | Product example | Primary function | Wait time before next step |
|---|---|---|---|
| Base coat | Gtechniq CSL | Bonds to clear coat, provides hardness and UV protection | 1 hour minimum before topcoat |
| Topcoat | Gtechniq EXOv5 | Adds hydrophobic properties and gloss enhancement | 12 to 24 hours dry time after application |
What are the curing and aftercare requirements for long-lasting results?
Applying the coating correctly is only half the equation. The curing period determines whether that application becomes a durable, long-lasting ceramic coating or a compromised one that fails early.
The first 24 to 48 hours are critical. Keep the vehicle completely dry and away from rain, sprinklers, bird droppings, and tree sap. Early water contact causes water spot etching that bonds into the coating as it cures, requiring reapplication to fix. Most professionals recommend avoiding any washing for at least five to seven days after application.
After the initial curing window, ongoing maintenance determines how long the coating performs at its best. Follow these practices to protect your investment:
- Wash with a pH-neutral shampoo only. Alkaline or acidic cleaners degrade the hydrophobic layer over time.
- Avoid automatic car washes with abrasive brushes. Hand washing or touchless washes are the only safe options.
- Apply a ceramic sealant booster like Gtechniq C2V4 every three to four months to revive hydrophobic properties between professional inspections.
- Inspect for high spots after the first week. Small high spots appear as dull patches and can sometimes be corrected with a light machine polish before the coating fully hardens.
Pro Tip: After washing, use a silica-based spray detailer as a drying aid. It adds a sacrificial layer of protection and makes drying faster without introducing swirls.
Weather and environment affect coating lifespan significantly. Vehicles parked outdoors in South Jersey summers face UV exposure, acid rain, and tree sap that accelerate coating degradation compared to garaged vehicles. Regular maintenance washes and annual inspections by a professional detailer extend performance well beyond the baseline. For detailed guidance on long-term care, Cdcautodetailing’s resource on maintaining ceramic coatings covers the full maintenance schedule.
How does professional ceramic coating compare to other paint protection options?
Understanding where ceramic coating fits among your options helps you make a confident decision rather than an expensive mistake.
| Protection type | Durability | Hydrophobic effect | Application complexity | Approximate lifespan |
|---|---|---|---|---|
| Carnauba wax | Low | Mild | Easy (DIY-friendly) | 4 to 8 weeks |
| Synthetic sealant | Moderate | Moderate | Easy to moderate | 6 to 12 months |
| Ceramic coating | High | Strong | High (professional recommended) | 2 to 5 years |
| Paint protection film | Very high | Moderate (with coating) | Very high (professional only) | 7 to 10 years |
Wax and synthetic sealants sit on top of the clear coat and are removed by washing, UV exposure, and friction over time. Ceramic coating bonds chemically to the clear coat at a molecular level, which is why its UV and abrasion protection outlasts wax by years rather than weeks. That chemical bond also creates the self-cleaning effect you see when water beads and sheets off a freshly coated car.
Paint protection film (PPF) offers physical impact protection that ceramic coating does not. PPF absorbs rock chips and deep scratches because it is a thick urethane film. Ceramic coating, by contrast, adds hardness and chemical resistance but will not prevent stone chips on its own. Many vehicle owners combine both: PPF on high-impact areas like the hood and front bumper, with ceramic coating over the entire vehicle for hydrophobic protection and gloss. You can learn more about how ceramic coatings protect paint versus other methods in Cdcautodetailing’s dedicated comparison resource.
The cost difference is real. A professional ceramic coating service runs significantly less than a full PPF wrap, making it the practical choice for owners who want durable protection without the premium price of film. For a deeper look at advanced options, Cdcautodetailing also covers self-healing ceramic coatings that add a layer of minor scratch resistance to the equation.
Key takeaways
The professional ceramic coating process delivers durable, long-lasting protection only when surface preparation, precise application, and proper curing are each executed without shortcuts.
| Point | Details |
|---|---|
| Preparation determines the outcome | Paint correction and panel wipe steps are non-negotiable before any coating is applied. |
| Flash time controls bond quality | Buff too early and the coating lifts; buff too late and high spots form that require machine correction. |
| Layered systems outperform single coats | A base coat like Gtechniq CSL plus a topcoat like EXOv5 provides superior hardness and hydrophobic performance. |
| Curing requires 24 to 48 hours of protection | Early water contact etches into the curing coating and can force a full reapplication. |
| Maintenance extends lifespan significantly | pH-neutral washes and periodic ceramic sealant boosters keep hydrophobic properties strong between professional services. |
Why I think most people underestimate the preparation phase
After years of working with ceramic coatings, the single most consistent mistake I see is treating prep as a formality rather than the foundation. Vehicle owners research coating brands obsessively, comparing Gtechniq CSL against TAC System UHS Ultra, and then rush through the clay bar step or skip paint correction entirely because the car “looks fine.” The coating goes on, and six months later they wonder why it looks dull or shows swirls. The coating did exactly what it was supposed to do. It locked in the surface condition it was given.
The environment control point also gets dismissed more than it should. I have seen coatings applied in direct afternoon sun at 90°F because someone wanted to finish the job that day. Flash times become unpredictable, the coating starts to cure before it is buffed, and the result is a panel covered in high spots that need machine correction. Patience here is not optional. A controlled environment is part of the process, not a luxury.
My honest recommendation: if you have any doubt about your ability to execute paint correction properly or to read flash times accurately, hire a professional detailer. The cost of a professional application is far lower than the cost of correcting a botched DIY job or, worse, repainting a panel. The step-by-step application guide from Isaac Pro Detailing is one of the clearest references I have found for understanding what proper technique actually looks like in practice.
— Charles
Get professional ceramic coating from Cdcautodetailing
Cdcautodetailing brings the full professional ceramic coating process directly to your driveway across South Jersey, including Pitman, NJ and surrounding areas. Every service starts with a thorough multi-step preparation: wheel cleaning, paint decontamination, clay bar treatment, and paint correction before a single drop of coating touches your car. Professional-grade products including Gtechniq CSL and EXOv5 are applied in a controlled, methodical sequence to deliver the durability and gloss you expect from a long-lasting ceramic coating.

Whether you are protecting a daily driver or a weekend vehicle, Cdcautodetailing’s mobile service makes premium protection convenient. Book your ceramic coating service today or reach out with questions about which coating package fits your vehicle and budget.
FAQ
What is the professional ceramic coating process?
The professional ceramic coating process is a multi-step procedure that includes paint decontamination, paint correction, panel prep, and the precise application of a liquid polymer coating that bonds chemically to the clear coat. The result is a hard, hydrophobic protective layer that enhances gloss and resists UV damage, chemicals, and light abrasion.
How long does ceramic coating take to cure?
The coating requires 12 to 24 hours of dry time after application and should not be washed or exposed to water for at least 48 hours, with most professionals recommending five to seven days before the first wash.
Can ceramic coating be applied over wax or sealant?
No. Existing wax or sealant must be fully stripped before ceramic coating application. Residual wax prevents the coating from bonding to the clear coat, which causes premature failure and uneven coverage.
How does ceramic coating compare to paint protection film?
Ceramic coating bonds chemically to the clear coat and provides UV protection, chemical resistance, and hydrophobic properties, while paint protection film is a physical urethane layer that absorbs rock chips and deep scratches. Many owners use both together for maximum protection.
How often does ceramic coating need to be maintained?
Wash with pH-neutral shampoo at every wash, and apply a ceramic sealant booster like Gtechniq C2V4 every three to four months to maintain hydrophobic performance. A professional inspection annually helps identify any areas needing correction or reapplication.