TL;DR:
- DIY truck detailing in South Jersey is cost-effective and can match professional results with proper techniques.
- Regular cleaning of the undercarriage and bed seams is crucial to prevent rust and maintain vehicle integrity.
- Combining exterior, bed, and interior care ensures a thorough, long-lasting shine and healthy cabin environment.
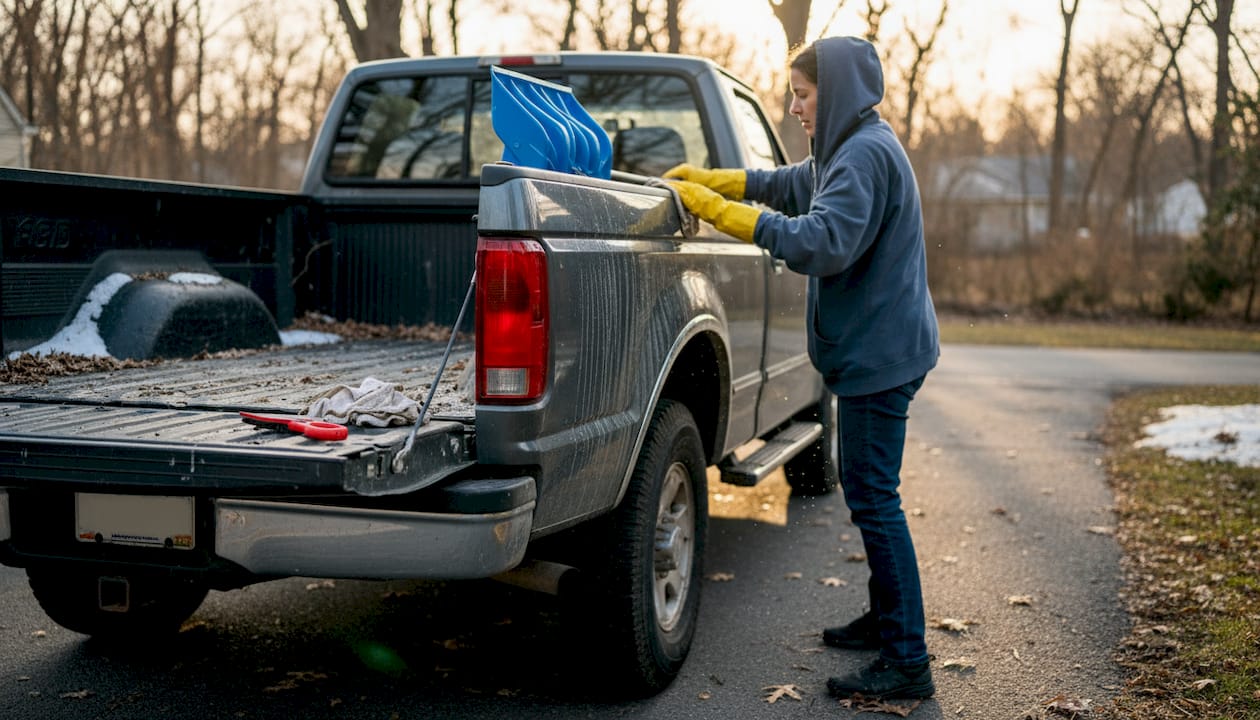
Your truck takes a beating in South Jersey. Salt from winter roads clings to the undercarriage, spring pollen coats every panel, and summer mud finds its way into every seam of the bed. Between work and family, finding time to drop it off at a shop feels impossible. The good news is you can get professional-level results right in your driveway with the right approach and a little discipline. This guide walks you through every step of truck detailing at home, from gathering the right supplies to sealing in that fresh finish.
Table of Contents
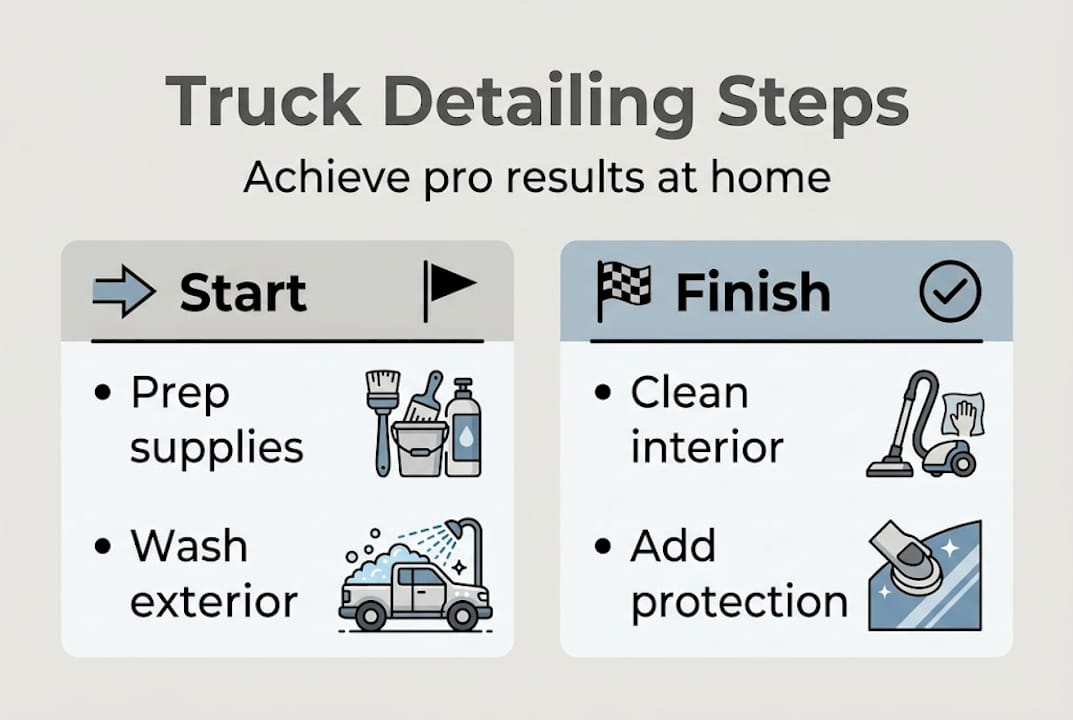
- Gather your supplies and prep your workspace
- Step 1: Clean exterior surfaces like a pro
- Step 2: Deep clean and protect the truck bed
- Step 3: Restore a spotless, healthy interior
- Step 4: Inspect, troubleshoot, and finish with protection
- Our perspective: What most skip about DIY truck detailing
- When to call in the pros (and elevate your results)
- Frequently asked questions
Key Takeaways
| Point | Details |
|---|---|
| DIY detailing saves money | With basic tools and a few hours, you can achieve near-pro results at home. |
| Undercarriage and bed protection are crucial | Paying attention to rust-prone areas keeps your truck looking and performing its best. |
| Interior cleaning boosts health and value | A spotless cabin makes your ride enjoyable while protecting resale value. |
| Inspect and protect for lasting results | A careful finish and routine checkup will preserve your hard work for months. |
Gather your supplies and prep your workspace
Armed with a clear understanding of why detailing at home makes a difference, it’s time to gather exactly what you’ll need for a smooth job. Skipping this step is how most DIYers end up with streaks, swirl marks, or missed spots. Preparation is not optional. It’s the foundation of every great detail.
Essential tools and supplies:
- Two-bucket wash system (one for soap, one for rinsing your mitt)
- pH-neutral car wash soap
- Stiff-bristle wheel and tire brushes
- Microfiber wash mitts and drying towels
- Foam applicator pads
- Interior-safe all-purpose cleaner
- Ammonia-free glass cleaner
- Vacuum with crevice and brush attachments
- Plastic and vinyl protectant
- Wax or paint sealant
Set up in a shaded area away from direct sunlight. Sun dries soap faster than you can rinse it off, leaving spots and streaks baked right onto your paint. A garage, carport, or the shady side of your house works great. Make sure the surface is level and free of debris that could scratch your paint if kicked up.
Starting a basic kit runs roughly $60 to $120, and those supplies last through multiple details. Compare that to the cost of professional services and you’re looking at significant savings after just two or three sessions. That said, make sure you’re using the right type of product for each surface. Refer to our vehicle cleaning checklist to avoid mixing up interior and exterior products.
Always wear gloves and eye protection when handling concentrated cleaners and degreasers. Even products labeled safe for automotive use can irritate skin with repeated contact. Think of it the same way you’d handle DIY oil change supplies: basic safety gear makes the job easier and protects you.
| Supply category | Estimated cost | Reuse potential |
|---|---|---|
| Buckets and mitts | $15-25 | 2+ years |
| Brushes | $10-20 | 1-2 years |
| Chemicals and soaps | $25-50 | 3-6 details |
| Microfiber towels | $15-25 | 20+ washes |
Pro Tip: Pre-sort your microfiber towels by color or label them before you start. Use one set for wheels, one for paint, and one for glass. This prevents cross-contamination and keeps harsh chemicals away from delicate surfaces.
Step 1: Clean exterior surfaces like a pro
With your workspace ready and tools on hand, start with the surfaces that take the biggest beating from weather and road grime. For South Jersey trucks, that means layers of salt residue, mud, and road oil that a simple rinse won’t cut through.
- Pre-rinse the whole truck from top to bottom using a strong stream of water. Focus on wheel wells, door jambs, and the undercarriage.
- Wash with two-bucket method. Dip your mitt in the soap bucket, wash a section, then rinse the mitt in the clean water bucket before reloading with soap. This keeps dirty water off your paint.
- Scrub wheels and tires separately with a dedicated brush. Brake dust and road grime bond to wheel surfaces and need real agitation to release.
- Rinse the truck again from top to bottom, making sure no soap remains in any crevice.
- Dry immediately with a clean microfiber drying towel or a leaf blower set to low. Water sitting on paint causes mineral spots.
The undercarriage gets neglected most often, but it’s the most important area on a South Jersey truck. Road salt from winter storms causes undercarriage rust prevention to become a real priority for any truck owner in this region. Hit the undercarriage with a direct rinse after every winter drive if possible.
For glass and mirrors, use an ammonia-free cleaner. Ammonia attacks window tint film and dries out rubber seals over time. Check out our guide on cleaning South Jersey vehicles for seasonal tips specific to this area.
Always rinse your undercarriage thoroughly after winter driving. Salt accelerates corrosion faster than most drivers realize, and by the time rust is visible, structural damage may already be underway.
Pro Tip: Always wash from the roof down. If you start at the door panels and work upward, grime from the roof runs down over sections you just cleaned. Work smart, not twice.
Step 2: Deep clean and protect the truck bed
Once the exterior is spotless, shift focus to the cargo area. The truck bed demands unique attention because it collects everything: gravel, fertilizer, tools, salt water, and all the debris that comes with working or hauling in South Jersey.
Here’s how to properly clean any truck bed:
- Remove everything stored in the bed, including mats, tie-downs, and any tools.
- Sweep and vacuum loose debris from corners, seams, and drain channels.
- Rinse thoroughly with a hose, paying close attention to the corners and tailgate seal.
- Scrub with a stiff brush and soapy water, working caked-on dirt up from seams and rails.
- Rinse again completely and let no soap sit.
- Dry the seams and rails with a towel and leave the tailgate open to allow airflow underneath liners.
Not all truck beds are the same. Here’s a quick comparison:
| Bed type | Ease of cleaning | Protection level | Key care tip |
|---|---|---|---|
| Bare painted steel | Moderate | Low without wax | Apply wax or sealant after each wash |
| Drop-in plastic liner | Easy | Moderate | Check underneath for trapped moisture |
| Spray-in liner | Easy | High | Brush firmly to lift embedded debris |
South Jersey’s winters are brutal for truck beds. Salt water sits in seams and drains, and a wet bed that sits overnight can nearly double rust formation risk compared to a dried and sealed surface. If your liner has drain plugs, pull them during washing and let everything flush out completely.
This step is not just about looks. A well-maintained bed directly affects your truck’s resale value and its ability to handle future work without structural compromise.
Step 3: Restore a spotless, healthy interior
Now that the outside shines and the bed is clean, bring the same attention to detail inside for a transformation you can see and feel. Truck interiors catch crumbs, pet hair, mud, and odors that build up fast, especially with kids or work gear riding along.
Follow this order:
- Remove all trash and anything that doesn’t belong in the cab.
- Take out floor mats and shake them outside. Scrub rubber mats with a brush and soapy water.
- Vacuum thoroughly, hitting every seat crevice, under the seats, and along the door sills. Per professional detailing standards, a complete vacuum including seats and mats is the non-negotiable first step.
- Clean the dashboard and door panels with an interior-safe all-purpose cleaner and a microfiber cloth. Use a small brush to work into vents and seams.
- Wipe down seats, using a leather cleaner and conditioner for leather, or a fabric cleaner for cloth. For stains, apply cleaner and let it dwell for two minutes before scrubbing.
- Clean the glass last with an ammonia-free cleaner for a streak-free finish.
Review our interior cleaning workflow and interior detailing checklist for a full breakdown of this sequence. You can also follow the step-by-step interior cleaning guide if you want a more detailed walkthrough.
Interior don’ts:
- Avoid silicone-heavy products on dash surfaces near the windshield (causes glare)
- Don’t use bleach-based cleaners on plastic or vinyl
- Skip heavily scented sprays that mask odors instead of eliminating them
- Never spray cleaner directly on screens or infotainment units
Cleaning the glass last is not just a preference. It’s a proven way to avoid smearing dust and product residue that settled from earlier steps right back onto your freshly cleaned windshield.
Step 4: Inspect, troubleshoot, and finish with protection
With every surface cleaned, the last step ensures your effort lasts for weeks. Check your work, seal in your results, and correct any minor mistakes before they dry and stick.
Do a full walkaround with these areas in mind:
- Check door jambs for soap residue or streaks
- Run your hand along panels to feel for areas that need another wipe
- Inspect glass from different angles to catch remaining streaks
- Look at the bed rails and tailgate seal for trapped moisture
- Check wheel wells for clinging mud or product buildup
Once you’re satisfied, apply a quality car wax or paint sealant to the exterior. Spray sealants are the fastest option and still provide solid protection for 60 to 90 days. Paste wax takes more effort but adds a deeper gloss. Either way, apply in thin, even coats and buff off with a clean microfiber towel.
For long-term protection, consider learning more about mobile detailing techniques that pros use to extend the life of each detail.
A full truck detail runs three to six hours from start to finish. Block out that time on a clear day and avoid rushing the drying or protection stages.
Common mistakes to avoid:
- Using bath towels (too rough, causes micro-scratches)
- Skipping the drying step and letting water air-dry
- Cleaning windows while sun is hitting them directly
- Applying wax on a hot surface
Pro Tip: After each detail session, take a few photos of your truck and note anything you missed. Building a personal log makes your next session faster, more targeted, and easier to improve upon.
Our perspective: What most skip about DIY truck detailing
After working with South Jersey vehicles across all seasons, one pattern stands out clearly. Most DIYers focus on what they can see and skip what’s hiding underneath. The undercarriage and bed seams are where rust starts, and by the time it breaks through to the surface, you’re looking at repair costs far greater than any detail.
Rinsing and drying discipline is what separates a genuine clean from a surface-level shine. Water left in rail seams or bed corners doesn’t just look bad. It accelerates corrosion in ways that show up months later when you least expect it.
We also recommend rotating your brushes and towels regularly as your truck ages. Older trucks with worn clear coat are more vulnerable to micro-scratching from tools that were fine on newer paint. Update your kit and your approach as your vehicle changes.
And here’s something rarely mentioned: a genuinely clean truck interior has real health benefits for families. Dust, allergens, and mold in fabric seats are real concerns, especially for kids. Taking protecting cabin comfort seriously pays off in resale value and daily driving quality. A clean truck just feels better to drive, and that matters more than most people admit.
When to call in the pros (and elevate your results)
Even with a robust at-home routine, sometimes trucks need a specialist’s touch for the ultimate finish. If your truck has deep paint swirls, severe rust in the bed, or you want ceramic coating or paint protection film applied, DIY methods simply won’t get you there.

CDC Auto Detailing serves South Jersey with mobile services that come to you, no drop-off required. From deep interior restoration to examples of auto detailing services you can’t replicate at home, our team brings professional-grade tools directly to your driveway. Want to understand what the full process looks like? See how auto detailing works and then book mobile detailing in just a few clicks. We make it easy to get expert results without leaving home.
Frequently asked questions
How often should I detail my truck for best results?
Detail your truck every three to six months, or more frequently if you regularly deal with salt, mud, or pollen. South Jersey winters especially call for frequent undercarriage rinses to prevent rust from forming in hidden areas.
What if my truck bed already shows signs of rust?
For visible rust spots, the right approach is to grind down to bare metal before sealing with a rust-inhibiting primer. If the rust is widespread or structural, bring in a professional to assess and restore it properly.
Can I use household products for truck detailing?
Avoid it whenever possible. Many household cleaners leave residue, strip protective coatings, or damage plastics. Stick to interior-safe automotive products and always use ammonia-free cleaners on glass.
How long does a full truck detail usually take?
Plan for three to six hours depending on your truck’s size, condition, and how thorough you want to be. Rushing any step, especially drying and protection, is where results fall apart.