TL;DR:
- Window tinting involves applying film to vehicle glass to block heat, glare, and UV rays. Successful results depend on proper tools, legal compliance, and a clean work environment, especially in the preparation stage. For complex shapes or deep curves, professional installation is recommended to ensure a flawless finish.
Window tinting is defined as the process of applying a thin film to vehicle glass to reduce heat, glare, and UV exposure. Knowing what do you need to tint windows before you start saves you time, money, and the frustration of a botched install. The core requirements fall into three categories: the right tools, quality film, and compliance with your state’s Visible Light Transmission (VLT) laws. Skip any one of these and you risk bubbles, jagged edges, or a ticket from law enforcement. This guide covers every supply, step, and legal checkpoint you need.
1. What do you need to tint windows: the essential tools
A professional starter kit for window tinting typically costs between $450 and $650. That price reflects a specific set of tools, not just generic supplies. Here is what belongs in every tinting kit:
- Snap-off knife with ultra-sharp blades for clean film cuts
- Multiple squeegees (hard and soft) for pressing out water and air
- Heat gun for shrinking film on curved glass
- Spray bottles filled with slip solution or distilled water
- Microfiber towels for lint-free glass cleaning
- Razor scraper for removing old adhesive or debris
- Plastic sheeting to protect interior panels during prep
Blade quality directly determines cut quality. Dull blades tear film and leave jagged edges that are impossible to fix after installation. Change your blade every few cuts, not every few windows.
Pro Tip: If you are on a tight budget, prioritize spending on blades and squeegees first. These two tools affect the final result more than anything else in the kit.
2. Choosing the right tint film for your vehicle
Not all window tint film is the same. The type you choose affects heat rejection, appearance, durability, and how difficult the install will be. Here is a breakdown of the main options:
| Film Type | Heat Rejection | Durability | Best For |
|---|---|---|---|
| Dyed | Low | Moderate | Budget installs, aesthetics |
| Carbon | Moderate | High | Color stability, no signal interference |
| Ceramic | High | Very High | Maximum heat and UV rejection |
| Metallic | High | High | Heat rejection, reflective look |
| Nano-carbon | High | Very High | Premium performance, non-reflective |
Ceramic film rejects the most heat and blocks the highest percentage of UV rays. It costs more upfront but holds its color and performance longer than dyed or metallic options. Carbon film sits in the middle: better than dyed, more affordable than ceramic, and it does not interfere with GPS or cell signals the way metallic film can.
Your climate matters when picking a film type. Drivers in hot states like Texas or Arizona get the most value from ceramic or nano-carbon film. Drivers in cooler climates may find carbon film sufficient. You can learn more about choosing the right film based on your state’s conditions and your budget.
3. Understanding legal requirements for window tinting
VLT laws are the single most important factor to check before you buy any film. VLT stands for Visible Light Transmission, and it measures how much light passes through the glass. A lower VLT percentage means darker tint. State VLT limits vary widely: California restricts front side windows to approximately 70% VLT, while Texas allows approximately 25% VLT on the same windows.
Getting this wrong has real consequences. Non-compliant tint can result in a fix-it ticket, a mandatory inspection, or forced removal of the film at your expense. Some states also require a certificate or sticker from the installer confirming legal compliance.
Key legal checkpoints before you tint:
- Check your state’s VLT limit for front side windows, rear side windows, and the rear windshield separately
- Confirm whether your state allows reflective or mirrored film
- Review any local HOA rules if your vehicle is parked in a managed community
- Ask your installer for a compliance certificate after the job is done
Verify your local tint laws before purchasing film. Laws change, and what was legal two years ago may not be today.
4. Step-by-step process for tinting car windows
Window tinting involves cleaning, measuring, cutting, wetting, applying, squeegeeing, and curing. Each phase matters. Rushing one step creates problems in the next.
- Clean the glass thoroughly. Use a razor scraper and glass cleaner to remove all adhesive, dirt, and film residue. Any particle left on the glass will show as a bump under the tint.
- Measure and cut the film. Roll the film out over the outside of the window and cut it slightly larger than the glass. Hand-cutting is the right starting point for beginners. Plotters become useful only when you are producing high volumes, not during initial learning.
- Heat-shrink curved windows. Flat film does not naturally conform to curved glass. Use a heat gun on the outside of the window to shrink the film into shape before you bring it inside. Skipping this step causes permanent wrinkles that no amount of squeegeeing will fix.
- Apply slip solution. Spray both the glass and the adhesive side of the film with slip solution. This lets you reposition the film before it bonds.
- Position and squeegee. Lay the film on the inside of the glass and use a hard squeegee to push water and air toward the edges. Work from the center outward.
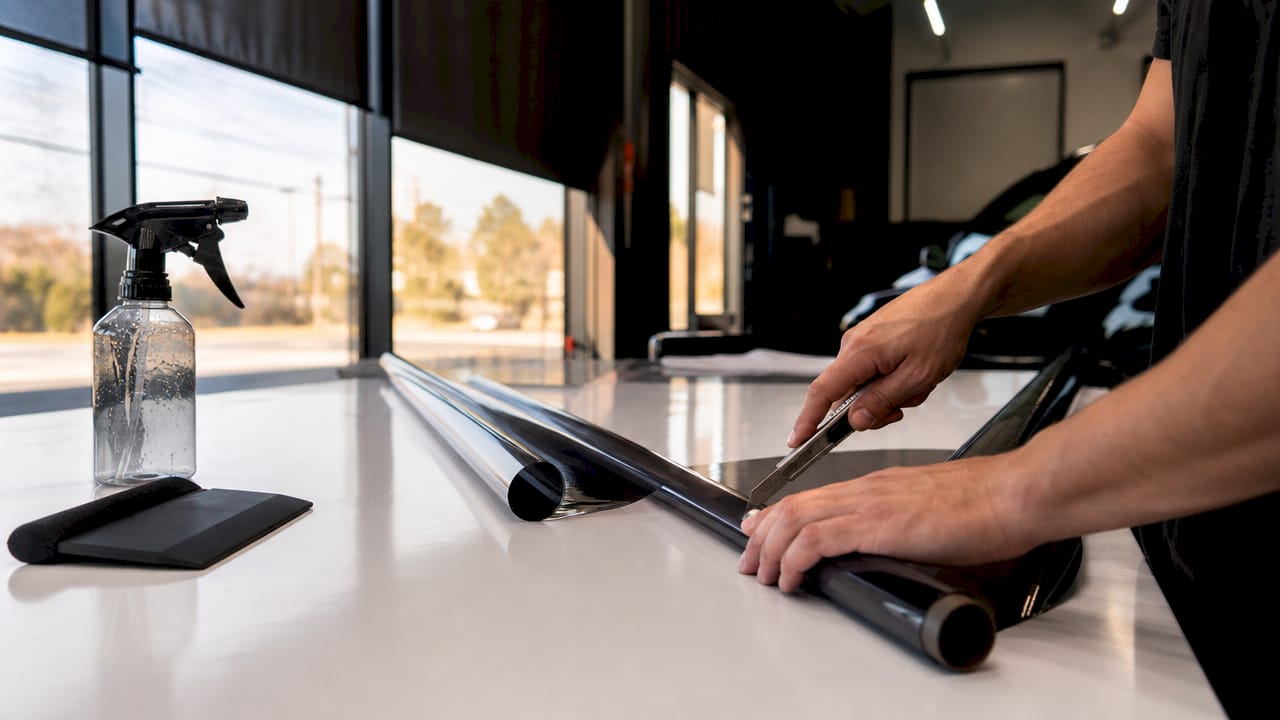
- Inspect and trim edges. Use a snap-off knife with a fresh blade to trim any excess film along the window seals. Clean edges define a professional-looking result.
- Allow the film to cure. Do not roll down the windows for at least 48–72 hours after installation. The adhesive needs time to bond fully to the glass.
Pro Tip: Work in a closed garage or indoor space. Wind carries dust, and microscopic particles trapped under the film create visible bumps that cannot be removed without pulling the tint off entirely.
5. Best practices for a professional-grade finish
The difference between a clean install and a failed one usually comes down to habits, not talent. These practices separate good results from great ones:
- Change blades constantly. Fresh ultra-sharp blades prevent film tearing and jagged edges. Use a new blade segment every few cuts.
- Wash your hands before handling film. Fingerprints on the adhesive side cause permanent marks.
- Use plastic sheeting on interior panels. Plastic sheeting catches drips and debris that would otherwise contaminate the glass during prep.
- Do not rush the heat-shrinking step. Curved rear windows need the most time. Move the heat gun slowly and let the film relax into shape.
- Inspect in bright light before committing. Hold the film up to a light source before applying it to catch any dust or debris on the adhesive.
Professional installation is the right call for complex window shapes, like rear windshields with deep curves or vehicles with factory-embedded defrosters. A professional brings warranty coverage and the experience to handle shapes that defeat most beginners.
Pro Tip: The most common DIY mistake is not the application itself. It is skipping the prep. Spend twice as long cleaning the glass as you think you need to, and your results will reflect it.
Key takeaways
Successful window tinting requires the right tools, legal compliance, and a clean work environment before a single piece of film is applied.
| Point | Details |
|---|---|
| Tools come first | A complete kit includes snap-off knives, squeegees, a heat gun, and slip solution. |
| VLT laws vary by state | California allows ~70% VLT on front windows; Texas allows ~25%. Check your state before buying film. |
| Film type affects performance | Ceramic film offers the best heat and UV rejection; carbon film balances cost and durability. |
| Heat shrinking is non-negotiable | Curved windows require heat shrinking on the outside before interior application to prevent wrinkles. |
| Cleanliness determines quality | Dust and debris trapped under film cause permanent imperfections that require full removal to fix. |
What I have learned after years of watching tint jobs go wrong
Window tinting looks deceptively simple. You watch someone do it once and think: I can do that. The reality is that the tools and the prep work carry about 80% of the result. I have seen vehicle owners buy decent film and ruin it with dull blades and a dusty garage. I have also seen beginners produce clean, bubble-free installs because they followed the prep steps without cutting corners.
The legal side is where most people get overconfident. They assume their neighbor’s tint is legal, so theirs will be too. That logic fails the moment you cross a state line or get pulled over by an officer who knows the local VLT limits. Checking your state’s tint laws takes ten minutes and can save you hundreds in fines and removal costs.
My honest advice: if your vehicle has a deeply curved rear windshield or factory defrosters embedded in the glass, pay a professional. The heat-shrinking required for those shapes takes real practice to get right. For flat side windows, a careful DIY approach with quality tools is absolutely achievable. Set realistic expectations, invest in good blades, and do not skip the cure time. The patience you put in during installation shows up in the result every single day.
— Charles
Window tinting services from Cdcautodetailing
Cdcautodetailing provides professional window tinting services for vehicle owners across South Jersey who want a clean, legal, and lasting result without the DIY risk. Whether you are weighing film types, trying to understand your state’s VLT requirements, or ready to book an appointment, the team at Cdcautodetailing handles the details so you do not have to.

From mobile detailing to ceramic coatings, Cdcautodetailing brings professional-grade care directly to your location. If you want to understand the full scope of what a professional detail includes, the auto detailing services guide covers every option in plain language. Contact Cdcautodetailing to get a quote or ask questions before you commit to any tinting decision.
FAQ
What tools do you need to tint car windows?
The core tools are a snap-off knife with ultra-sharp blades, hard and soft squeegees, a heat gun, spray bottles with slip solution, microfiber towels, and a razor scraper. A professional-grade starter kit typically costs between $450 and $650.
How long does it take to tint car windows?
The process can take several hours per window for beginners, depending on window shape and the installer’s experience. Curved rear windshields take the longest because they require heat shrinking before the film is applied inside.
What is VLT and why does it matter for window tinting?
VLT stands for Visible Light Transmission and measures how much light passes through tinted glass. State laws set minimum VLT limits, and installing film that is too dark can result in fines or mandatory removal.
Can beginners tint their own car windows?
Yes, beginners can achieve solid results on flat side windows by mastering hand-cutting and heat shrinking before using complex machines. Complex window shapes, like deeply curved rear windshields, are better left to professional installers.
How long should you wait before rolling down windows after tinting?
Wait at least 48–72 hours after installation before rolling down the windows. The adhesive needs that time to bond fully to the glass, and rolling the window down too soon can peel or shift the film.